 Landscape lights can really add some pizzazz to a home. Not only can you accent particular features of the landscape and of the home itself, but it also is a good deterrent to prospective burglars. But what are you spending for this feature? It really isn’t hard to figure out.
Here is the formula (and this formula works for other items too):
Watts x hours used/1000 x cost per kilowatt hour (Kwh)
You could go through each light fixture in the yard and add up the wattage of each fixture and plug it into the formula above, but this would take some time. You could also get the total wattage off of the transformer. This wouldn’t be totally accurate though as that number is a maximum, and you shouldn’t exceed 90% of the transformers capacity. So certainly, adding the individual fixtures is more accurate. Just to illustrate the formula and as an acid test, I’m just going to use the 90% figure from the transformer, although I'm not using anywhere near the 90% number.
My current kwh cost from the power company is .13 per kwh ( I say current cost because I know my rate will go up soon). My transformer is 600 watts. If I take 90% of that maximum, I will input 540 watts. If I run my lights 8 hours per night for a 30 day month, I can complete the formula as follows:
540 watts x 240 hours (8 hours per day for 30 days)/1000=129.6 kwh. X .13=$16.85 per month.
So I pay the power company $16.85 per month for the privilege of having a landscape light system. Now, this is a fairly large system, so don’t let the numbers scare you. There are much smaller transformers available that can probably handle your needs. My neighbor’s is only 250 watts and he has many slick lights. For example, if we take 90% of a 250 watt transformer you get 225 watts to use. If you are using 13 watt bulbs you could have 17 fixtures on that system. Using the smaller system would cost only $7.02 per month (this would assume using the full 90% of the transformers max, which you may not be doing. The point is that the way to get a true cost of your power consumption is to actually count the watts you are using.
 It’s a good idea to check out your landscape irrigation before the summer heat hits. If you notice dry grass or plants that are struggling, tackle it now rather than when it gets really hot and it gets too tough for your landscape to rally for a comeback.
You can turn on each irrigation valve one at a time and check for good coverage. You can do this by either manually advancing the sprinkler timer or by removing the lid from your irrigation box and opening the bleed screw. If you open the bleed screw you will get a little water spraying out of the valve. When you are done checking the zone, turn the bleed screw back off.
While the water is on go around and check the sprinkler heads for good coverage. They may all work great, or you may see part of the spray arc is blocked or spraying erratically. You may need to remove the head, clean it out and re-install it. You may see a geyser from a broken head or riser. These are all easy to fix as they are threaded fittings.
For the plants, check to see that the drippers all drip water. These get overlooked until it is too late. Since they don’t spray water, you really don’t notice they are on unless you can hear the lines purging the air. Again, turn on the valve and check each plant. When you find one that is blocked, I would just replace it because while you might be able to clear the debris, it may fall back into the emitter and block the opening once the water comes back on.
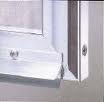
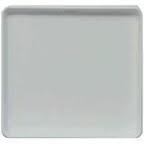 Many people have drain pans installed under their water heaters or washing machines, but it amazes me that many of those pans are not connected to a drain pipe to move the water out of the area. With that set-up, all you are doing is delaying the inevitable flood by about two minutes. Once the pan fills with water, it overflows.
With a drain line installed, the water flows out via the drain pipe instead of overflowing. Without a properly installed drain pan, your water heater will create a mess when it springs a leak.
Installing a drain pan is straightforward, but it’s a pain because the water heater (or washing machine) is very heavy. This is a two-person job, so you’ll need some help. We get calls to replace drain pans from installers who have cracked the pan during installation. The pans are metal or plastic and are flimsy, so it doesn’t take much to damage them. You have to be careful setting the appliance into the pan.
You will have to drain the water heater and disconnect the piping to it. Then you can lift it up, slide the pan under it, and gently set it down into the pan.
Some pans have a knockout in the side for a drain attachment, and some you will have to drill a hole. If you have to drill, locate the hole in the sidewall closer to the bottom of the pan rather than the top. Insert a male adapter through the inside of the hole and run the pipe to the exterior. Run the pipe so that it is gravity-fed with no rise in it. In other words, the pipe should run downhill as a rise could cause the pan to overflow.
A washing machine upstairs without a drain pan is a disaster waiting to happen. Builders will install a floor drain so if a hose breaks the water at least has somewhere to go.
If you don’t have a floor drain, the job is probably a little beyond the skills of your average do-it-yourselfer. It involves installing a sanitary tee in the drain pipe above the trap but below the bottom of the pan. You’re probably better off leaving that one to the professionals.
If you have a floor drain, you can cut a hole in the bottom of the pan and install a drain connection to the floor drain. By the way, for about $30 you can buy a set of steel-braided, no-burst washing machine hoses that typically come with a 10-year warranty. They screw on in under five minutes and are well worth the money.
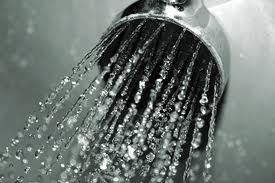
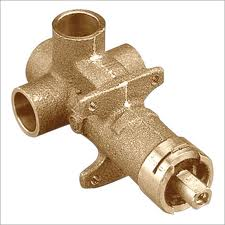 A shower valve can certainly cause a leak downstairs. It may not be the valve, however. You may need to do some investigating to figure out the cause and then the solution.
If you suspect your shower valve is leaking and causing damage downstairs, instead of cutting the ceiling open, first remove the escutcheon plate covering the valve. You will have to remove the handle to pull the escutcheon away. You can use a flashlight to look into the wall and check the valve. If the leak is coming from the wall, you will want to check for leaking water from the riser up to the shower arm. Remove the shower head and cap the shower arm, then turn the water on. This will pressurize the piping and if you have a leak here, you should see the water.
You might also look for a leak at the handle area and the possibility that water is running back into the wall.
Most of the ceiling leaks I see are the result of drains. Whether the connection from the shower drain to the pipe is bad, or that there is a loose or damaged fitting, the drain line is often the problem. You may not be able to tell where the leak is coming from until you open the ceiling. Water will take the path of least resistance and it may be coming from 5 feet away, running down various obstacles in the way and finally dropping onto the ceiling where you see the stain.
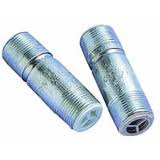 Water heater heat traps help to stop convection heat loss due to circulation of hot water in the pipes above the water heater. New water heaters will come with them installed in the nipples of the tank. They usually work in pairs.
There are various different designs with some using a ball that travels up or down in the nipple. There are directional arrows on the nipple-type heat traps. When hot water in the tank starts to convect out of the cold nipple, the ball rises to stop the flow. There are heat traps you can buy for specific water heaters that allow you to remove the supply line from a non-heat trap nipple, and add a plastic flap mechanism that performs the same function. As a side benefit, the plastic part makes for a dielectric connection to prevent galvanic corrosion.
Finally, you can bend a high loop in your water supply lines at the top of the water heater. For this you will likely need to buy longer copper flex lines. The supply line will come out of the top of the tank rising up past the cold water shut-off valve, bend the line upward and back down without kinking the line and connect it to the valve. It’s always a good idea to insulate the copper flex lines. Typically you only need to insulate the hot outgoing line if you have heat traps as very little hot water should escape from the tank.
 There are several reasons why your water heater needs to be strapped to the wall framing. These are commonly called earthquake straps, and they are a code requirement for specific zones.
So one reason for the straps is to preserve the health and safety of the home’s occupants. Not only could seismic movement cause the water heater to fall onto someone or something, but it could also rupture the gas line and/or water supply.
Another not so obvious reason is to give people a supply of potable water in case of a crisis. What kind of crisis? Imagine an earthquake strikes and ruptures utilities. Not only could a ruptured gas line cause fires, but a ruptured water line could stop water supplies to people’s homes. The only source of clean drinkable water may just be in your water heater. True, the water will be hot, but at least it is safe. If water service is stopped to your house during a crisis, at least you could have the water volume in the water heater tank to use…either 40, 50, or 75 gallons to use until service gets restored.
 A shower door sweep is important to keep water in the shower where it belongs. Some designs though can be challenging.
There are shower door sweeps that simply use a flexible rubbery flap that hangs down to block the gap between the bottom of the shower door and the shower threshold. They work fine. There are also those sweeps that have a drip rail along the door. These will have a groove along the rail that catches water as it hits the shower door and rolls down. Eventually (depending on how long of a shower you take), the groove will become full of water. When you get out of the shower, you open the door and the wonderful principle of centrifugal force takes over. As you open the hinged door, the arc of the swing flings the water on your floor.
There isn’t a whole lot you can do about that, except maybe open the door VERY gently. You might try to build a small dam at the end of the rail (on the handle side). This would at least minimize the amount of water that flies out. Try applying some silicone caulking to plug up the groove. It may even take a few applications of it to build up the height somewhat.
 I frequently get calls that there is poor water plumbing pressure in a bathroom, or another specific area of the house. Most homeowners believe that there must be a blockage in a water line, but in my experience, it is a matter of several causes occurring simultaneously.
The key here is to isolate the problem. Is the pressure isolated to a particular fixture or the all the fixtures in the room? Is the problem just with the hot or cold, or is it both? What I find is that the house will have a single handle shower valve (that controls both the hot and cold water) and this can be attributed to a shower cartridge. By the way, a Moen positemp cartridge commonly fails to the hot side, so if you are experiencing low or no hot water in the shower, replace the cartridge and that should fix it.
For the sink faucet, the problem is usually with the aerator at the end of the faucet. This will affect both the hot and cold pressure (actually water volume) so that either will come out poorly. The aerator will get clogged with debris and scale and will need to be cleaned out. They just unscrew from the end of the faucet. There certainly may be bigger problems, but these are typical of what I see.
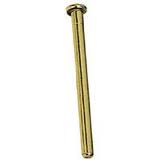 If you need to remove a door from the hinges, it’s a pretty easy process. The two leafs of the hinge meet in the middle and a hinge pin is placed through the knuckles of each half, holding them together. The pins resist the pulling pressure of each half of the hinges. The fit is fairly tight so that the door won’t have a lot of movement in it as it opens and closes.
If you need to remove the door for whatever reason, you will need to remove the hinge pin in each hinge. Depending on the doors size and weight, most interior doors have 3 or 4 hinges.
It’s probably best to partially close the door and add something underneath the door to give it some support. I usually start at the middle hinge, then do the bottom hinge, and finally the top one. Saving the top one for last will allow you to give the door some support as you remove the pin. Use a small screwdriver and a hammer and tap from the underside of the hinge. Place the tip of the screwdriver at the bottom of the pin and give it a few taps. This will lift the head of the pin out slightly. Then you can tap underneath the head to lift it up further so you can grab it and pull it out.
Try not to move the door as you are removing these. If you are lucky, the knuckles will stay aligned and will help support the door as you remove the pins.
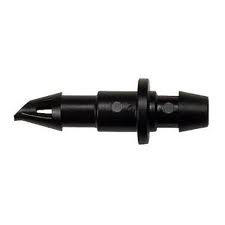 Irrigation drip lines are black poly tubes that carry water to individual plants. There will be a time when you will see water spraying from somewhere along the tubing. It may be that a fitting has worked its way loose, or maybe the tubing has a split or crack in it.
This is easy to repair. For a split in the plastic tubing, you will need to cut out the area of the split. Make the cut cleanly at a 90-degree angle. Use a barbed connector and push each end of the tubing onto the connector. Turn the water on and test to make sure there are no other leaks.
If a fitting has worked its way out, the repair is similar. The fittings are barbed so there is no glue that is used. If the fitting is pulling out of the tubing, I would cut the tubing back to where it isn’t stretched out, like maybe ¼”-3/8” of an inch back. That way you get some new tubing to push the fitting back into, and since it isn’t stretched out, it should hold well.
Whenever you work on drip systems, it is a good idea to take the time to check that the emitters are dripping water to the various plants. Sometimes when working on the system, you may inadvertently allow dirt into the system which could clog the emitters.