 I got a call from a customer who wanted to replace their Hollywood light bar. These folks liked the light fixture, but felt it was cheap and outdated.
This particular light fixture is somewhat unusual in that the builder doesn’t usually install a junction box behind it. Instead, they will take a hammer and break open a hole in the wall, which will be covered by the light fixture anyway. It is usually the case that if you want to replace the Hollywood bar with a different fixture that you have a problem. Then you need to repair the drywall and install a junction box for the new fixture to mount to.
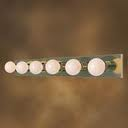
With a Hollywood bar, the fixture is mounted in several places along the length of the bar. They can be fixtures commonly from 3 bulbs to 10 bulbs. Removing the old fixture is a matter of unscrewing the bulbs and then pulling off the decorative retaining rings around the sockets. This will allow you to remove the decorative bar, leaving only the support and wiring behind it.
With the power off, you can remove the wire nuts and separate the wires. You will also see the screws that hold the support bar to the wall, so when you remove the screws the bar will come off of the wall as well. You can install the new bar in the reverse order, just make sure the bar is level.
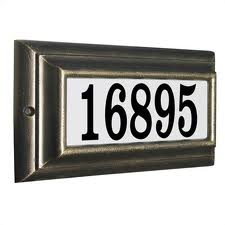 If you have a light fixture on the front of your house with your address on the cover, at some point it will cause you some frustration. It is going to go out and you will be left to figure out why.
The easiest repair will be replacing the bulb inside. These are ordinary bulbs that you can just screw in. You may be able to find them at a home center, or you may have to go to an auto parts store (I know that sounds weird). It’s best to take the light bulb with you to make sure you are getting an exact replacement. The cover is usually held in place by some tabs on the top and bottom. If you gently squeeze the top and bottom you can disengage the tabs and remove the cover. You may have a screw on each side of the cover that holds it in place.
Once you have the cover off, you will have access to the bulb. You may find a variety of different bulbs. Some fixtures may have a small bulb that you have to push in and turn to remove. Other bulbs have contacts that are held by the fixture, and these will pull out of the contacts. Although not common, some even have small bulbs that screw in.
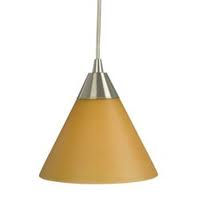 If you want to upgrade the look of your room, many people consider installing pendant lights. These are perfect over a work surface or bar, and if you already have recessed can lights there, it is really easy and fast. If you can replace a light bulb, you can install the conversion kit. They are widely available online, but there may be some local retailers that stock them.
They conversion kits work the same way, but will have varying mounting hardware. Basically, you unscrew the bulb in your recessed light and screw in the connection which powers the fixture. The screw-in mechanism looks just like the base of the light bulb and will run the electrical power to the pendant. The only thing you will need to do is to adjust the length of the cord and cover the opening with the decorative cover…and it’s the cover that gives the secret away.
Most pendant lights have a small escutcheon that covers the hole in the ceiling. The conversion kit must have a cover large enough to cover the opening to the light fixture. That doesn’t mean it looks bad, but rather the pendant fixture is larger so that it doesn’t look unbalanced. All in all, you can quickly and inexpensively change the appearance of the room with the kit.
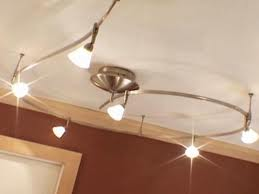 Installing a track light fixture is an easy project; there isn’t much difference between it and a regular light fixture. You do need to consider the styling of the fixture though. Some older fixtures look like they are from the 1970’s rather than modern day. They are basically a track with large cans connected to them. More modern fixtures allow the “arms” of the fixture to curve and bend in different directions. They use smaller halogen bulbs that greatly minimize their appearance. Regardless of the style, they install in the same manner.
Connect the wires from the ceiling to the fixture wires (black to black, white to white and either green or bare copper wires together). The arms of the fixture get secured to the ceiling with screws…the location is up to you and where you want the arms to sit.
Once the arms are secured, you till secure the bulbs into the arms. The bulbs go into the light assembly and then usually twist into the arms. The power source runs along the arms and by twisting the lights into the arms, they make contact and illuminate.
From there you can direct each individual light in a different direction to accent a picture or shine in a particular area.
 I often get asked if you can replace one light fixture with two fixtures. I see this most often with master bathroom vanities where you have a long light bar over two sinks. The idea is to remove the single light bar and instead put a smaller light fixture over each sink. Yes you can do this.
There will be challenges with this. You will need to branch off from the single location to two locations, and you will likely have to go through wall studs to get there. You it’s not a quickie job, but it will totally change the appearance of a bathroom.
Use remodeling junction boxes and secure them to the drywall after you have centered them above the sinks. Another great look is to install wall sconces on either side of a mirror for a more indirect lighting approach. This is the same process.
Run the appropriate size NM cable from the new locations to the old, leaving enough cable so that you can strip the sheathing and make connections…usually about 8 inches inside the box, but you can trim it and gently fold the Romex into the box after making the connections. Use wire nuts at all locations until the connections are snug.
You will also have to repair the drywall, texture the patch and paint it to match or paint the entire wall to make the patch go away.
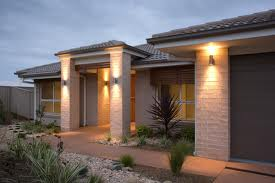 Replacing coach lights is a perfect project for a would-be electrician. In fact, you don't even have to use a ladder if you don't want, but you will need to stand on something solid to reach.
Before you replace the coach lights, you might check out the exterior porch light near your front door. This light fixture is typically a matching style with the coach lights. My point is if you are replacing the coach fixtures with a different color or style, you may want to consider replacing the light at your front door as well.
Removing the old fixture is really easy. First make sure the power is off to the fixture by turning off the power at the main panel.
The lighting fixture will be attached to the wall by two small threaded rods, which will be covered with decorative nuts that you simply unscrew. The base of the lighting fixture will pull off the wall, but there will be wires from the junction box attached to the fixture wires. While you support the light fixture, unscrew the wire nuts that connect the house wires to the fixture wires, then remove the fixture.
The new fixture goes in as easily as the old one came out. Strip about three-eighths of an inch of insulation from the fixture wires. Use yellow wire nuts and connect the fixture wires to the circuit wires. Connect the white circuit wire to the white fixture wire and the black circuit wire to the black fixture wire. Then, attach the green grounding wire to the bare copper ground wire in the box. Carefully tuck the wires into the box and place the lighting fixture over the two threaded rods.
Some fixtures come with a sheet of foam that fits in between the fixture and the wall. The purpose of the foam is to block out the weather. If your fixture has one, slip it in between the wall and the fixture before you connect the wires. The wires will easily thread through the hole in the center of the foam.
Once everything is connected, tighten down the nuts that hold the fixture to the threaded rods and this will compress the foam as you tighten. Doing that will help fill voids in between your wall surface and the fixture base.
Some stucco finishes are very rough, so you may need to lay down a bead of caulking around the perimeter of the fixture's base.
Flip the power back on and enjoy the new look of your home.
 You turn on the bathroom light fixture and all is well until the fixture “clicks” and turns off. This is actually pretty common. In most cases, the fixture is getting too hot and turning off. There is a high temperature limit switch that does this. So how can you fix it?
The fix is to lessen the amount of heat getting to the switch. This can be accomplished in a variety of ways.
Heat commonly builds up from standard light bulbs. Flood-type bulbs seem to be a common thread. If you like that style of bulb, you can lower the bulb closer to the floor, which is further away from the switch. To do this you will need to remove the bulb and loosen the wingnut on the side of the can fixture. This will allow you to slide the socket up or down. You want to move it down, but not so far down that the bulb sticks out of the ceiling. Move it down a little and see if the problem recurs. If the fixture does turn off again, you can move the bulb down a little further.
Probably the easiest thing to do is to replace the standard bulb with a bulb that doesn’t generate as much heat. You can use LED bulbs or CFL (compact florescent) bulbs for this.
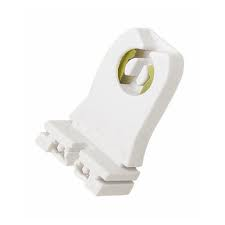 The worst thing about replacing a florescent light socket is standing on a ladder. Otherwise it is an easy wiring job to replace the socket.
To gain access to the socket, remove the plastic lens cover and then remove the light bulbs (the tubes). The socket is what the ends of the tubes are sitting in. To get access to the wiring, remove the metal cover right below the tubes. This may have screws holding it in place, or it you may be able to squeeze it and pop the tab out of the slot.
With the cover removed you will be able to see the ballast (s) and wiring. Follow the wires from the socket to the ballast. You will need to cut the two wires leading to the broken socket and replace it. The new socket will come with a length of wire attached. Make sure the power is off to the fixture and cut the wires so that you have plenty of wire to work with. The last thing you want to do is to make the cut so short that the socket leads don’t reach.
The old socket will snap out of its holder, and the new socket will snap right in its place. Use wire nuts to hold everything together and gently tuck the wires back in place. You don’t want sharp bends in the wiring, only gentle loops. A sharp bend could damage the wiring and you want to avoid that.
 Replacing a bathroom light fixture is pretty easy. The first thing you need to do however, is remove the old fixture. A Hollywood style fixture doesn’t have any obvious method of holding the fixture to the wall.
Hollywood light fixtures are very common, because they are inexpensive and install quickly. Most builders don’t even install a junction box. Instead, they just punch a hole in the wall with a hammer and run the cable right into the fixture. You will need to install a junction box for you new fixture. So be forewarned, you may even have some drywall work to do if the new fixture doesn’t cover up the damaged area.
Of course, removing the old fixture is first. To remove a Hollywood light fixture, first remove the bulbs. Around the bulbs are decorative “cups” that slide over the sockets where the bulbs screw in. Pull the decorative cups off of the sockets, but use your other hand to hold the fixture against the wall. Once the last cup is removed, the decorative light cover will come off. There will be nothing holding it to the wall after the last cup is removed.
At this point the bracket will be exposed. With the power shut off, disconnect the wiring at the fixture. Then just unscrew the screws that hold the bracket to the wall.
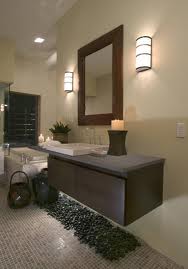
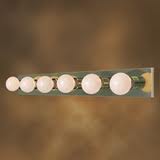
You know the type. In a bathroom a light fixture that has the large round bulbs in a row is called a Hollywood bar light. It usually has anywhere from 3 to 12 bulbs and conjures up images of a Hollywood starlet primping before going on stage. Only nowadays buildings install these fixtures a bathroom staple. Many people don’t like them and want to replace them.
If its time to replace it, you first need to remove it. It doesn’t have any visible fasteners that hold it to the wall. Here is how to remove it from the wall.
Make sure the power is off and unscrew the light bulbs. There are decorative covers that push over the sockets where each bulb was. Grab each cover and, one by one, pull them off of each socket. Make sure to keep a hand on the fixture because when you remove the last cover the fixture will want to fall down…that is all that is holding the fixture to the bracket. Remove the decorative fixture and the bracket will be exposed. These fixtures are commonly installed without a junction box, so you may find one or may not. Remove the wire nuts that connect the fixture wires to the house wiring. The fixture’s mounting bracket will be held to the wall with a couple of screws. Remove these and get started on installing your new light fixture.