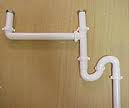
 Sink piping sloped in such a way that keeps drain water in it can lead to a smelly sink drain. This can happen when a combination of situations occur.
Lots of homeowners have a garbage disposal, but there are folks that either don’t use it or don’t have one. So they are left to let debris run down the sink strainer. The strainer allows only small food particles to pass through and run down the drain. This is fine as long as the slope of the drain is correct and allows the water and debris to flow as it is designed. However, I have seen cases where the sink piping will elbow over to the main pipe, but the vertical drain pipe from the strainer (the tailpiece) is left slightly too long. This can cause an uphill rise in the horizontal pipe which will cause water and food debris to remain in the pipe…to rot and spoil.
The fix is to cut the tailpiece slightly shorter to the point that the rise in the horizontal section of drain is removed. In this way there is no pocket for the drain water to sit and “ferment” and smell up the room. The drain should be gravity fed and not have any uphill rises in the piping.
 I went over to a customer’s house to investigate a noise that the homeowner said was new. The gurgling noise was coming from a small bathroom downstairs that, when any other drain ran in the house, made a loud gurgling sound. The noise occurred when the toilet next to it was flushed or when any upstairs fixture was running. Since the noise was coming from the shower drain, that was an obvious place to start. The cause was also very obvious. The shower was rarely used and the trap had run dry.
It is common that when the trap has run dry, a sewer smell will enter the room but this isn’t always the case. The sound though was very loud. I simply took a small bucket of water and poured it down the drain. The sound stopped since the water in the trap now acted as a buffer.
In speaking to the homeowner, that particular shower never gets used, which is why the water in the trap evaporated, creating a void where sewer gas and noise can enter the room. I’m sure I would have been called earlier had sewer gas smells entered the room, but apparently the noise got to be enough. The homeowner now knows to pour a little water down the drain if he hears noises or smells sewer gas.
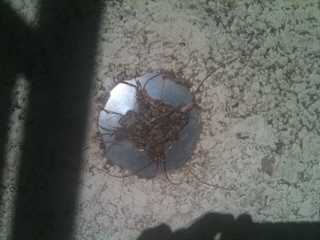 A balcony is a great feature, but you have to check the drain or drains every so often. A large balcony will generally mean a large roof and that has the potential to cause problems when a downpour occurs. Some of my neighbors have a balcony in front and several have water stains on the garage ceiling below the balcony. When you consider that the huge roof dumps onto the balcony below, you can understand how important it is to keep the drains clear.
Certainly, it makes sense to give a thorough inspection to other potential problems as well. When it rains heavily, look out at the balcony deck. There is probably a primary drain and a secondary drain in case the water starts rising quickly. You might have just cleared the balcony of all debris, but when it rains heavily, the rain will wash the debris on your room down onto the balcony, which can clog the drains. It is a good idea to be vigilant when it really starts coming down. In some cases the drains will clog and will get high enough to enter the house from under the door. Take a look at the picture, there isn’t any large piece of debris there. It is just lots of small leaves that slow the draining water enough to allow a back up.
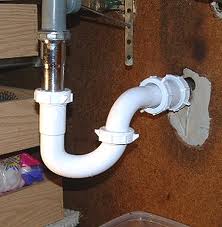 A leaking drain line under a sink is a fairly common repair. Many people consider repair vs. replacement. Many drain repairs can be repaired, particularly at the connections. With plastic drain lines, if the leak is occurring at a point where two pipes connect, a repair might be in order.
Plastic drain piping is susceptible to just about everything. It connects easily, but if you bump it, it may start to leak. Lots of people will throw their kitchen garbage can under the sink and it will hit against the pipes and they can start dripping. So make sure you actually have a damaged pipe before you start worrying.
If the leak is coming from a connection, check to see that everything if fitting properly. There is a slip washer that, if not properly seated, will leak where the slip nut holds it down. If you do have a cracked pipe, I would replace it. There are plenty of folks who swear by gluing the crack or even using a leak tape, but over time these products can fail. A new plastic drain pipe will cost you under five dollars and all you have to do is cut it to fit (you may not even need to do this) and slip it into place. Make sure the slip washers and nuts are properly seated and hand tighten.
 A loose shower drain cover is one of those things that really bothers some people; others really don’t care much about it.
Drain covers should be in place enough where they don’t slide all over the floor when you are using the shower. However, they need to be removable for the times when you need to snake the drain. Some older drain covers are held in place with screws. You find these types with customer mud pans. Modern plastic drain covers can just snap into place. If you need to remove them, you can just pop them off with a small standard screwdriver.
If you can’t figure out how your drain cover stays in place, you can always use a small bead of clear silicone caulking around the perimeter of the drain cover. Just a little bit on the underside will hold it in place until you need to remove it because of a clogged drain. If you need to remove it, pry it up (you may need to cut the caulking in between the cover and the drain recess it sits in.
By the way, you probably want to handle the drain cover as little as possible. When you do have to handle it, wear rubber gloves as drains are a breeding ground for germs.
 If you have a plumbing clog in a drain, I like to do the easiest fixes first as most people do. For toilets, a plunger or a closet auger works well. For sink drains, cleaning out the trap takes care of many issues. For larger drains like showers, you can clear the trap easily enough, and then try a snake to reach the blockage if it is within the reach of the snake. But what if it’s not?
You can try a drain bladder. This is a rubber bag that expands once you pressurize it. There are different sizes made for different pipe diameters, but basically, you attach a hose to the end of the bag and place it at the opening of the pipe. It will also come with fittings to connect it to an indoor faucet.
Turn the water on and as the bag begins to fill with water, it compresses against the interior walls of the pipe. Water then begins to pulse out of a small hole at the other end of the bag.
The idea is that the pressure will push the clog out of the drain and into a larger pipe where it is free to tour the city via the sewer.
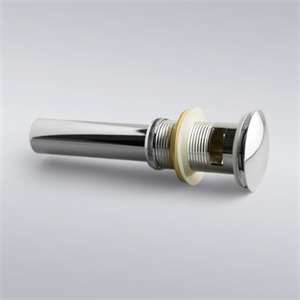
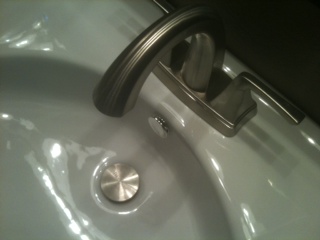 Some faucet manufacturers are no longer making the pull rod type drain stoppers. Instead, they are including a pop-up stopper that you simply push with your finger. Push the stopper once to stop the flow of water and fill the sink, and push it again to open the drain and allow the sink to drain.
Design-wise it is a very clean look. Gone is the little knob behind the faucet to open and close the drain stopper. In my mind, however, it seems to be unsanitary to touch the drain stopper. I know what I put down my drain, and I certainly don’t want to touch it. Plus I don’t want to stick my hand into a sink full of grossness to push the stopper.
Installing this type of stopper assembly is very easy, and you won’t need tools….surprise here: most of the assembly is plastic. Remove the large nut (that holds the assembly to the bottom of the sink) and the conical washer. Drop the assembly through the top of the sink and into the hole for the drain. You won’t need to put any plumbers putty under it unless the manufacturer says to do so. Hold the assembly in place and install the conical washer back onto the tailpiece so that the large end faces down. Then just spin the nut back onto the threads. This nut will push the washer into the hold and seal out any leaks. You may have to give it another quarter turn if it leaks.
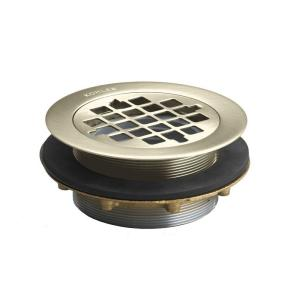 If you are replacing a fiberglass shower pan adding the drain connection is the most important part. If it’s not done correctly, you get a leak and the resulting water damage. The drain connection looks very intimidating, but it is actually very common sense.
First off, spend a few extra dollars and buy a brass drain connection. Plastic is cheaper but don’t use it. Use plumbers putty under the lip of the drain and tighten the nut underneath the shower pan. The putty should ooze out.
What you will be looking at is the drain pipe in the middle of a hole in your floor. The pipe should be at about floor level, but dry fit everything before you make any cuts. The drain assembly will fit over and around the drain pipe.
At the bottom of the assembly is a lip. With the assembly over the lip, place the neoprene washer around the pipe. This will be a snug fit, so you may need a wooden paint stir stick to fully seat the washer against the lip at the bottom of the assembly. A little liquid soap can help as it acts as a lubricant to slide it on down.
Insert the compressing ring and start tightening it. This threads onto the inside of the drain assembly and compresses the washer against both the outside of the drain pipe and the inside of the drain assembly. This is what prevents leaks. The compression ring has notches in the top of it to accept a small metal key. The key drops into the notches and you can start turning it. Once it becomes too difficult with your fingers, you can slide a screwdriver into the slot in the middle of the key and continue turning.
Finally, you can snap the strainer into place.
 Removing a bathroom sink drain involves some tools and a little wrestling. These parts can be corroded and will fight you from removing them.
Generally, the only time you will replace a drain assembly is if you are changing the faucet (so the new drain flange looks new as well), or if it is damaged and leaking.
The first thing to do is to remove the trap. This unscrews at the slip nuts. From here you will likely need a pipe wrench to hold onto the tailpiece and another wrench to unscrew the nut that holds the assembly to the underside of the sink. Try not to hold the tailpiece at the threads because you may need those threads to get the assembly out. The pipe wrench will mangle the threads.
Depending upon which style you have, the flange may screw onto the end of the threads, or the flange may be fixed onto the end of the tailpiece. Loosen the nut and you will be able to see the flange. Once you get the nut down an inch or so, push the assembly upward out of the sink. You can try to grab the flange with pliers and turn the tailpiece to break them free. The tailpiece may also be in two pieces. As a worst case scenario, you can always move the nut down and out of the way, and then cut the tailpiece above the nut and under the sink’s bottom. Then the flange will lift right out.
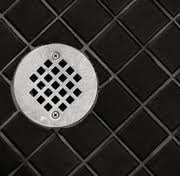
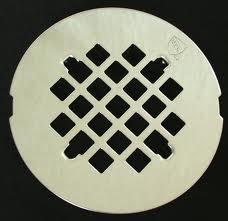
If you constantly wrestle with a drain cover that pops out, you can fix it pretty quickly. The shower drain cover is designed to be removed to clear any clogs in the drain, etc. The cover has holes in it so that the water can drain but so that the holes can catch hair before it flows into and possibly clogs the drain.
Occasionally, the cover won’t stay in place and you may fight with it when showering. So here are some ideas to get it to stay.
Some drain assemblies are plastic and some are metal. I would start with a good cleaning of the surfaces. Some of the covers snap into place but if there is a lot of crud built up into the surfaces, it may not be able to stay in place. Metal covers can be held in place by screws that recede into the surface so that you won’t cut your feet during a shower. For these get replacement screws. Metal covers may also snap or twist back into the assembly.
You can always use a small bead of clear silicone and place it around the perimeter of the lip of the assembly. Then just set the cover into the drain and let the silicone hold it in place. When you need to snake the drain, the cover will be easy to remove.