This is surprising to be, but it’s a common question. “Can I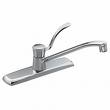 replace my 2 handled kitchen faucet (or bath faucet) with a faucet with only one handle. The answer is yes.
The vast majority of faucets are made to fit into a standard sink. The sink probably has three holes in it to connect whichever type of faucet you want. If you currently have a faucet with two handles, the outside holes will allow water supply lines to connect directly to the handles. The center hole will be for if you have a kitchen faucet sprayer with a pull-out spout, as the spout hose will connect there.
If you have a single handled faucet, the deck plate on it will cover the outside two holes. Basically the footprint of both types of faucets are the same and so you can install whichever type you like.
There are some high-end single handle faucets that don’t have a deck plate, and instead mount in a single hole. It would look very odd if you mounted one of these in a three-hole sink without making allowances for something that looks intentional, such as a soap dispenser or maybe a lotion dispenser. Here is some information in a kitchen faucet installation.
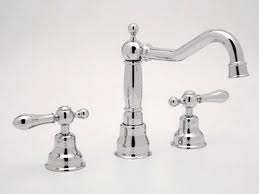 When choosing a new bathroom faucet, you can choose the deck mounted faucet or the widespread faucet. The difference is on a widespread faucet you can see the countertop between each handle and the spout. On a deck mounted faucet, the handles and spout are all attached to the body of the faucet. Widespread faucets are cleaner looking, but also more expensive. They are also more challenging to install.
Each handle and spout will mount independently of each other. As you place each through the holes in the sink or countertop, use plumbers putty under each and secure each with a series of washers and nuts. There will be a handle specifically for the cold side and the hot side.
After securing the spout, you will install a tee fitting on it so that the holes in the fitting are oriented to the hot and cold handles. There will be a series of gaskets, o-rings and nuts that hold this fitting underneath the spout. You will connect each handle to the tee fitting under the spout with hoses. Tighten the hoses but don’t allow them to kink. You can loop them to avoid kinking them.
Finally connect the water supply that feeds each handle valve. You can use a standard water supply line for this from the angle stop to the handle valve. Connect the sink stopper to the faucet pull rod. Tighten all connections and turn the water back on to test for leaks.
 It's Saturday morning and your laying under your sink, cursing your faucet with your scraped knuckles. After all, you just want to replace your kitchen faucet . Sometimes it seems impossible to remove the old faucet. So what do you do?
For starters, it helps to have the right tools. Some deep sinks will leave you only a few inches to access the nuts that hold the faucet to the sink. It is virtually impossible to get your hand and a tool into this small area to turn the nut. For this situation, you need a basin wrench.
A basin wrench is a skinny tool that will fit into these tiny areas. It looks like a thin piece of pipe with jaws on the end of it. On the bottom is a handle. To use the tool, just set the jaws over the nut and turn. It sounds easy , but sometimes it's not. Sometimes the handle will start to bend with the amount of force you have to apply. In that case you can place a length of pipe over the handle and turn it, effectively increasing the amount of leverage you can apply to the nut. You can also use the basin wrench to install the nuts on your new faucet.
If this fails and you have the room, you can try a nut splitter (place the tool over the nut and turn the handle). You can also try to cut off the faucet and or nuts from either on top of the sink or beneath it.
 Faucet installations can jolt your bathroom into the modern age in about an hour.
Start by turning off the water at the hot and cold valves under the sink, then test that the water to the faucet is off.
Next, disconnect the water supply lines from the faucet. I suggest you wear safety glasses if you have to lay on your back to access the water supply nuts. I know wearing safety glasses sounds silly, but many times the corrosion around the nuts will flake off and land right in your eye.
If you're lucky, you can unscrew the nuts with a small crescent wrench or pliers (each about $5). If there is no room for a wrench, or even your hand, you'll need a basin wrench (about $10). This tool has a long handle with self-closing jaws, and is made for getting into tight places. Secure the nut in the jaws and unscrew. Repeat for the other side.
After you clean up the water that has spilled, loosen the screw that holds the sink stopper handle to the extension rod and pull out the handle.
Next, loosen the lock nuts that hold the faucet to the sink. It's the same deal as the water supply nuts, except that these nuts are bigger, and can often be removed by hand. Once the lock nuts are gone, pull the old faucet straight up through the holes and discard it.
A new faucet will typically attach to the sink by using the same fittings as the water supply lines, or it will have separate bolts coming out of it that will hold it to the sink using metal plates. If the faucet has separate fittings, wrap the water supply fittings three times with teflon tape. It's easier to wrap the fittings standing up than it is lying on your back.
Center the faucet on the sink and secure it using the locknuts or metal plates (whichever came with the faucet). Make sure the water supply fittings are wrapped with teflon tape and screw the nut on the fitting (make sure the hot water supply line is attached to the faucet's hot water side and vice versa). Turn the water supply valves back on and test for leaks. If it leaks, it will likely be where the water supply connects to the faucet's fitting. In this case, give the nut another quarter turn until it stops leaking.
Replacing the drain flange and pop-up assembly can be even easier because there is no water pressure.
First, loosen the slip nuts on the P-trap and drain the water out of the trap. Remove the pop-up pivot lever by loosening the retaining nut. The pivot lever attaches the pop-up stopper in the sink to the pop-up handle on the faucet -- it makes the stopper go up and down.
Next, loosen and remove the lock nut on the underside of the sink. Also, remove the gaskets between the lock nut and the sink. The drain flange may lift right out, or you may have to unscrew the tailpiece assembly from the drain flange.
Once the drain flange has been removed, scrape the old plumber's putty out of the sink's drain hole and clean the area.
Take the new pop-up assembly and place a ring of plumber's putty (or silicone caulk, depending upon the manufacturer's recommendations) under the drain flange. Place the assembly in the sink's drain hole, and place the sealing gasket under the sink. Slip the retaining washer under the gasket and screw on the lock nut behind the washer. Don't fully tighten it yet.
Align the hole for the new pop-up pivot lever with the pop-up stopper handle in the faucet, then finish tightening the drain's lock nut. Insert the new pivot lever, making sure it connects with the new pop-up stopper, and tighten it down with the retaining nut. Attach the pop-up handle extension to the pivot lever and adjust if necessary.
Finally, reconnect the P-trap by tightening the slip nuts. Use a rag to wipe away the plumber's putty that will have squeezed out from tightening the drain flange.