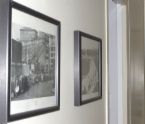
Hanging pictures in groups can be a little challenging for people who don't like to read a tape measure.
When you're hanging things from a wall, it is always better to hit a stud. It is usually the case, however, that a stud isn't located where you want to hang the picture.
Fortunately, you can buy picture hooks that don't require nailing into studs. A picture hook sits flush against the wall and has a nail that is hit through it at a downward angle. These hooks come in different sizes and can support substantial weight -- anywhere from five to 50 pounds.
To install the hook, simply hold it against the wall and tap the nail into the drywall.
To hang a picture exactly where you want it isn't difficult, but it takes a lot of measuring. If it has a wire on the back, you should only need one hook.
Start by holding the picture where you want it to hang. Use a pencil and make a light mark on the wall at the top of the picture at the center of the frame. This mark represents the vertical plane where you will mount the hook. Now we need to determine how far down the line to go.
Take the picture down and grab a tape measure. At the front of the tape is a metal lip. Place the lip underneath the picture wire and pull the wire up until it is taut. Now measure the distance from this point to the top of the picture frame.
Take this measurement back to the wall and, from the mark you made on the wall, measure down by this amount and make another small mark. Use a level and hold it vertically on the wall to make sure the second mark is aligned with the first. If it isn't aligned, move it over until it is. This is where the bottom of the picture hook should sit.
Hold the picture hook against the wall and hammer in the nail. Hang the picture wire on the hook and hold the level under the picture to level it out.
Centering one picture on a wall is easy. What if you want to center a group of pictures? It takes more measuring.
Let's say that you want to hang three pictures in a group so that they all have the same distance between themselves and the edges of the wall. You simply measure the length of the wall and divide that distance by four (always one more than the number of pictures you are hanging).
If you want to cluster those same three pictures close together in the center of the wall, you guessed it, more measuring. Let's say that your pictures are each 12 inches wide and you want them spaced four inches apart. You have a total picture width of 44 inches (12+4+12+4+12=44).
It is easier if you can imagine the cluster of pictures as one large window. Find the center of the wall (overall length divided by two) and make a mark at the height of your choosing. Your center picture will hang at this spot.
From this location you will add 16 inches (one-half the width of the center picture plus the 4-inch space plus one-half the width of the next picture). So from the center point on the wall, you will measure out 16 inches to the right and the left. Use a level to make sure the points are aligned and nail in the hooks.
For large pictures that have a bracket on each side instead of a wire, it is much like hanging two pictures instead of one. Measure the distance from one bracket to the other. Find the center of the wall and add one-half of this distance to both the right and left of this point.
Make sure the points are level and then install the proper hooks. Pictures that don't have a wire on the back are much harder to adjust if they are not installed level in the first place.
If a picture is a little crooked after you hang it, try wrapping the bracket on the low side with a couple of layers of paper, or stuff a piece of cardboard under it. No one will see it and it is easier than re-installing a hook.