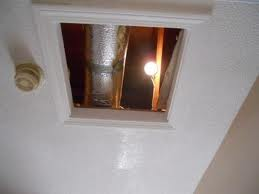
 You probably don’t have any insulation on your attic access panel. If you are like most homeowners, you will simply have a piece of drywall cut to fit into a hole and held there by resting on a lip from some molding.
If you have R-30 in your attic but have no insulation at your attic panel, you are lowering the R-value for the entire attic.
You will need a few parts for this but it won’t break the bank. I would get a 1”x3” strip and cut it to fit around the perimeter of the scuttle hole. You can paint it to match the ceiling. Secure it to the bottom perimeter of the opening so that it sits on top of the lip of the molding (where the attic panel used to sit. You can caulk it and paint it and make it pretty if you choose.
For the insulation, you can use poly-iso (poly-isocyanurate) or polystyrene rigid board. These are rigid foam boards that you can cut to fit. You can cut the board with a utility knife. You could use the attic panel as a template and cut them to fit, or you can just measure and cut the pieces from your measurements. You will need several layers of the boards to get a good R-value. Poly-iso has an R-value of 7 per inch while polystyrene is 4-5 per inch, depending upon whether it is extruded or expanded. You can build up the back of the panel with several layers of the insulation board. Use the appropriate adhesive for these boards, as some adhesives will degrade the boards
Finally, lay a strip of weather stripping along the top of the ledger board you previously installed at the perimeter of the attic scuttle hole. You will lastly want to fashion a way to hold the panel down with enough tension that air won’t leak. You can do this with an eyehook, or even a latch. You can get as creative as you want, but the point is to compress the weather stripping to stop any air leaks.
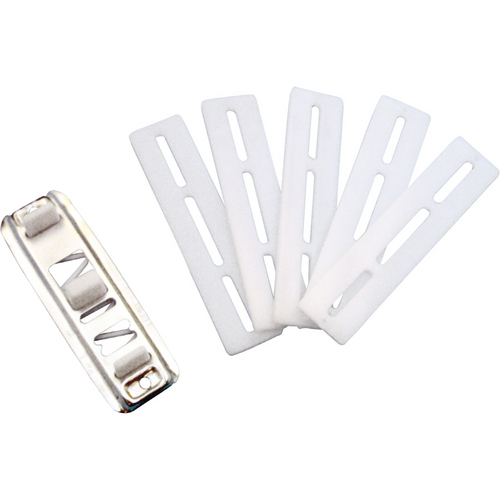 If you have had flooring replaced in a bedroom, have you ever noticed that the sliding close doors now swing? It is probably because you are missing a small plastic guide that gets installed at the floor. It likely wasn’t replaced after the flooring was done.
It also happens that these door guide will break or can get pulled out if someone gets rough with the door. The guides are not very tall, and so it is possible that you may have to either raise the divider up or lower the doors down so that they engage with the guide. You will see some carpet installers install a small block under the carpet just for this purpose. This raises the level of the floor to the point that the guide will hold the doors in the correct position.
As I said, the other option is to lower the height of the doors. There are screws at the top of the doors where they are held to the rollers. If you loosen these, the door can be lowered and then retightened.
Installing a guide is a matter of placing the guide in position (make sure it is in the middle of the opening in the same plane as the doors). It is best to close the doors and install the guide at the point where the doors overlap. It is held in place with screws.
 A cabinet drawer suffers lots of abuse. People slam drawers and little kids pull up on them. Occasionally, a drawer front will come off. Fixing it is easy.
Drawer fronts are attached from the inside of the drawer. Some are screwed in, some are stapled, and some are glued. For the repair, I would plan on screwing from inside of the drawer box and into the drawer front.
The big challenge is getting the front back on the drawer so that it aligns with the neighboring drawers. This isn’t difficult, and you should be able to use the marks on the back of the drawer front as a guide. Place the drawer front face down on a padded surface and set the drawer on top of it. You should be able to tell exactly where the drawer was attached to the front due to screw or staple holes, or even wear marks. Use some padded C-clamps to hold the front to the drawer. At this point you can place the drawer back into the opening but it won’t close due to the C-clamps. Make sure everything is lined up and then you can pre-drill some holes from inside the drawer to the front. Make very sure you don’t penetrate the drawer front with the drill bit.
Once you have the holes drilled, screw the drawer box to the front and reinstall it onto the guides.
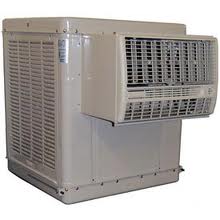 A Swamp cooler needs an occasional once-over. The biggest indicator is if the swamp cooler is not blowing cool air (assuming it’s not really humid outside). If the cooler is blowing air but it isn’t cold, that would suggest that the pads are not getting wet.
Remove a panel and take a look inside the cooler. Turn the pump on and make sure the spider is delivering water to the top of the pads. If the individual arms of the spider are working except one, you know the problem is isolated to that arm. Scale will sometimes get caught in the arms at a bend in the arm. You can probably dislodge it with a flexible pipe cleaner. Take your finger and first pick off any dried deposits on the end of the arm and then stick the pipe cleaner up there. You can do this while the water is running and hopefully when you dislodge the debris, the water will push it out of the arm.
If none of the arms are flowing water, check to see that the pump is working. If the pump works, you might consider removing the spider at the top of the cooler and investigating whether it is blocked. The spider is held on by a screw on top of the frame. You can disconnect the hose that runs from the pump to the spider and turn the water on. Water should shoot out of the hose. If water doesn’t come out of the hose, the problem is with the pump. If water does come out of the hose, the spider is plugged up and needs to be cleared out or just replaced.
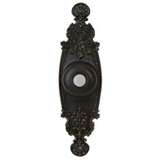 So your doorbell is missing on the foreclosure you just bought. It may look ugly, but it is easy to fix. If this is the scope of your repairs, consider yourself lucky.
Make sure the system works by touching the two wires together that are sticking out of the wall. The chime should sound when you touch the wires. If you don't get any "ding-dong" sound, then it might be the previous occupant started fixing it and got in too deep to finish it.
Let's assume that the wires make the chime ring. The only thing to do is to choose which door bell button you want to use and then connect the wires. The back of the doorbell button will have two screw terminals. Place a wire at each terminal and tighten the screw. You don't need to turn off the power as these are low voltage and won't hurt you.
Once you have the wires connected, you can push the button into the wall. Some buttons have small wings that create friction inside the hole in the wall, and some walls have a small pipe for this and some just a small hole that holds the wires. If you don't see any obvious way to secure the button to the wall, use some adhesive caulking and apply a bead around the button. Then just push in to the wall.
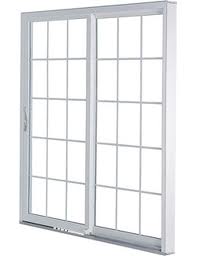 Part of getting a patio door to roll smoothly is making sure that it is level. If the door is level at least you’ve got a fighting chance. If it isn’t level, the lip of the door may dig into the track and really bind up. Additionally, you may find that the handle lock doesn’t engage anymore.
Adjusting the door for level is pretty easy. You will need a screwdriver and maybe a flashlight. At the bottom of the door are two roller assemblies, one on each side of the door. If you look at the edge of the door at the bottom, you will see a small hole. Both the front edge and rear edge will have such a hole. This is where you will stick a screwdriver to adjust the rollers either up or down.
You will have to feel for the screwdriver to engage because the rollers are recessed into the door (this is where a flashlight may give you a clue). Place the screwdriver into the hole and move it around until you feel it engage with the screw. If you want to lower the door, rotate the screwdriver counter-clockwise. If you want to raise that side of the door, rotate the screwdriver clockwise. Realize that in raising the door, you will be lifting the weight of that side of the door, and so you will have to use one hand to slightly lift the door as you rotate the screwdriver. Constantly check the operation of the door and make sure the lock engages properly before you call the job done.
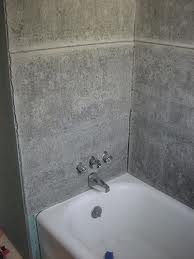 For shower wall repairs, it is a pretty common issue to wrestle with: should you use cement board or green board? There are benefits to each, but I am partial to cement board.
I like cement board because it is so durable. The downside is that it is more expensive, it is sold in smaller pieces (3’x5’ sheets that makes it easier to handle), it is slightly more difficult to cut, and the fasteners are more expensive.
Green board on the other hand has just the opposite of the drawbacks listed above. Green board though is often referred to water proof, which it is not. It is water resistant. It has a waxy surface which can resist wetness, but it is definitely not water proof. It is smarter to use green board than ordinary drywall when working near wet locations.
Both cement board and green board are cut using a score and snap method. The edge for the cement board will be much more jagged than the green board, but since it will be covered by the shower wall surface, it shouldn’t make much of a difference. Since the cement board is heavier, you will also use more screws to hold it to the wall studs. These are specialized screws with small burrs under the screw head that dig out some of the cement surface so that the head will not protrude.
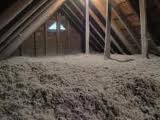 Attic Insulation is crucial for energy conservation. The higher the R-value of your attic insulation, the greater the insulating effectiveness. The R-value is a measure of insulation’s resistance to heat flow.
Determining your attic’s r-value is a matter of determining what type of insulation you have, how thick the insulation is, and how well it was installed. Also, the overall r-value of your attic may not be the same as the insulation in it, because heat flows around the insulation and through studs and joists. An infrared camera illustrates this very well.
Here are some common do-it-yourself materials used for attics and their R-values:
Insulation Type R-Value per inch
Blown Cellulose 3.7
Blown Fiberglass 2.8
Fiberglass batts 3.0*
*The quality of the installation is extremely important with insulation. Fiberglass batts have to be correctly installed for this R-value. If they are compressed, or if there are gaps the r-value drops substantially.
You can measure the depth of the insulation and multiply this by the r-value. The effective r-value takes into consideration how well it was installed. There are formulas to determine the degree to which these values drop, but the message is that installing batts is at least as important as the insulation itself.
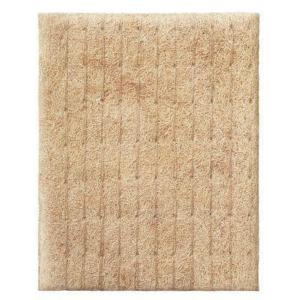 If you use a swamp cooler, you are probably happy with the lower electrical bills. As I’ve said before, swamp coolers are simple machines, but you can’t just plug them in and forget about them. They will need occasional maintenance.
So when do you know it’s time to replace the cooler pads? Well, that isn’t such an easy question to answer. If you see scale building up on the surface of the pads, it’s a good time to replace them. As water evaporates, what is left behind is the salts that accumulate in the water. You will see many water pumps that will have a bleed outlet to pump out a small amount of water while the pump is running. As water is slowly pumped out, the float drops to a level that allows fresh water to refill the basin. This minimizes the scale that builds up in the cooler (and will help your pads last all season). If you don’t have water in the basin automatically pumped out, you can remove the drain tube and manually drain out a few gallons of water every few days, or oven weekly. Over time you may notice that the temperature of the air may not be what is used to be. So go remove a panel and take a look inside. If your pads are covered in white scale and are hard as rocks, it may help to replace the pads.
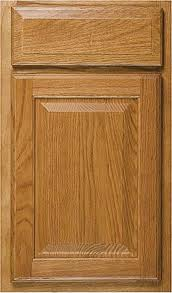
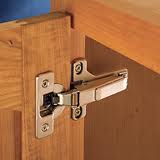 Having one cabinet door higher or lower than the others looks very strange. It is either that the hinges need to be adjusted, or maybe that the doors weren’t installed correctly in the first place.
If you are lucky, you will have the adjustable European hinges. These hinges are not seen until you open the door, and they can be adjusted for and up and down, side-to-side, or front-to-back movement. It is easy and fast, and all you will need is a screwdriver.
European hinges will have two screws on each hinge that you will need to slightly loosen to adjust the door for height. These screws on the cabinet wall and are at the front of the hinge closest to the opening, at the top and bottom of each hinge.
Loosen the screws at the bottom hinge first and support the door as you slightly loosen the top hinges screws. You will feel the weight of the door in your hand when you have loosened the screws enough. Move the door up or down to your liking and tighten the screws to hold the door in place. Close the door to check its alignment with the other doors. If you are satisfied, open the door back up and tighten the screws until snug.