 If you are going to install ceramic tile on a counter or shower surround, it makes for a nice finished look to get finished round over or bullnose tiles (for kitchens they are referred to as V-cap tiles). Some styles of tile do not have these and so you may be faced with the chore of making them look good at an end point.
For a shower surround you can use a border tile. This would be a tile that would complement the field tiles, but does have a round over finish. The other option is to apply grout at a 45-degree angle between the wall and the top edge of the tile. This essentially covers up the unfinished edge.
For a corner on a countertop or shower pan where you have a flat surface going over to a vertical surface you are faced with a different problem. Without a rounded finished edge, you will need to get creative. Imagine the unfinished edge staring back at you. That would be pretty ugly and certainly the sign of a novice. What you can do is grind off the unfinished edge at a slight angle so that when it comes time to grout the area, you can simply fill the void with grout. Grind the area from the top finished edge of the tile (don’t touch the finished edge) and remove a small amount of the tile under it. The grout will match all the other grouted areas and will look nice.
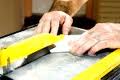
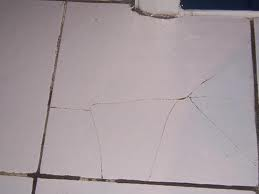 It is common that you will have a ceramic tile with a crack in it, in a sea of perfectly unbroken tiles. If you are lucky you will have a replacement laying around you can remove the old tile and reinstall the new one. The trick is to get the old tile out without damaging the surrounding tiles.
Use a grout removing tool to remove the grout around the entire perimeter of the tile. There are a myriad of tools designed for this job, which include grout saws, carbide tipped tools, and a grout removing bit that works in a Dremel tool. Grout comes out quickly, just get down to the subfloor.
Now it’s time to remove the tile. As the tile is cracked, it may be loose enough to tap it out. You can use a chisel and a hammer and try to lift an edge of the tile. Be careful not to hit the surrounding tiles or they may break as well. You can also hit the tile with a hammer. Obviously, protect yourself with gloves, long sleeves, and protective glasses. The tile may shatter or you may dig a small hole with the business end of the hammer. In this case, use the hammer and chisel to remove the rest of the tile by leaning the chisel at approximately 45-degrees and striking the chisel until the tile pops out. Once the tile has been removed, clean up the old mortar by scraping the floor with a stiff blade. Then you can install the new tile.
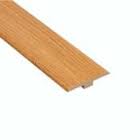
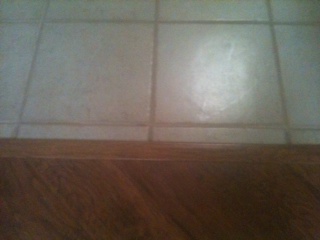 When you are installing flooring and are using laminate and ceramic tile, you will have a transition strip between the two surfaces. The transition strip is an attractive strip that covers the area where the two different flooring surfaces meet. They are not difficult to install, but you must plan ahead.
It is usually the case that one of the flooring surfaces will already be installed, and so when you are looking at materials, take note of the clearances for the transition strip. You will need to leave a gap between the two surfaces where the strip will fit.
A common distance is 3/8” between the surfaces, but read and measure for yourself. The transition strip is shaped like the letter “T” and the vertical leg will fit into the gap while the horizontal leg spans the gap and makes the nice transition. Some strips come with a metal channel that you can glue, screw, or nail to the subfloor, while others use adhesive.
For the metal channel, measure and cut and then figure out which method you will use to secure it. If you have a wood subfloor, you can easily screw the channel in. For concrete, you can use an adhesive, or concrete nails (be careful here though as you can damage the flooring by an errant hammer strike). You can also use concrete screws like tapcon bolts but their height will affect how the transition strip sits. You will have to remove a small amount of the vertical leg right above the head of the screw if the screw head sits to high. Once the channel is secured, the strip just pushes into the channel.
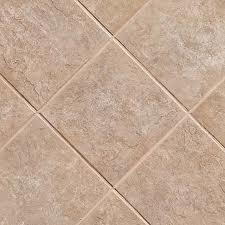 If you have ever installed ceramic tile, you know that it has its challenges. Getting all the tiles perfectly aligned and on the same plane can be tough. Fortunately, there are things that can make it easier.
For the alignment, you can certainly use the spacers. These are pretty foolproof. You lay down a tile, place a spacer at each corner, and install the next tile. This will keep them straight. But what if one side of the tile ends up higher than the other side?
It doesn’t take much height difference to be noticeable. I’m not talking about a trip-and-fall hazard, but rather a slight difference that you can tell as an installer.
When you have finished laying the tile, and before the grout is installed, the floor looks terrible. It is the grout that pulls it all together. So when you are grouting the area with the height difference, pull the float from the low side to the high side. This will clean up the area and make the height difference blend in somewhat. Float the area at an angle and as the float comes off of the high side, it will give it a nice appearance. If you go from the high spot to the low spot, it tends to overfill the joint and will draw attention to it.
 Ceramic tile work is like putting together a jigsaw puzzle one piece at a time...and it is straightforward until you get to an obstruction. This happens a lot when tiling a shower wall. You will tiling away and then run into a shower valve handle sticking out of the wall. So, you have to go around this by notching the tile. That is fancy talk for cutting a section out of the tile. This will be hidden by the escutcheon plate for the handle.
The key is to make the notch big enough that it fits around the penetration, but not so big that it can't covered by the escutcheon.
The best tool for this is a wet saw. Before you cut, you can lay out the markings on the tile. You can hold the tile up to the penetration and make some boundary lines on the face of the tile. You can use a pencil or a wax pencil for this.
Lay the tile on the bed of the wet saw. I make the stop cuts first and then nibble away the interior of the notch. The wet saw makes quick work of this. You can cut the far left cut first, and then the far right or vice-versa. Then slowly nibble away from left to right, or whichever direction you feel comfortable with. The last sliver will likely break off, but you can clean up the bottom of the notch by running it against the blade along the series of cuts. When you have the notch finished, you can dry off the tile and mortar it to the wall.
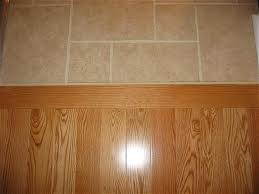 When two different flooring surfaces meet, such as ceramic tile and laminate, there must be a transition between the two. A transition strip allows you to mate the two surfaces with an attractive strip to bridge the gap between the different surfaces. When laminate flooring is involved, you will use a transition strip made of laminate.
This transition strip is shaped like the letter "T" with the top spanning both the ceramic tile and laminate surfaces. The vertical leg of the "T" gets secured into a gap between the two surfaces. The size of this gap depends on the type of transition strip you are using. Many of these strips have a metal channel you will install first into the gap. You can nail or screw the metal channel down (and in some cases use a construction adhesive like Liquid Nails). Once the channel is in place, the transition strip gets pushed into the channel. Trim it to fit first and then snap it in place. The metal channel will hold the transition strip, which covers the ends of the different flooring surfaces.
Once the transition strip is installed, it should be flush with both surfaces. In other words, you want to make sure you install each surface so that they are equal in height. Otherwise, you may find that the transition strip will be higher on one side than the other, and may not even stay in the metal channel.
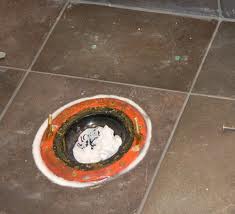 Removing the toilet to install new ceramic tile is always a good idea. It creates more work now, but will save you plenty of aggravation down the road.
True, you will need to remove the toilet and then buy a new wax ring and bolts. However, when you are done with the floor, it won’t look amateur. Plus, you won’t have to make a bunch of round cuts on the ceramic tile to fit around the base of the toilet. By removing the toilet, you can tile right up to the flange and the cuts won’t need to be perfect as this area will be hidden by the toilet anyway.
How will it save you time in the future? At some point you will want to replace the toilet with a new one. Maybe it’s outdated. Maybe it uses way too much water, or maybe you just want a different design. When you replace it, the big concern will be finding a new toilet with the same footprint as your old toilet. That may be tough. Tiling up to the base of the original toilet is not very attractive anyway, as there is a gap between the tile and the toilet. Can you imagine how ugly the new smaller toilet will look with an even larger gap? Do yourself a favor now and remove the toilet before you tile the floor.
 Changing flooring surfaces requires an attractive and long lasting solution. In this case, ceramic tile leading up to laminate flooring can be transitioned with various methods. A “T” shaped strip will bridge the gap between the flooring surfaces.
When you are installing flooring, you have to plan on things like this. Have the transition strip on hand so you can determine how large of a gap to leave between the flooring. For this transition strip, a metal channel gets secured in the gap between the two surfaces. Measure the distance of the gap and cut the channel to fit. You can use a hacksaw for this. The channel has evenly spaced holes along the bottom of it. You will secure it to the sub floor with screws or nails. This is usually hammered down into the sub floor to secure it. If you are installing over a concrete slab, use concrete nails or screws. Just be careful swinging a hammer around the edge of ceramic tile…it chips awfully easily.
Once you have the channel secured, the “T” snaps down into it. The leg of the “T” secures into the channel and the top of the strip extends over the two surfaces, which bridges the gap. In addition to the channel, you can use construction adhesive to help keep the ends from lifting.
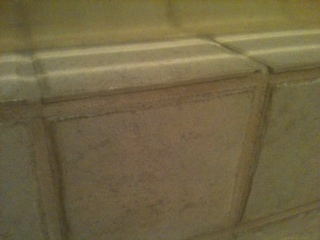
 Ceramic tile can be finished is several ways. If you are, for example, you are installing ceramic tile for a shower surround, you typically have the option of using bullnose, or round over tiles at the perimeter. This gives a nice finished look along the perimeter of the tile. If you are using a tile that doesn’t have that finished option, you will have to create your own finished look with grout.
When you have unfinished tiles along an edge, they can be unsightly. By using grout, you can create a line from the top edge of the tile, down to the surface of the wall at a 45-degree angle.
Measure the distance from the wall’s surface to the top edge of the tile. Take that distance and make a mark from the tile edge along the wall’s surface. Run a piece of painter’s tape at this distance along the perimeter of the tile’s edge so that the tape runs parallel to the tile. You will be left with a gap from the tile to the tape.
Mix up some grout and push it into the space next to the tiles vertical edge. Use a float and, holding it at a 45-degree angle, push the grout into the triangular space to create the edge. Wait until the grout starts to set up and then slowly pull the tape in one continuous piece. You will be left with a perfect grout line that covers the unfinished tile edge.
I get this a lot. A customer wants to install ceramic tile in a bathroom and hasn’t quite figured out what to do around the toilet.
The answer is to remove the toilet and install tile underneath it. You want to install the tile up to the flange. This way, when you replace the toilet you don’t have to worry about the footprint of the old toilet matching the new one. Besides that, it just doesn’t look very nice. You have cut tiles around the toilet and it is an instant tip-off that a homeowner did the job. It is rare to find a new toilet that has the same footprint as the old one. When this happens, you usually have to break out the tiles that have been cut and replace them with whole tiles that will extend to the flange. If you don’t have any matching tiles around, you may be faced with retiling the floor. Here is an article on how to install ceramic tile.
Ceramic tile is a great choice for a bathroom floor. I’ve seen carpet in bathrooms and I just shake my head. A leak will be hidden by carpet and cause damage in the process, whereas you should be able to see a leak on top of the ceramic tile. If you are unsure about ceramic tile, I would go with vinyl rather than carpet.