 A cable for your landscape lights supplies the power to illuminate the individual fixtures. When this cable gets severed or otherwise damaged, the lights obviously won’t work because there is no power getting to them. You can certainly run a new line of cable, but it is easier and cheaper to splice the severed pieces.
You can buy a cable splice at any home center and it takes only a few minutes to repair. The splice is a hard plastic with grooves for the cable and sharp teeth that penetrate the cable and touch the electrical wires inside the cable. The two halves of the splice clamp down and grip the cable so that there won’t be any movement.
Open the two halves of the splice and lay each side of the severed cable into the appropriate side (you may want to cut away any ripped or torn insulation from the wires so you have a smooth cut). Push the top of the splice down upon the bottom. You will feel some slight resistance as the teeth push into the cable. Tighten the screws that hold the two halves together and then go manually turn on the transformer. Your light fixtures should light up.
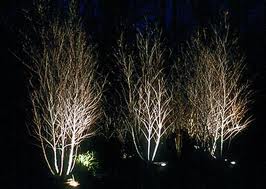
 Landscape lights can really add some pizzazz to a home. Not only can you accent particular features of the landscape and of the home itself, but it also is a good deterrent to prospective burglars. But what are you spending for this feature? It really isn’t hard to figure out.
Here is the formula (and this formula works for other items too):
Watts x hours used/1000 x cost per kilowatt hour (Kwh)
You could go through each light fixture in the yard and add up the wattage of each fixture and plug it into the formula above, but this would take some time. You could also get the total wattage off of the transformer. This wouldn’t be totally accurate though as that number is a maximum, and you shouldn’t exceed 90% of the transformers capacity. So certainly, adding the individual fixtures is more accurate. Just to illustrate the formula and as an acid test, I’m just going to use the 90% figure from the transformer, although I'm not using anywhere near the 90% number.
My current kwh cost from the power company is .13 per kwh ( I say current cost because I know my rate will go up soon). My transformer is 600 watts. If I take 90% of that maximum, I will input 540 watts. If I run my lights 8 hours per night for a 30 day month, I can complete the formula as follows:
540 watts x 240 hours (8 hours per day for 30 days)/1000=129.6 kwh. X .13=$16.85 per month.
So I pay the power company $16.85 per month for the privilege of having a landscape light system. Now, this is a fairly large system, so don’t let the numbers scare you. There are much smaller transformers available that can probably handle your needs. My neighbor’s is only 250 watts and he has many slick lights. For example, if we take 90% of a 250 watt transformer you get 225 watts to use. If you are using 13 watt bulbs you could have 17 fixtures on that system. Using the smaller system would cost only $7.02 per month (this would assume using the full 90% of the transformers max, which you may not be doing. The point is that the way to get a true cost of your power consumption is to actually count the watts you are using.
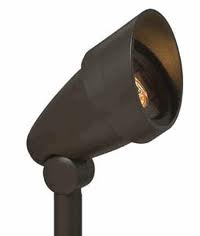
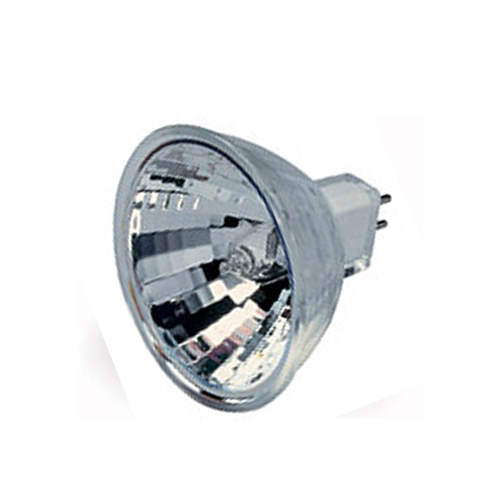 Replacing a bulb in your landscape lighting is very easy. Most are not the type of bulbs you think of when you think light bulbs. The typically don’t screw in. They have pins at the rear of the bulb or a flat area with contacts that fit into a slot, rather than a threaded socket.
The bulbs are halogen and have the wattages stamped on the underside of the bulb. So look at your old bulb and find the wattage on it, and replace it with the same bulb. You can replace it with a bulb that has a lesser wattage, but if you want to increase the wattage you need to do a little math. You should add up the watts on all of the bulbs. The total cumulative watts should not exceed 90 percent of the transformers output.
To get access to the bulb, you will need to remove the cover from the light fixture. These usually unscrew at the top. Make sure the system has been off for a while because the bulbs will get very hot when they are on (assuming you are replacing a bulb that is working). If the bulb is not lighting then the fixture should be cool. Pull the old bulb straight out to remove it, and push the new bulb into the holes in the socket. The pins will fit perfectly into the holes. Push the bulb into the holes until it stops.
 Landscape lights seem to always be in need of repair. They look very nice, but occasionally you will have to change bulbs and troubleshoot them.
A customer called and said she had several lights in sequence that were out. The first thing to do is to check the bulbs. You can buy a new bulb or simply use a bulb from a working light, that way you know that the bulb is good. Place the bulb in the fixture and see if it lights up. If it doesn't, the fixture is not getting power to the bulbs socket. You can confirm this by using a multi-meter and touching a probe to the contacts.
Next, dig down to where the fixture connects to the cable in the ground. You can remove the contacts in the cable and use the multi-meter to see if there is power in this area. You can also try to attach the contacts in a different area of the cable. It may be that the old holes were corroded to point where the contacts were bad. Incidentally, if you do get a power reading on the multi-meter, it's probably time to replace the fixture.
Now since there are a sequential line of lights that are all out, I would guess that there is damage to the cable which is stopping power from continuing down the line. Start digging just past the last working light to the first non-working light and find the damage. At this point you can install a repair coupling and re-bury the cable. The coupling simply snaps over the cable which allows the electricity to continue to flow down the cable.
 If you are planning on installing a landscape lighting system you better be ready to do some math. You see, it’s not just about plugging in the system and you have light. No, you need to do some calculations and planning first. The biggest consideration is how large of a transformer you need to buy. You can figure this out by doing some quick math.
I would recommend drawing a road map of where you want lights and what wattage each bulb will be. This is critical, because if you exceed 80% of the transformers capacity you will have problems. So, once you have a list of the fixtures and their bulb wattages, add the watts up so that you come up with a number. That number shouldn’t exceed the 80% rule for the transformer. For example, if you add up the watts of all the light bulbs on your planned system and it comes up to 290 watts and your transformer is rated for 300 watts, you better either upgrade your transformer or decrease the bulb wattage or number of fixtures on your system. A 300 watt transformer should be able to handle 260 watts (300 x 80% = 260).
If it is possible you might want to add fixtures in the future, you are better off buying a larger transformer now, rather than buying two 300 watt transformers later. A larger transformer is cheaper that buying 2 separate transformers.
The pre-packaged landscape light systems you can buy at a home center are good to install right out of the package as they have already considered the 80% rule. Just don’t increase the wattage of the bulbs without doing the calculations.
As you walk up your driveway you notice that half of your landscape lights are on and the other half is off. There goes the weekend. If all of the lights are on up to a certain point and then they are all off, you likely have a damaged cable (the other possibility is that the lights are run by two separate transformers, and maybe one of them needs to be reset).
You can repair the cable, but first you have to locate it. You can get an idea for where it is by following it from the landscape light that is working. It will have a connection from the light to the cable. The cable generally isn't very deep, but you will have to do a little digging. Once you find the cable, look for a break or damage to it. Most of these are pretty obvious as you will see rust from where water has entered an opening in the cable.
You can cut out the bad section of cable and use a cable splice to reconnect the cable. You can find a lot of suggestions on splicing cable that include soldering, etc. I like the splices that are small ridged sections that have sharp points to pierce the cable and maintain the electrical path (they are referred to as "pierce-point"). Some are filled with silicone or jell to fight against water intrusion. Whatever type of splice you choose, make sure they are specifically for direct burial.
 You pull up to your house at night and notice that one of the landscape lights are not working, and you suddenly realize that you have a project for the weekend. Troubleshooting landscaping lights is a systematic process. In this case it may be as easy as replacing a bulb. Landscape lights are a series of fixtures that are energized by a cable underground. A multimeter tool helps in diagnosing these electrical issues.
Start by swapping out the bulb. Remove a light bulb from a working fixture and install it into the broken fixture. If your transformer has a timer, rotate the switch to "on". If your transformer has a light sensor, cover it with black electrical tape. This will allow the transformer to send electricity down the cable and illuminate the bulbs. If the bulb lights you simply need to replace the bad bulb with a new one. You can also stick the multimeter probes in the bulb sockets to test for power.
If the fixture doesn't light, the problem is either with the fixture or that the fixture is not receiving electricity. Dig the light fixture out of the ground and get to the area where the fixture clamps into the cable. Remove this clamp which will leave 2 openings in the cable. Use the multimeter probes and test to see if you get electricity. If you do get electricity, you probably need a new fixture, but you can try to re-clamp the fixture onto the cable at a different point (it maybe a corroded connection). If you don't get a reading of electricity, move the fixture down and try to resecure it into a fresh piece of cable. If more than one consecutive fixture is not working, you would need to inspect the cable for failure.
 As you pull up to your house at night, you notice that a few of the landscape lights are not working. Fortunately the weekend is coming up and you have nothing better to do that work on some landscape lighting repairs.
The simplest fix is to change the light bulbs, but if that doesn't work, use a low-voltage tester (about $12 from a home center) to test that the light bulb receives power. The tester will have two terminals. Manually turn the lights on and stick a terminal in both sides of the light socket. You may have to place a piece of black duct tape over the light sensor if the transformer doesn't have a manual switch.
I say "light socket," but it doesn't look like one. This socket will have either two holes, or two clips depending on the system. If the tester indicates you have power to the socket, then you have a bad bulb. You can also use the continuity-testing feature on the multi-meter to test the bulb.
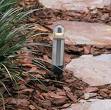
If you aren't getting any power to the socket, you will need to dig up the light base assembly. This assembly contains the socket, the wiring that connects the socket to the underground cable, and the stake that holds it all in the ground. The entire assembly will only be about six inches deep, but dig it out carefully as you don't want to sever the cable.
You want to find where the light assembly connects to the cable. In many cases, this area corrodes or gets clogged with dirt preventing electrical contact. Unscrew the connector or pull it apart, then clean it off with a soft brush.
At the ends of the light assembly's wires will be sharp contacts. These contacts are pushed into the cable to provide electricity.
Use the continuity tester by touching a terminal to both contacts. If the light assembly is good, the tester will show continuity. If there is no continuity, replace the light assembly (between $12 and $25).
If the light assembly tests fine, then re-install the connector into the cable. It is possible that the contacts have either pulled away from the cable's wiring or that dirt has prevented the contacts from touching the wires. Clear away any dirt, then re-install the contacts into the cables. The connections are secured by either twisting on a retainer cap, or by pushing the contact wires together until they lock in place.
Had the entire system been dark, you would have first checked that the transformer was getting power from its source (typically a GFCI outlet). If it was not, then you would need to backtrack from the GFCI outlet (try pushing the "reset" button on the outlet).
If the transformer were receiving power but not delivering it to the lights, you may have needed a new transformer. Many transformers have a circuit reset button. Try pushing the button before you buy a new transformer.
If all of the lights work up to a certain point and the rest of the lights are not on, you may have a damaged cable.
In this case, start by digging up the first light assembly that doesn't work and pull the contacts out of the cable. Manually turn the system on and stick the tester in the holes of the cable that the contacts made. If you get power from the cable, the problem is somewhere in the light assembly or bulb.
If there's no power, dig up the cable between the last operating light and the first nonoperating light. Find the damaged area of the cable and splice a new section of cable in its place. New cable and splice connectors are available at most home centers.