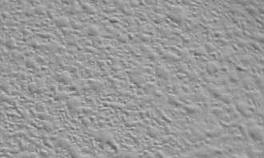
 Las Vegas Handyman repairs drywall every day. Lots of homeowners repair drywall as well, but may lack a little when it comes to matching the texture. Matching texture is not easy, but it is cheap and you can practice before you apply it to the wall.
Before you spray texture on a drywall repair, make sure the patch is good. It should be flat with no bumps. You can hold a shop light next to the patch and shine light along the wall. If the patch is not flat you will see shadows behind the uneven areas.
Once the patch is flat, use try to remove the borders of the patch. Grab a toothbrush and some warm water and use a swirling motion to minimize the border of the patch. You want to remove the drywall mud that has filled the surrounding texture.
For small patches, the aerosol cans of texture work great. Practice on a piece of cardboard or scrap material and get the spray pattern right. You can change the pressure in the can by holding it in cold or warm water. You can use the dial setting to control the size of the splatter. Practice until you have the right look. I generally start with a large sized splatter and then move to small splatter. It takes some playing with to get it looking right. Let it dry and then take one swipe with fine sandpaper in a sanding block to level the top of the texture.
 Las Vegas handyman certainly does plenty of drywall repairs. Whether large or small, you can count on us. We encourage homeowners to attempt the easy ones, and then all us if they get into trouble or if the project is bigger than they are comfortable doing.
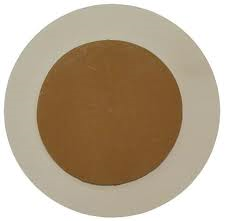
A common drywall repair is a doorknob hole that punctures the wall. You can do a traditional drywall repair using a wood backer, drywall, and float out the joint compound. You can also buy kits that make quick work of the repair.
The kit will include a template that you place around the damaged area. The template has to completely cover the damage. It is usually a large circular shape that you place over the damage. Draw a line at the template and cut out the along the line leaving a circular hole. The drywall plug that comes with the kit fits perfectly inside the circular hole that is left in the wall. It has a tape flap around it so that you can apply some mud and stick it in the hole. At that point you can just float the patch out to blend in just like a regular drywall repair. You can put a couple of coats on and then texture it to blend in with the surrounding wall.
As for painting the patch, if your house has been recently painted and you have kept the paint indoors, you are probably fine just to touch up the patch. If there is any doubt, you may want to paint the entire wall from corner to corner.
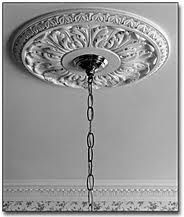 If you’ve ever encountered a drywall problem while replacing a light fixture, a ceiling medallion might just be your answer.
On occasion, if you remove a ceiling fixture that has a large base and are installing a light fixture with a smaller base, you may run into trouble. At the very least, the paint likely won’t go all the way to the junction box, and it may be that the drywall will have a gap that you might see. A ceiling medallion can solve both of these problems.
The medallion will get secured to the ceiling before you install the new light fixture. They are made of different materials and can be caulked into place, screwed to the ceiling and then float over the holes. Some are made of plastic and some are plaster. They can be painted whatever color you choose. You can buy them in ornate styles or very plain styles depending upon the décor of the house. If you are going to paint it, you might paint before you get it on the ceiling and then do any touchups afterward.
Once the medallion is secured to the ceiling, you can install the light fixture like normal although you will likely have to modify the opening on the medallion to expose the box and connections.
 If you are moving out of your home and have drywall nails throughout, don’t just smear some spackle over the hole. It is very unsightly, and with just a small amount of effort, you can make the smear go away.
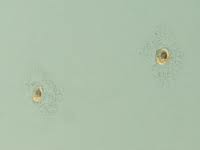
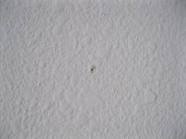
It usually happens in a hurry. You just want to fill in the tiny nail holes and get on your way, so you use a putty knife and spread a glob of spackle on the wall. Yep, the hole is filled, but so is all of the surrounding texture which now is about 2” in diameter.
So here are a few ideas to make the 2” sore shrink back down to a nail sized hole. Make sure that the hole hasn't been raised by pulling out the nail. If so, you can use the handle of a putty knife to push it in, or even a sharp utility knife to cut off the high spot. Instead of using a putty knife, you can always use your finger. Get a little spackle on your finger and press it into the hole using a wiping motion. This way you won’t fill in all of the surrounding peaks and valleys which draw more attention to the area. You might also try using drywall compound that you mix yourself. This takes longer to dry and gives you more time to clean out the peaks and valleys if you do happen to fill them in. Use a toothbrush dipped in warm water and use a swirling motion to clean up the area. Then you can touch up the paint if needed.
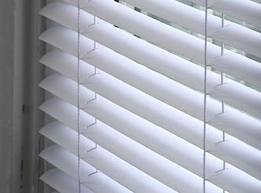 Installing blinds into drywall is an easy task, so long as you have the right tools. Mini blinds will come with the necessary brackets and hardware to install, and you just need to figure out if you want the blinds mounted inside the window opening, or outside of the window. Regardless of which way you decide, the blinds will either snap or slide into the brackets.
The most important tool for the installation is a drill/driver and coarse thread drywall screws. Don’t use the screws that come with the hardware. Instead, use 1 ¼ coarse thread drywall screws. You can hold the bracket to the wall with one hand, and drive the screw into the wall with the other.
The only thing to be aware of is the positioning of the brackets. You may run into some metal corner bead when working around the window opening. If you do, you will notice that the screw keeps spinning but not sinking into the surface. In this case, just relocate the bracket slightly back or up and down (depending on where the metal is). You want the screw to enter the wood framing for some strength. Make sure that whatever position change you make to one bracket, you make for all brackets. If you don’t you will end up with brackets that are misaligned and do nothing to support the blind.
 Walking through a customer’s home, the drywall texture really stood out. They had obviously done some repairs, but didn’t do it very well. It looked like the holes they patched were very small, probably some nail holes or wall anchor holes. Anyway, it looked like they had just gone through the house and smudged a giant 2” swath of spackle across a tiny little nail hole. Boy did that stand out.
I’m not sure why they didn’t just fill in the tiny nail hole; they could have just smudged a little joint compound on the end of their finger and filled the hole.
The goal here is to minimize the visual impact of the repair. Even if you don’t have any experience, you don’t have to just smudge a glop of compound on the wall. Once the compound starts to set you can use a toothbrush and some warm water. You want to slightly soften the surrounding area and bring the texture back out. Right now the voids are all filled with compound, but you can use the toothbrush to open them back up. Use a light swirling motion to clear out the smooth swath of compound from the wall. Dip the toothbrush in the water and swirl lightly. Of course the other option is to spray some texture on the wall, but the job really tends to grow when you do this.
 We get called to do plenty of drywall repair jobs. A common occurrence is when someone will be moving furniture (or something heavy) and it will gouge the wall. It typically digs into the drywall and removes the paint and texture as well. Fixing it is pretty simple, if you have the right paint match.
Fill the gouge will drywall mud and get it level with the surface. This step doesn’t have to be perfect as you may have to add some more anyway. Let this dry. Some people use sandpaper to level it, but I like a damp sponge. Get the sponge wet, wring it out, and wipe away the excess drywall using a swirling motion. This will also clean out the mud from the textured area surrounding the gouge. This will help the repair blend in by minimizing the repair area.
When the area is dry, spray some texture on it and make sure the splatter size is consistent with the surrounding texture. If the height of the new texture is somewhat taller than the surrounding texture, use a sanding block and take one swipe of it using a fine grit sandpaper. When the texture looks right, you can paint the patch and be done with it.
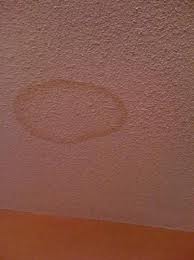 Water stains on drywall look ugly. On a ceiling, it can look like a big coffee stain, while near a floor it looks somewhat lighter in color as the water can go elsewhere. Note: there are times when you may want to have a professional check to see if the water damage has led to any mold or fungus issues, which can lead to health problems in certain individuals. So be careful.
If the texture on the surface is in good shape, that is dry and doesn’t flake off when you touch it, you can probably get away with sealing the stain and painting. Use a stain sealer like Kilz or Zinsser and apply it over the stain. You may have to apply a few coats to cover the stain. Once it is dry, give it some paint. You will likely have to paint the entire wall, rather than just the stained area. By the way, the stain sealer is somewhat thicker than paint, and so you may find that your textured area becomes less textured after you apply the stain sealer. It tends to knock down the ridges of the texture.
If the texture was flaking off and the wall is dry, you can retexture the area and then paint.
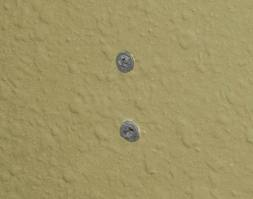 If you have ever had to remove drywall anchors from the wall, you know what an ugly mess they can be. It’s not like a small nail hole that you can just fill. Some wall anchors leave a very noticeable hole in the wall. The problem isn’t so much removing the anchors, but rather what to do after you’ve removed them.
Some drywall anchors push into the wall, and some screw into the wall. For the anchors that screw into the wall, such as the EZ toggle, you can just unscrew them. These anchors have large threads that bite into the drywall and will leave a hole in the wall about the diameter of your pinky finger.
For anchors that push into the wall, they generally have some type of texture on them to help hold them in place. Many will have little arms that, when a screw is installed in them, will push out against the drywall to help hold them in place. They will have a lip that you can grab with needle nose pliers and pull out of the wall, or you can simply push them into the wall and let them fall into the wall cavity.
Once the drywall anchors are removed, you can decide how fancy you want to get with the repair. At a minimum you can fill in the hole with drywall mud or spackle. If it is really unsightly, you can spray a little texture on it before you paint it.
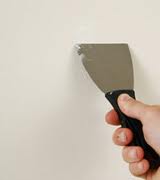
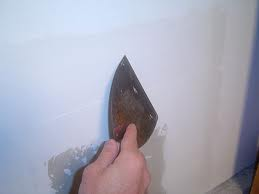 When you patch a drywall hole, you have an ugly eyesore staring at you. After you have patched the hole, taped it and floated drywall compound (mud) over it, you have a smooth area in the middle of a textured area (unless your wall wasn’t textured).
The key to making a drywall patch is getting the surface flat so that it doesn’t protrude or indent from the surrounding area. When you reach that point it is a matter of spraying some texture on it and painting.
Once the mud dries, many people use sandpaper. If you use sandpaper, use a fine grit. Beginners tend to use a medium grit and it leaves scratches. Finer is better. Sandpaper will remove dried mud quickly, so use light strokes over the entire area.
You can also use a damp sponge. Ring the water out and lightly use a swirling motion. The sponge will clog with wet mud, so you will need to dunk the sponge and wring it out again.
Once everything is flat, use a damp sponge and get rid of the border of the patch. When you spread the mud on the patch, it will fill all of the textured divots. Try to erase the border of the patch to bring the textured area back. Once you have done this, you can spray some texture on the drywall and paint it to match.