 It’s a good idea to check out your landscape irrigation before the summer heat hits. If you notice dry grass or plants that are struggling, tackle it now rather than when it gets really hot and it gets too tough for your landscape to rally for a comeback.
You can turn on each irrigation valve one at a time and check for good coverage. You can do this by either manually advancing the sprinkler timer or by removing the lid from your irrigation box and opening the bleed screw. If you open the bleed screw you will get a little water spraying out of the valve. When you are done checking the zone, turn the bleed screw back off.
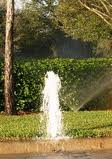
While the water is on go around and check the sprinkler heads for good coverage. They may all work great, or you may see part of the spray arc is blocked or spraying erratically. You may need to remove the head, clean it out and re-install it. You may see a geyser from a broken head or riser. These are all easy to fix as they are threaded fittings.
For the plants, check to see that the drippers all drip water. These get overlooked until it is too late. Since they don’t spray water, you really don’t notice they are on unless you can hear the lines purging the air. Again, turn on the valve and check each plant. When you find one that is blocked, I would just replace it because while you might be able to clear the debris, it may fall back into the emitter and block the opening once the water comes back on.
 Irrigation drip lines are black poly tubes that carry water to individual plants. There will be a time when you will see water spraying from somewhere along the tubing. It may be that a fitting has worked its way loose, or maybe the tubing has a split or crack in it.
This is easy to repair. For a split in the plastic tubing, you will need to cut out the area of the split. Make the cut cleanly at a 90-degree angle. Use a barbed connector and push each end of the tubing onto the connector. Turn the water on and test to make sure there are no other leaks.
If a fitting has worked its way out, the repair is similar. The fittings are barbed so there is no glue that is used. If the fitting is pulling out of the tubing, I would cut the tubing back to where it isn’t stretched out, like maybe ¼”-3/8” of an inch back. That way you get some new tubing to push the fitting back into, and since it isn’t stretched out, it should hold well.
Whenever you work on drip systems, it is a good idea to take the time to check that the emitters are dripping water to the various plants. Sometimes when working on the system, you may inadvertently allow dirt into the system which could clog the emitters.
 Installing landscape irrigation is only half the battle. Once drip lines are in position, they are typically covered with landscape rock to hold them in place. You should take note of the environment though. Kids and dogs will cause you some grief here.
A drip system saves lots of water by directing the water right to the root ball of the plant. When the drip emitter becomes clogged or is moved out of place, the plant will eventually die. You can periodically monitor the emitters to make sure they still emit water, but for the lines being pulled out by kids or animals, your first line of defense is to stake the drip lines down.
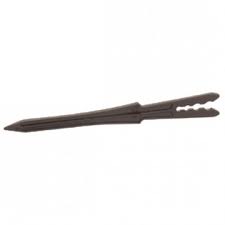
Stakes come in many different sizes. You can stake down the main lines with either ½” or ¾” stakes. For the small individual drip lines, you can stake those near the root ball.
I see many people stake the drip lines several inches off the ground. This is good to be able to see that the emitters are still dispensing water to the plant, but bad in that they are easy targets for an errant ball or running child. The flip side is that if you stake the drip lines so that are right on top of the ground, they are less likely to be displaced, but it is more difficult to see if they are working correctly.
 Homeowners generally don’t consider using a pressure reducer for their drip irrigation system, but they should. Drip irrigation directs water to the root ball of the various plants, which saves water. Instead of spraying water over a wide area, the drippers direct water at the root ball.
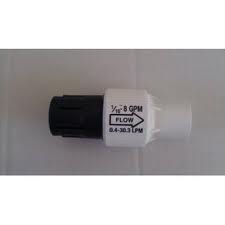
Another big difference between sprinklers and drippers is that drippers don’t use adhesive to hold the system together. Instead, drip systems use black tubing and the fittings are barbed which is enough to hold the system together…unless the pressure is too high. Drip systems generally like pressure at or below 25psi. Your home’s water pressure should be between 40-80psi which is far more than a drip system likes. Consequently, you need to install a pressure reducer.
The order of parts is the water enters and exits the irrigation valve, then the filter, then the reducer, although some systems have a filter/reducer combination.
You can buy reducers at different pressure levels, and some have an adjustable reducing feature.
To connect everything, the filter threads into the valve and the reducer (if it is a separate piece) will either screw onto it. Then you will need a barbed insert and glue it into the output side of the reducer. From there the black poly hose pushes into the barbed insert.
 Irrigation valves generally sit below ground in a box and sometimes end up submerged in water. It’s no wonder they don’t last forever. Occasionally, you may find that a sprinkler valve won’t fully shut off. It’s time to investigate.
Pop the top of the irrigation box and determine which valve is running. You can usually do this by feeling the valve. You will feel for a small vibration in the valve…it will also be the coolest as fresh water is constantly running through it.
It may be that there is debris in the valve which is preventing the valve from operating properly. To check, unscrew the series of screws that hold the top of the valve to the bottom of the valve and carefully lift off the top. You will see a gasket between the two pieces. There will be a rubber diaphragm in the center of the bottom half of the valve. Look for dirt or debris around this area. You should also look at the general condition of the diaphragm. Look for damage or small holes or tears in it. You can buy a replacement or just reinstall the old one if it looks good.
Once you reassemble the valve, turn on the water and test for leaks and check to make sure it actually shuts off the water correctly.
 A sprinkler valve is the gate keeper for water rushing to your sprinkler heads. If there is a problem with the valve either the water won’t turn on or it won’t turn off.
The problem is usually with either the diaphragm or the solenoid. Both of these parts can be changed quickly, but you need to get the correct parts. There are small differences in these parts which can make your repair fail.
You can get the make and model number of the valve and bring it with you. Turn the water off and let the pressure out of the system. The solenoid will just unscrew from the top of the valve. To access the diaphragm, you will need to remove all of the screws that hold the top of the valve to the bottom of the valve. Lift off the top of the valve and install the new diaphragm, then replace the screws.
If you are replacing both of these parts, you might just consider buying a new valve and installing the new top half of the valve onto the body of the old valve. In this way, you are basically getting a new valve, without all of the work of digging out the old one and gluing the piping together.
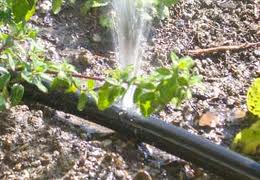 When your landscape irrigation comes on, do you see small geysers shooting into the air? If you do, you probably need to do some quick repairs. Drip lines connect to the main black poly tubing (either ½” or ¾” tubing) and then branch off to each individual plant.
Leaks develop due to a variety of causes. Pets chewing on the tubing, high pressure (no pressure reducer), even the sun’s UV rays can weaken the tubing (although the tubing may be UV resistant).
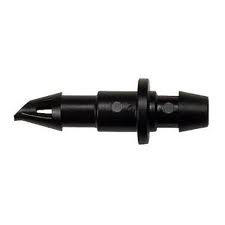
Much of the damage is easily repaired. If an animal has bitten through the tubing, cut each end square and install a barbed fitting. These fittings are simply a straight piece of plastic with a barbed end. Just push the drip tube onto the end of the fitting and it stays.
If you have noticed that drip emitters and fittings are being blown from the tubing, that is a good sign that the pressure is too high. Go to the irrigation valve and look for a pressure reducer just after the valve and filter. If there is none present, you might consider installing one to prevent this in the future.
Also, although manufacturers say it is acceptable to leave the drip lines exposed, I prefer to bury them. This also makes animals work a little harder to chew on them.