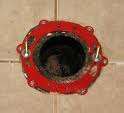
 A toilet that leaks is bad enough…one that leaks rusty water is worse. If the toilet is leaking between the bowl and the floor, then we it sounds like the wax ring is bad and needs to be replaced. The fact that the water is rusty suggests that the flange that mates with the wax ring is rusted. I would guess that when the flange rusted, it probably broke and the toilet became loose at that point and moved, which broke the wax ring seal and caused the waste to show itself under the base of the toilet.
That's a long winded way of saying the flange needs to be repaired and then a new wax ring installed. It's a lot easier to repair a flange than replace it. Try using a reinforcement ring. These are beefy metal rings that sit right on top of the broken flange. The holes of the reinforcement ring align with the holes of the flange and so the toilet bolts will sit in exactly the same place. You can secure the ring to the subfloor with screws, or if you are on a concrete slab, you can use tapcon screws.
Once the new ring is secured, install a new wax ring and secure the toilet.
 Swollen baseboard means only one thing; at some point water got to it and caused it to swell up. It may be from an old leak or a current leak, but you need to do some investigating to determine the cause and to see if the leak is active.
I see this a lot behind toilets. Water will drip and eventually be absorbed into the baseboard. Builder-grade baseboard is made of medium density fiberboard and bloats when water even gets near it. There really isn’t a good repair for this due to the baseboard being so distorted. Once you’ve figured out the cause and repair of the leak, remove the damaged piece of baseboard. You will need to get a replacement and it’s best to take a sample with you to match up the profile. You can cut a sample from the piece that you removed since you will be replacing it anyway. Buy a length longer than you need.
You will likely need to miter the ends (unless you have corner molding pieces) so measure correctly and dry-fit the piece until you have it at the right length and the angles are correct. Use finishing nails and nail it into the studs and then finish it off with a bead of caulking along the top edge and miters. Then just paint it.
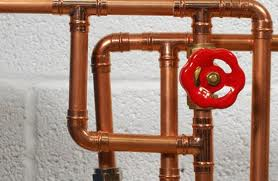 Many people have thought that their plumbing is backwards, meaning that the hot and cold water lines have been reversed. This is seldom the case.
In most cases the problem lies with how the fixture or fixtures were installed. A common location for the reversed water temperatures is at the shower, and involve a single handle that controls both the hot and cold water. In this case, the cartridge is reversed and needs to be rotated 180 degrees.
It’s the same solution for really any single handle fixture with the hot and cold reversed. A kitchen faucet is the same fix as the shower faucet. Remove the cover on the handle, unscrew the screw that holds the handle, and remove the handle. Rotate the stem 180 degrees and reassemble the handle. It should work fine.
If the kitchen faucet has two separate handles (one for cold and one for hot) and the temperatures are reversed, it is likely that the hot water supply line is connected to the cold side of the faucet and vise-versa. This is pretty hard to do as the hot is on the left and the cold is on the right. It is almost as if someone intentionally hooked up the water supply to the wrong sides.
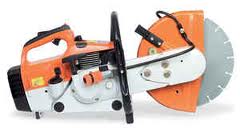 As a Las Vegas handyman, we are asked to do many things, much of which involves simply giving advice. Regarding cutting masonry, it depends on how many pieces you have to cut. If your project includes cutting things like bricks, blocks, or roof tiles, then you need a large, fast-moving masonry blade.
If you are cutting lots of these items, you might want to rent a masonry saw. This is the right tool for the job if time is a concern. They cut quickly, but they are heavy and require a two-handed operation. They are also quite loud, and they kick up a ton of dust.
You can rent one for about $50, but you should only do that if you have a heavy load. The machine runs on gasoline and has a pull-start engine.
As you fire it up and get the blade spinning, gently plow into whatever you are cutting.
Masonry blocks are heavy enough that they won’t move as you cut them, but smaller bricks will likely move, so you will have to weigh them down with something or put your foot on the edge of the brick (be careful here).
When you cut masonry products, were eye, ear, and breathing protection. The dust created from cutting such products is a heavy, gritty mess. It will get in your hair, clothes, and so on.
If this is a one-time cut, you can stick a masonry blade in a circular saw. Using a circular saw typically won’t produce a perfectly smooth finish even with an expensive blade, but since you will be using mortar to join the pieces, the flaws will be hidden anyway. Just take the cut slowly and steadily.
Realize that a circular saw will take longer to cut as it doesn’t have the power of a gasoline-fired engine. Also, a circular saw won’t react well to masonry dust, so you will need to clean it up after you are finished.
You also have a choice in the type of blade. The cheapest type is silicon carbide, and then it gets expensive with either segmented or continuous diamond blades. The more money you spend on the blade the better it performs and typically the cleaner the cut (a continuous blade will leave a very smooth cut).
When you are cutting masonry products, take several gradual passes.
Start the saw and let it build up to full speed before you sink it into the masonry. If you try to cut too much on one pass, you will hear the motor of the saw bog down and you will need to ease up on the depth and speed of your cut. The performance and sound of the saw will tell you the proper depth and speed, just start out slow and shallow.
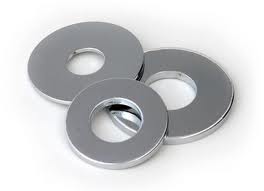 A handyman uses washers for a variety of jobs. Washers are typically used with screws and apply force to a wider area than would the screw head alone.
If you are installing boards to a wall, you might use lag bolts, for example. Lag bolts have large threads on a large shank that have lots of holding power. If you were to continue to screw in a lag bolt, you could probably break the surface of the board until the bolt head was virtually flush with the surface of the board. The large threads have a lot of pulling force. By installing a thick washer under the head of the lag bolt, that force is spread out under the diameter of the washer. So the force is distributed to a larger surface area.
Lag bolts aren’t the only application for washers, rather they are used in many different situations. They are used for wood, metal, plastic, etc.
Washers are made of different materials also, including metal, rubber, and plastic and can be used for a variety of purposes. Some have teeth that bite into the surface being driven into, some are lock washers and help the bolt and material to stay together and not allow the bolt or nut to work loose. They can also be used as spacers.
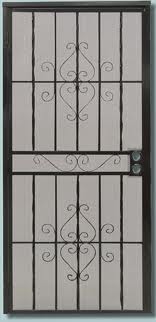 Having a security door installed by your handyman is a common job. However, if you want to tackle the job yourself, it shouldn’t take you over an hour.
Once you get the door home, it is all about placement. Determine which side the door will swing from (the hinge side should be on the same side as your home’s door) so that you don’t have to go from one side of the door to the other. You will want to check that the door knobs don’t hit each other as they protrude from the door…this will prevent the security door from locking. You can switch the position of the handle and lock to alleviate this.
Set the security door on a piece of wood or other object until the height is correct and then make some marks on the wall where the holes are located. Remove the door and pre-drill the holes for the jamb. The diameter is usually 3/16” but check to make sure another size isn’t specified.
With the holes drilled, use a bar of soap and rub it on the threads of the screws (this will act like a lubricant). Set the door back at the correct height and start screwing in the screws. Monitor your progress with a level. Once the hinge jamb is secured, install the door knob and lockset. Move to the latch side of the frame and extend the deadbolt, lining it up with the door. Install it by following the same procedure as above. Then install the head rail in the same manner.
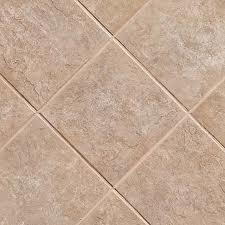 If you have ever installed ceramic tile, you know that it has its challenges. Getting all the tiles perfectly aligned and on the same plane can be tough. Fortunately, there are things that can make it easier.
For the alignment, you can certainly use the spacers. These are pretty foolproof. You lay down a tile, place a spacer at each corner, and install the next tile. This will keep them straight. But what if one side of the tile ends up higher than the other side?
It doesn’t take much height difference to be noticeable. I’m not talking about a trip-and-fall hazard, but rather a slight difference that you can tell as an installer.
When you have finished laying the tile, and before the grout is installed, the floor looks terrible. It is the grout that pulls it all together. So when you are grouting the area with the height difference, pull the float from the low side to the high side. This will clean up the area and make the height difference blend in somewhat. Float the area at an angle and as the float comes off of the high side, it will give it a nice appearance. If you go from the high spot to the low spot, it tends to overfill the joint and will draw attention to it.
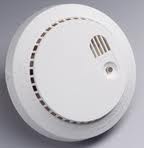 It’s my handyman obligation to remind you that you should have replaced the batteries in your smoke detectors last week when we changed the clocks for daylight savings time. It is also a good time for you to determine if the smoke detectors need to be replaced. If your detectors are 10 years old, you should replace them.
Replacing a smoke detector is easy. If you buy the same brand of detector that is currently installed at your house, to may not need to replace the pigtail that connects the house wiring to the detector. However, over time, manufacturers do change sizes, etc.
If you need to replace the pigtail, shut off the power to the circuit at the main panel. The pigtail will be wired to the house wiring with wire nuts. Replace the wires of the old pigtail with the wires of the new one, color for color. Snugly twist on a wire nut to hold the wires securely.
You will probably need to replace the ceiling mounting plate that holds the detector to the ceiling, but this in a matter of two screws.
Plug the new pigtail into the new detector and then rotate the detector to engage the tabs on the mounting plate.
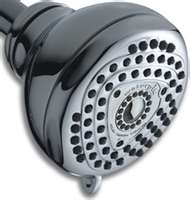 So you are in the shower and the shower head is only spraying through half of the holes in it. Before you replace it, you might try a few easy fixes first.
Some shower heads have rubber "self-cleaning" sprayers on them that allow you to clear off the calcium build-up simply by rubbing your finger over them. Other shower heads are not flexible and so you can use vinegar or a product like CLR (stands for calcium, lime, rust). It is sold at grocery stores and home centers.
You can pour it into a dish and either hold it up to the showerhead, or remove the shower head and set it into the liquid. For difficult-to-remove calcium, let it sit in the CLR for a few hours, rinse it out and then blow through it. Make sure when you unscrew the shower head that you hold on to the neck coming from the wall. The last thing you want to do is to loosen this and have a leak in the wall.
By the way, if you don't want to go through the cleaning process, you can certainly choose to replace the shower head. Just wrap the threads on the neck with teflon tape and then screw the new head on.
 Yes, even the garage of a handyman needs to be organized. Finding things in a messy garage or work area is very frustrating. Soon enough the pile of stuff needs to be placed in a way that allows you to be able to find and use it like you want.
The biggest thing is to get things off of the floor. It will open up areas that you will be able to use, plus you will feel less stress when you go into the abyss.
You can buy organizing items at any home center and they are easy to install. Yard tool organizers mount to the wall and allow you to hang all of your yard tools along the wall. It’s the same deal with your hand tools. Buy pegboard and hooks and soon enough the hammer and screwdrivers will be staring you in the face.
For items you don’t use very often, buy plastic stackable bins and throw them in the bins and then stack them out of the way or hang them from the ceiling. The more expensive option is to install large garage cabinets, but the bins are a good second choice. While you are getting things off of the floor, hang up the bicycles and ladders too. There are special hangars for those and they install in 5 minutes.
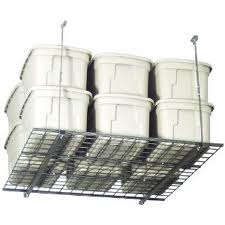
My favorites though are the ceiling racks. These hang from the ceiling and effectively give you a second level of storage. You can place bins on the racks up to several hundred pounds.