 A crack in copper plumbing needs to be repaired quickly. The water is under constant pressure in the supply lines and will spray water out and can cause damage.
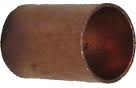
There are copper repair couplings (also called sleeves) that can be used once the crack is cut out of the pipe. Use a pipe cutting tool (not a hacksaw) and cut out the area of the crack. This is going to leave a void in the pipe that you will fill in with a repair coupling. When you buy a repair coupling, make sure it is longer than the area that you removed from the pipe. Some couplings have internal stops inside that won’t allow the pipe to go beyond that point. Don’t buy that type. Instead, buy the coupling without stops so that you can slide it wherever you want it to go.
You will use the same procedure to solder it on, just as with any soldering job. Clean the ends of the pipes, flux the mating surfaces, and apply the heat. You will have to slide the repair coupling somewhat beyond its final resting point so that you can place it onto the pipe on the other end of the void. Here is an article on how to solder copper plumbing.
 Installing landscape irrigation is only half the battle. Once drip lines are in position, they are typically covered with landscape rock to hold them in place. You should take note of the environment though. Kids and dogs will cause you some grief here.
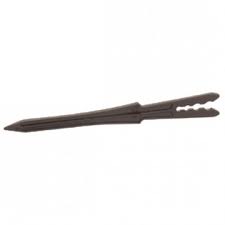
A drip system saves lots of water by directing the water right to the root ball of the plant. When the drip emitter becomes clogged or is moved out of place, the plant will eventually die. You can periodically monitor the emitters to make sure they still emit water, but for the lines being pulled out by kids or animals, your first line of defense is to stake the drip lines down.
Stakes come in many different sizes. You can stake down the main lines with either ½” or ¾” stakes. For the small individual drip lines, you can stake those near the root ball.
I see many people stake the drip lines several inches off the ground. This is good to be able to see that the emitters are still dispensing water to the plant, but bad in that they are easy targets for an errant ball or running child. The flip side is that if you stake the drip lines so that are right on top of the ground, they are less likely to be displaced, but it is more difficult to see if they are working correctly.
 A customer sent me an email about a plumbing question. He said he was under his kitchen sink and saw a water line with some type of a clamp holding to a pipe. He didn’t know what it was.
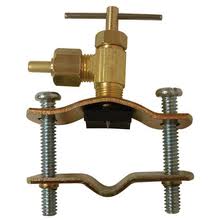
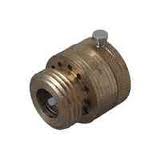
This sounds like a saddle valve and they tap into a water line to supply water to a particular device, such as an icemaker or a reverse osmosis system. You might also find a clamp around a pipe holding a drain line from a reverse osmosis system. When the r/o drains, it drains into the drain pipe from the sink and the clamp holds it in place.
The saddle valve is held in place by a clamp that bolts around the pipe. The pipe is pierced by a needle that twists into the pipe and starts the flow of water. From the valve you can attach a hose or other supply line to the threaded fitting and run the water to wherever you need it. These valves are under pressure and so be very detailed when you install it. The saddle that holds the drain line for a reverse osmosis is not under pressure and so is somewhat more forgiving, but you have to check the valve as the reverse osmosis is draining to verify the installation is tight.
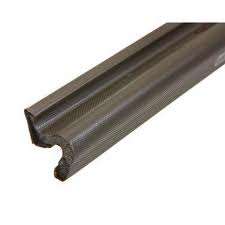
 When you are installing a shower door set, you will need to cut the track to fit in the opening. I wouldn’t use a pair of snips to cut it though as they are aluminum and not meant to be cut with the squeeze of the hand (I'm not sure anyone has the strength for that).
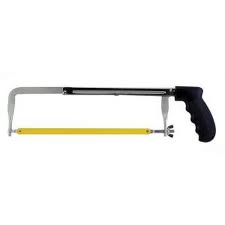
Instead, use a hacksaw. These have a moderately aggressive in cutting, yet they give you plenty of control over the cut. That means the blade won’t wander off of the cut and as long as you are careful, you will get a nice square cut.
Use the old carpenter’s rule of measure twice and cut once. You will need to cut the top and bottom tracks but not the vertical supports. I usually cut the channels or tracks with the walls facing up. That way I can visualize a 90-degree cut and since I only have to cut through two thin walls, it is a pretty quick cut. Move your arm like a machine would. A straight back and forth movement keeping the blade as vertical as possible will yield the best results. Once you get down to the base of the track, the cutting will dramatically slow down because you are cutting through more material.
 Weatherstripping your door is extremely important for energy conservation and your comfort. If you can see daylight around your door, then outdoor air is entering your house and mixing with your conditioned air. This means your air conditioning/heating equipment must work longer and more often to maintain the indoor temperature. Can you imagine how much air would enter your house if every door were like this? It would all add up to a sizeable hole in your house. A few dollars in weatherstripping can prevent this.
Bare bones weatherstripping is the peel & stick type that just sticks to a surface. It comes in different densities and compresses easily or firmly. It also comes in different widths. I would only use this as a last resort as it doesn’t seem to want to stick very well.
Modern doors have a kerf that allows you to install a vinyl coated weatherstripping. You can simply pull the old strip out and push the new one in. The vinyl has a small barb that pushes into the kerf and holds. This needs to be cut when you come to a corner, and then you start the next strip. When you’ve done the perimeter of the door, check to see that the sweep on the bottom of the door is in good condition. You may be able to adjust the sweep, if not just replace it.
The big test is whether or not you can see daylight anywhere around the door when you close it. If you do can’t see daylight, your job is done.
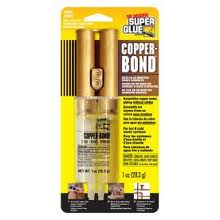 If you are doing a plumbing job with copper piping and are uncomfortable using a torch to solder the fittings, you can try a copper adhesive. They come under various brand names, but they all do the same thing; connect copper piping and fittings together.
You will still need to prepare the fittings and the ends of the pipes, by cleaning them with either a brush or emory cloth. This will make the inside of the fittings and the outside ends of the pipes as shiny as a new penny. From there you will need to apply the adhesive.
The copper adhesive will come in a two-chambered syringe that allows you to dispense equal amounts of the product. Each chamber is filled with a different compound and when mixed make the adhesive. Depress the plunger until the product is at the tip of the syringe (you want to get out any air bubbles at the end here). Push out equal amounts of the products on a scrap surface (the product packaging works well here). Mix the two together with a wood stir stick vigorously until well mixed. Use the stick and apply a thin layer of the adhesive to the outside of the pipe and the inside of the fitting. Push the pipe into the fitting with a slight twist and wait until it takes hold.
The package will say how long to wait until you can turn the water back on, but it is usually within 30 minutes. It’s not for all applications, and I would rather solder a fitting, but in some situations it is a good fit.
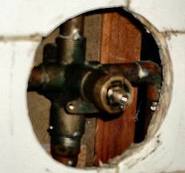 A loose shower valve in the wall is a common item found during a home inspection. It is usually only found on single handle valves where the handle is pulled out to start the water, rather than the valve where you simply turn the know side-to-side. The problem is that the valve and associated piping wasn’t strapped to the wall framing. There are some simple fixes you can try first, before opening the wall to strap the fixture.
The reason the problem is more common is the pull-out handles is that sometimes it takes a lot of force to move the handle outward from the wall, especially if the cartridge is old and crusty. So an easy solution is to replace the cartridge in the valve. That is a common sense solution that many people don’t think about. If you lessen the force necessary to move the handle, then you lessen the movement of the valve in the process.
Another possible solution is to fill the wall cavity with some expanding foam insulation. You will have to remove the handle and escutcheon plate and then you can spray some foam around the valve and let it dry. As the foam dries it might (and I emphasize might) create enough resistance to the valve moving.
As a last resort, you can cut the wall open and properly strap the valve so that it doesn’t move. Then you will either have to repair the wall or maybe consider an access panel.
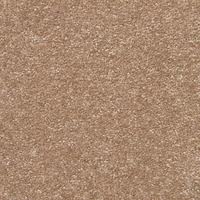 Here’s a handyman tip for patching carpet. If you are lucky enough to have a scrap or a remnant of carpet laying around that matches the area you need to patch, count your blessings.
Regardless of whether you do or don’t have a remnant, you will need to cut out the damaged area of carpet. This can be tricky because you want to make the cut in the shape of a square, but not cut any fibers of the carpet. You want to cut the backing while leaving the fibers intact. That is easier said than done.
You can use a carpenter’s square and push it down onto the carpet. Spread the fibers of the carpet like you are parting your hair. You should be able to make a straight line that runs the length of the square. Cut along the square with a sharp utility knife. Ideally you want to cut only the backing and not the fibers, but in all likelihood you will cut some fibers. Continue cutting in this manner until you have a square patch removed.
You can cut the new patch in the same manner from your remnant using the old patch you removed as a template. If you don’t have a remnant, go into an inconspicuous spot, like in the corner of a closet and repeat the process for cutting out a new patch.
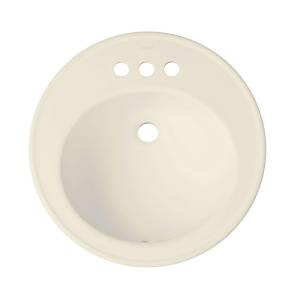 Removing a bathroom sink is pretty easy, especially if it is a drop-in sink. A drop-in sink drops into a hole in the countertop, rather than mounting to the countertop from underneath the counter (called an undermount sink).
Start by turning off the water to the faucet via the angle valves under the sink. Open the faucet to relieve the pressure and remove the water lines from the faucet. A basin wrench helps if the space is small, but you can use any wrench that removes the nuts from the faucet.
Next, disconnect the drain. You can either remove the sink from the tailpiece (the vertical section of drain coming from the sink) or you can disassemble the trap and remove it that way. Either way you do it, you want to be able to pull the sink out without it getting hung up on the drain.
The sink will be held to the countertop with either clips from under the sink, or by adhesive. If you have clips, they will unscrew from below and free the sink. If you have adhesive, you will have to be careful not to damage the countertop. Adhesive will pull up ceramic tiles or laminate, so make sure you cut through it with a blade before you start lifting. Once everything is free, you can use the faucet as a handle and gently lift the sink from the hole.
 A vacuum breaker is an important plumbing device to protect your water supply. You will commonly find them on your irrigation system and hose bibs to prevent possibly contaminated water from backing up into your potable water. These devices are generically known as anti-siphon, backflow, or pressure vacuum breakers, and they prevent water from the garden hose or sprinkler system from backing up into your home's water.
On a hose bib, the device will simply screw onto the end of the faucet. Once they are snug, there is a small screw with a hex head that is tightened against the threads to make sure it won’t move.
Remove the old device by loosening the screw first, and then unscrewing the device. On the new device, make sure there is a rubber washer seated in place and then gradually start screwing it onto the hose bib. Once it is tight, you can tighten the screw that holds it in place.
You may find that the old screw has damaged the threads of the hose bib. Once you get the new device on, check to see if it leaks from this area. If it does, you may find yourself replacing the hose bib first, and then you can install the new vacuum breaker onto it.