 Even a handyman doesn’t like roof work. However, it is a simple edge tile replacement, then the most difficult part is finding a good match.
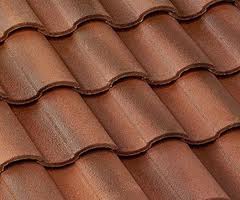
Roofing work is dangerous; just ask any workers compensation company. If you don’t have to be on the roof, then stay off of it. If you feel comfortable at heights, and have a safe ladder to reach the edge, then maybe you can consider it.
There are times when an edge tile will crack or break (or even fall off if it wasn’t installed correctly. High winds will cause trees to topple and knock off tiles. Wind can cause tree branches to drag along the roof edge and displace or knock them off. (Note to homeowners: trim the trees).
So where can you find a match for a missing or broken tile? Go to a roofing wholesaler and meander through their boneyard. A boneyard is where they place unused tiles from previous jobs, and it can be a godsend. It’s best to take a sample tile with you to get a close match. They will probably charge you a few dollars if they don’t just give it to you for free.
When you get back home you will need to place the tile back into position. It has a lug on one side and it will fit under the tile above it and rest on the tile under it. Then hit a nail through the hole in the tile to keep it in place.
 Whether or not you are replacing the door or just the handle, if the latch doesn’t line up with the strike plate, you have some decisions to make.
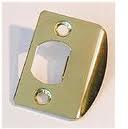
If you have replaced the door and all that is wrong is that the latch doesn’t align, I would just move the strike plate. If the door is binding along the frame, you will need to adjust it which may fix the problem anyway.
Most people find this problem just by replacing the door handle and lockset. It is a very easy and quick fix. The adjustment will be with the strike plate only. Don’t even attempt to play with the handle or lockset…just stick with the strike.
Get eye level with the latch and partially close the door until the latch contacts the strike plate. Make pencil lines somewhere on the jamb that shows the level of the latch. Open the door back up and take note to where the strike needs to be moved in relation to the marks on the jamb. It is likely only an eighth of an inch or so. If it distance is really small, you can use a metal file and file away the area on the strike. Otherwise, remove the strike, pre-drill the holes and reinstall it so that the hole in the strike matches up with the marks on the jamb. You may need to fill in the old holes with a golf tee and glue or the screw may wander back into the old location.
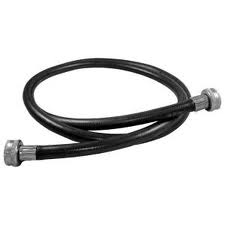 It may take someone that is handyman minded to tackle removing rusty, corroded washing machine hoses. Maybe you are moving or just upgrading the hoses or appliance, but those old fittings must come off.
I would start off by using opposing force. What I mean is using two large wrenches and using them in a manner that allows you to free the corroded fitting without damaging the hose bib or your knuckles. Let me explain.
Let’s say you will be using two large pipe wrenches. You want to configure the two wrenches to that when it comes time to apply force, the two wrenches will be opposing each other. Take one wrench and open the jaws. Place it under the hose faucet’s spout, and hold the faucet’s body and spout so that it won’t move when you turn the corroded hose coupling. Take the other wrench and place it over the hose’s coupling facing downward. What you have now are the two wrenches facing each other so that the handles are just a few inches apart. The idea is to be able to cradle the bottom handle in your fingers while squeezing the top handle with your hands. You only need to move the top handle roughly a quarter-turn to free it…and if the wrench slips, your knuckles don’t suffer.
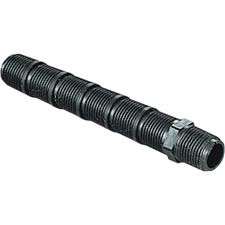 Sometimes sprinkler heads need a little handyman help. If it was installed too low and sod was laid around it, it may not be clearing the grass to spray the surrounding area. In this case what you will see is a lush ring of green grass around the sprinkler, but dry grass a little farther out. You can raise the height of the sprinkler head to clear the grass.
The sprinkler head just unscrews from the riser, and the riser screws into a threaded elbow or tee, depending in where in the pipe it lies. There is no glue or tape needed for these connections.
To raise the sprinkler head, unscrew it and the riser from the threaded fitting. You will be adding a longer riser. You can buy risers in a variety of lengths, or you can buy a riser that allows you to cut it to the length that you need. These are nice in that you can cut it, and if it is still too high you can cut it again. Remember that most sprinkler heads pop-up once the water pressure hits the sprinkler, and so you will gain a little height from that. Make sure you don’t raise the sprinkler head up so high that the lawnmower hits it and shears it off.
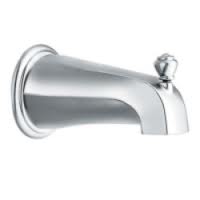 When you lift up on the tub spout diverter to direct water up to the shower head, does water still pour out of the tub spout? You probably need to replace either the gate in the tub spout, or just go ahead and replace the entire spout altogether.
You will find that the finding a replacement gate will be the hardest part of the job, which is why most people replace the entire tub spout. You can try contacting the manufacturer for the part, but for under $20 you can buy the entire spout.
If you are able to get the right part, you can replace the gate without too much difficulty. The knob that sticks out of the top of the spout will unscrew. You will probably need some needle nose pliers to reach up and pull the gate out. The new gate will fit back in its place. The gate will slide into some grooves that will help it stand up to the water pressure. The gate will only go in one way, so it helps to take note of how the old gate was oriented into the grooves.
Much of this is by feel. When the gate is in place, you can install the knob and then give it a test. When you let go of the knob, it should immediately drop down into position. This will allow water to flow into the tub when you turn the water on.
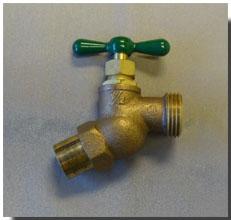 So why would someone want to add a plumbing hose bib to their soft water conditioner line? That’s easy…a spot-free car. When I was little, I always wondered why the neighbor was washing his car with a hose coming from the garage. He was washing his car with soft water for a professional finish.
You want to install the hose bib on the outgoing line of your water softener. If you look behind your water softener, you will see two water lines going into the unit. The water flows into the unit, gets softened, then exits the unit. There should be an arrow on the bypass valve showing the direction of flow.
It’s not rocket science, but you will have to figure out the fittings necessary to make put the whole thing together. You will at least need a tee and the hose bib, but you may need some additional fittings depending on how your lines are configured.
You will need to turn the water off and cut the outgoing line. Use a pipe cutter instead of a hacksaw. Dry fit the fittings and then you can sweat them all together. You will need to clean, flux, and then apply the heat and solder. Here is an article on how to sweat copper.
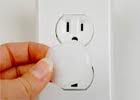 Besides protecting your child from chemicals in cabinets or falling down stairs, you must child-proof your electrical outlets.
Outlets are installed at a height that, unfortunately, lures curious kids. In a study conducted way back in 1997, the Consumer Product Safety Commission found that in cases of household shock injuries, 86 percent of those involved children between 1 and 4 years of age.
To solve your problem, you must turn off the power to the outlet at the main panel. At that point you can try to grab the object with needle-nosed pliers and pull the object out of the slot, but remember that outlets are plastic and can crack easily. If you can’t grab it, replace the outlet.
Replacing the outlet is simple. With the power turned off at the breaker, unscrew the outlet from the junction box and take note of where the wires are located. If your outlet is at the end-of-the-run (the last outlet on the circuit), you will only have one black, white and ground wire each. If you outlet is in the middle of the run, you will see two of each.
Replacing the outlet is as simple as placing the same wires in the same locations. You will notice that the black hot wires are secured around the brass screws, and the white neutral wires are attached to the silver screws. The green or bare copper ground wire wraps around the grounding screw (wrap the wires clockwise).
After that, gently fold the wires back into the junction box so there are no sharp bends and then screw the outlet to the box. The final step is to screw on the outlet cover plate.
To child-proof the outlet, you can buy plastic plugs that push into the outlet just as you would plug into a lamp.
There are also clever outlet covers that you can install (they replace the standard ones). These just screw onto the outlet but they are great at frustrating hurried children (hurried because their parents may catch them). These covers twist or slide to block the holes in the outlet’s face. Some people are averse to this style though because it is obvious that they look differently from standard outlets.
For those people, an outlet is made that looks like a standard outlet, but it actually has little doors that prevent a child from sticking something in the hole. The little doors open only when two objects (like a standard plug) are pushed simultaneously into the outlet.
 If you have a single handle shower valve, and water runs out of your shower head when the knob is turned off, you should replace the cartridge. What if you replace the cartridge and it still leaks or drips?
On a single handle shower valve, there really is only one part to replace…and that is the cartridge. There are a couple possibilities that may explain the leak.
The cartridge is a cylindrical part with a variety of o-rings and rubber pieces on it. The fit is snug. It may be that as the cartridge was pushed into the opening an o-ring may have twisted and allows water to pass. It may also be that the cartridge is bad. In any case, you will need to remove the cartridge.
Once you have the cartridge out, inspect it for defects. It really doesn’t take much for water to pass. Look for tiny defects or nicks in the rubber parts. Also look for cracks in the plastic housing. If everything looks fine, rub some liquid soap on the cartridge and slide it back in. The soap acts as a lubricant and so the part should go in very easily. If it still leaks after this, replace the cartridge with a new one…there are times that you won’t be able to see the problem even if the part is new.
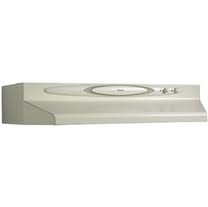 Installing a microwave oven in place of a range hood is a common upgrade. Not only is it very convenient, but it clears some space on your countertop.
If there is currently a range hood in place, then there is already power in the cabinet above it. So it is a matter of removing the range hood and installing the microwave. Unplug the range hood and look below the hood. It will be held in place with four screws. The hood will drop down and as you remove it, thread the power cord through the hole in the underside of the cabinet and remove it.
The microwave will be considerably heavier. It is held in place by a bracket that is screwed to the wall. The key here is that at least one of the screws that hold the bracket to the wall must be in a wall stud. The others can be held with wall anchors (check with the manufacturer for the specifics). You will need to attach the cord to the unit and thread it through the hole where the old one went. Lift the microwave up and set it on the lip at the bottom of the bracket and then swing it up into place. You will install a screw through the cabinet bottom that mates with a hole in the top of the microwave (there is a template included in the box to mark the location). As you tighten the screw, the front of the microwave will rise up to meet the bottom of the cabinet.
By the way, microwaves are set up to recirculate the air back into the room through a charcoal filter. You can install it this way, or if the microwave is on an exterior wall, you can rotate the motor 90-degrees and run the venting up and out of the house.
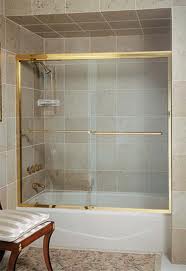 A sliding shower door can really only cause one problem…it doesn’t slide anymore. For the most part, these doors operate without problems.
It may have been that someone in the shower bumped the door, or even lifted slightly instead of just pushing the door to the side, but either way, you need to get the rollers back onto the track. It may be as fast as lifting the door back on the rail, but they can be a little fussy.
You will need to lift the door enough to clear the plastic door divider at the bottom. When the bottom of the door clears the divider, swing the bottom of the door out and lift the door up into the head rail. Then set the rollers on the track inside the rail. When you let the door down, make sure it rests back inside the divider. This may be all that is needed to fix the problem.
If that doesn’t work, you may need to either adjust the rollers or even replace them if they are damaged.
Adjusting the rollers is a matter of removing the door (follow the above steps) and loosening the screw(s) that hold the roller in place. The adjustment screw will ride in a slot that allows you to move the rollers up or down. If the door drags on the bottom, move the rollers downward to left the door higher. If the rollers are damaged, take one with you to get the right match.