 A bad shower door sweep can cause plenty of problems with water getting outside of the shower. This can lead to water damage that can be stopped by a good shower sweep.
There are many styles to choose from, and just because you have one style now, doesn’t necessarily mean you have to stay with that style.
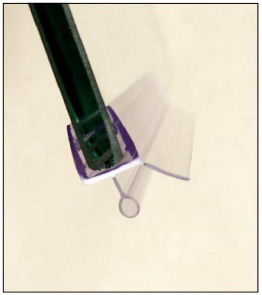
Sweeps are typically screwed onto the frame, caulked into place, or slid into a track. There are also shower sweeps that slide along the entire length of the shower door.
If you have a particular type of sweep, such as the screwed-in style, it’s probably easiest to buy a replacement for it. If you choose not to stay with the screws, I would opt for the style that slides along the bottom of the door. These are basically plastic and they are formed in a way that allows them to grip the bottom of the door. The opening is smaller than the width of the sweep, so you have to spread the opening apart slightly before pushing along the bottom of the door.
If you are going the screw the new sweep into the frame, you may have to drill some holes. The new sweep should have some holes or grooves already in it, but they may not line up with the old ones in the frame. If you have to drill new ones, drill very shallow as you don’t want to drill a hole all the way through the door frame.
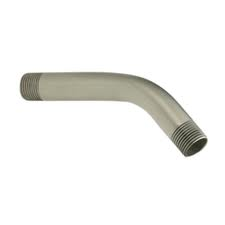 A customer was adjusting his showerhead when he noticed that the arm to which it is attached was a little loose. There shouldn’t be any movement in the shower arm, only in the showerhead.
There is a valve in the wall that controls the hot and cold water. From this valve is a riser that goes up the wall and connects to an elbow with a female thread. This riser should be strapped to the framing in the wall to keep it still, and the shower arm screws into this female elbow. It may be that the riser wasn’t strapped to the wall, or it may be that you need to reinstall the shower arm; you would likely see evidence of a water leak.
You can check for leaks by removing the showerhead, then screwing a cap onto the end of the shower arm. Remove the escutcheon around the shower handle to allow access to the wall cavity, and turn on the water. This will pressurize the riser and if there is a bad connection from the shower arm to the elbow, for example, you should see water coming down in the escutcheon hole. If you have a leak, then try replacing or reinstalling the shower arm.
Reinstalling the shower arm is as easy as unscrewing the old one and screwing in the new one. Just make sure you wrap the threads of the new shower arm with several wraps of Teflon tape and slowly screw it in.
Because the shower arm has a bend in it, it’s pretty easy to cross-thread the arm as you screw it. So, at the point where the threads enter the elbow, you will need to hold it steady as you screw in the new arm.
Your chances of cross-threading it also increase because you won’t be able to see the elbow inside the wall. You will, however, be able to feel it as it screws in.
After you have the shower arm snug and in the right direction, place the cap back on and turn on the water; you shouldn’t see any water dripping down.
The other possibility is that the riser may not be strapped to the framing. This is a fairly easy fix, but you have to have access to the riser pipe, which means cutting open the wall. If you don’t have access through the back of the wall (for example, if there is a closet or bathroom behind the shower), you may need to go through the shower wall, which means removing tile or the surround.
This job can be a pain, because invariably the tiles will break and you may not be able to find an exact match for replacement.
To strap the pipe to the framing, cut the wall open slightly lower than the shower arm. Buy a ½” pipe strap and screw it in to hold the pipe in place. You may need to add apiece of lumber in between two wall studs if there isn’t any wood it the right place.
Seal up the wall when you are done and that should be the end of it.
If you don’t have any leaks, you might consider leaving well enough alone.
I don’t think most people play around with the showerhead each time they shower. But if it bothers you that much, be forewarned: you may be opening yourself up for a long weekend.
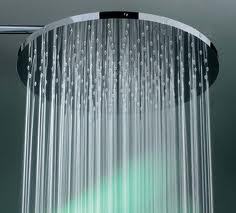 A shower head can certainly waste or conserve water. Most shower heads are 2.5 gallons per minute, but there are many that have a higher gallons per minute (GPM) and certainly there are lower ones.
How can you tell what your shower heads GPM is? If it doesn’t specifically say on the shower head, you can measure the flow with a bucket and a timer.
Get a bucket that holds 1 or 2 gallons. You can either enlist the help of another person, or just use a stopwatch (a cellphone timer works great here…just don’t get it wet).
Turn on the shower and put the bucket under the shower head in the stream of water so that the water starts filling the bucket. Start timing as soon as the bucket gets wet. Stop the timer when the bucket is full and then you can calculate the GPM. Here is the formula:
GPM= Bucket’s capacity in Gallons x 60/ Number of seconds to fill the bucket
Alternatively, you can hold the bucket under the water for 10 seconds and then measure the quantity of water in the bucket. Then multiply that quantity of water by 6. You will likely have to convert amounts though. For example you could use a measuring cup to determine the number of cups left in the bucket and then convert that amount to gallons before multiplying by 6. (1 gallon=16 cups).
 I’ve been doing some insulation work and the quality of other people’s work is amazing. I don’t know if the previous worker just didn’t know how to install fiberglass batt insulation or if he was just lazy and wanted to move to the next job.
In order for insulation to reach its full advertised R value, it must be installed correctly. Actually, it must be installed perfectly. The batt must not be compressed, rounded, or laying on top of things like cables or pipes. It must be in direct and full contact with the drywall ceiling below it.
I went through an attic and concentrated on a vaulted ceiling. This room was the warmest in the house in summer, and coldest in the winter. And for good reason. The batt insulation was hardly even touching the drywall. In fact, the batts were just sitting on top of the ceiling joists with just the center touching the drywall ceiling. This is rounding and the picture above shows this condition. The full face of the batt needs to be squarely installed so that it sits nicely in the middle of the joists. With the rounding I saw, although the batt had an R value of 30 printed right on it, it probably was performing at around an R-4 or so.
 The other day I heard someone say they were going to install ceramic tile on the floor and then install cabinets on top of it. I guess that is okay, but why? The guy said that if he ever wanted to replace the cabinets, he wouldn’t have to worry about the flooring lining up with the new cabinets.
Okay, I guess I understand that, but how often are you planning on replacing the cabinets? I’m guessing that by that time, the flooring will be out of date and you will be doing the entire project all over again…and that is just more tile to break up and haul away.
As for now, why not install the cabinets first, and then lay the tile up to the cabinets? This way, you not only save the extra cost of buying and installing the additional tile, but there will be less fuss installing over possibly wavy tile, although that is what shims are for. The savings could really add up. Take a cabinet depth of 2’ and multiply that by the linear footage of the cabinets to get a square footage. Plus, if you do decide to replace the cabinets in the future, the depth of the cabinets won’t change so you shouldn’t have to do anything to the tile, unless you change the configuration of the cabinetry.
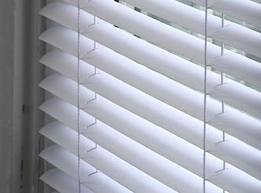 Installing blinds into drywall is an easy task, so long as you have the right tools. Mini blinds will come with the necessary brackets and hardware to install, and you just need to figure out if you want the blinds mounted inside the window opening, or outside of the window. Regardless of which way you decide, the blinds will either snap or slide into the brackets.
The most important tool for the installation is a drill/driver and coarse thread drywall screws. Don’t use the screws that come with the hardware. Instead, use 1 ¼ coarse thread drywall screws. You can hold the bracket to the wall with one hand, and drive the screw into the wall with the other.
The only thing to be aware of is the positioning of the brackets. You may run into some metal corner bead when working around the window opening. If you do, you will notice that the screw keeps spinning but not sinking into the surface. In this case, just relocate the bracket slightly back or up and down (depending on where the metal is). You want the screw to enter the wood framing for some strength. Make sure that whatever position change you make to one bracket, you make for all brackets. If you don’t you will end up with brackets that are misaligned and do nothing to support the blind.
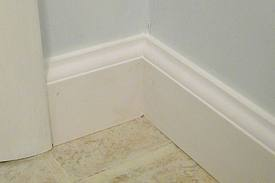 Installing baseboard that you plan on painting lacks the detail work. When you are installing natural wood that you plan on staining and varnishing, the installation really needs to be detailed so that you can’t see any flaws. For painting though, it is a different story…it’s much easier.
The reason it is easier is that you can cover the flaws and gaps with caulking. Caulking is like the duct tape of the baseboard installer’s world. It fills gaps and voids, and covers small errors you wish you hadn’t committed. These gaps occur at corners and really anywhere two pieces of baseboard meet. A very noticeable gap will occur along the top of the baseboard down the length of the wall. This area won’t be the installer’s fault, rather that is just the way the ball bounces. The wall can be wavy, and what you will find is that in between the studs will be gaps.
The easiest way to fix the gaps is to insert a small bead of caulking. Use a caulking gun and load a tube into it. Cut the tip of the tube at an angle, poke a long nail through the skin of the caulking and gently squeeze the trigger. You want to lay down a bead of consistent size along the length of the board. After that, wet your finger and smooth out the bead with the top of the baseboard. Let everything dry and it is ready for paint.
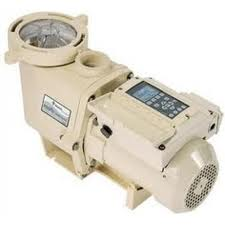 A variable speed pool pump can dramatically cut your energy usage. When compared with a single stage pump (like I have), the savings are dramatic. Most manufacturers claim that the payback is 1 to 2 years, but that is based on several assumptions, many of which don’t hold true for me personally. So when you look at the sales literature make sure the numbers portrayed actually apply to you.
The sales literature I’m reading is based on comparing a variable speed pump to a 1 ½ horsepower single speed pump running at 12 hours per day. The cost of electricity is $0.16 per kWh. The claim is a cost savings up to $1,500 each year. This would hold true if your costs and run times are the same as the comparison.
I don’t run my pump for twelve hours a day unless the water looks like split pea soup. Otherwise I run it the minimum amount necessary for the water to be clear and the chemicals to stay balanced. So the cost to run my 1hp single speed pump will be less and my purchase decision may be different.
I calculated that the cost to run my pump is $509.52 per year. I arrived at this number by calculating the total number of hours annually that I run my pump and multiplying by my hourly cost of $0.22 per hour.
Hourly cost: Motor Amp Rating x Voltage=Watts (7.4 x 230v=1702watts)
Watts/1,000=Kilowatts (1702/1000=1.702 kilowatts)
Kilowatts x Cost per kWh=Cost per hour (1.702 x $0.13=$.22 per hour)
I calculated my annual run times by taking the number of hours each day I run the motor.
For December through March: 3 hours each day x 120 days=360 hours
For April: 5 hours each day x 30 days = 150 hours
For May: 8 hours each day x 31 days = 248 hours
For June through August: 10 hours each day x 92 days=920 hours
For September through October: 8 hours each day x 61 days=488 hours
For November: 5 hours each day x 30 days=150 hours
Total annual hours=2316 hours x $0.22 per hour=$509.52 annual electricity cost to run my pool motor.
By comparison, if I get a variable speed motor and run it a flat 10 hours per day (although I think the true time would be closer to 15 hours per day), my costs decrease. Using the formulas above: 2.44amp rating x 230v=561.2/1000=.5612 kilowatts
.5612 kilowatts x $0.13 kWh=$.073 x 3650 hours per year = $266.45
So if I installed a variable speed motor, my annual power cost is $266.00 for a savings of $243.00 per year over my current cost. Right now my power company is offering a rebate that would lower my installed cost down to about $1,000.00.
My simple payback is $1,000/$243=4.12 years
There is no doubt the variable speed pump saves energy. Substitute your own numbers for mine to see your own breakeven.
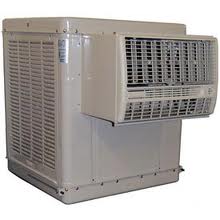 I got an email asking about why a swamp cooler would be smoking. Obviously, that is very concerning, and I would suggest you stop using the cooler until you can determine if there is a problem and what it may be.
There aren’t many things in the cooler that would smoke. Certainly the motor, pump and the switch are connected to electricity, but if you are smelling smoke you need to investigate that carefully. With the volume of air being blown by the cooler, the smoke would have to be significant in order for you to smell it. It may not even be coming from the cooler. The swamp cooler blows outside air into the house. You can certainly smell a neighbor barbequing if the barbeque is close to your swamp cooler and the conditions are right. The same thing goes if someone is smoking near the cooler and the cooler is blowing a low volume of air. If you have a good sense of smell you can pick up these odors.
With that being said, there is water and electricity in the cooler, and when they mix bad things can happen. I would be cautious and investigate the cooler. It’s a matter of removing a panel and looking inside. If there is a problem inside, it should be pretty evident.
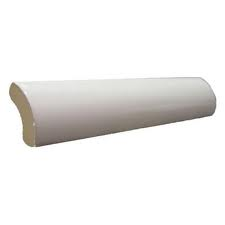 If you are replacing a sink that has rounded-over ceramic tiles sitting on top of it, you have some choices to make. These sinks look like an undermount sink due to the round-over tiles that sit along the perimeter of the sink. Although it isn’t truly an undermount sink, you have to remove the small roundover tiles to get the old sink out.
So your choices are to get a sink that will use the same quarter-round tiles and reinstall it, or get a stainless sink with a large lip on it to cover the damaged area where you will be breaking out the tiles.
The issue you may find with using a similar style sink, is that you will need to match the existing tiles. This may be easy to do, but if you can’t find the exact color, you may consider installing a contrasting color or a complementary color. Realize though, that this will be a dead giveaway that the sink was replaced and you couldn’t find matching tiles.
The other option is to replace the sink with a stainless that has a wide lip. In this way, you can mortar in the corner pieces to lift and support the sink. The new sink will sit on top of these, and you can caulk around the perimeter to complete the installation.