 The other day I was troubleshooting a swamp cooler because there were areas of the pads that were not getting wet. Then I pulled the sides off of the cooler and could see that water was intermittently coming from each tube from the spider at the top of the cooler.
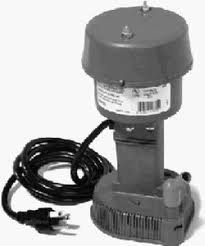
At the bottom of the cooler is the pump, and it was much louder than normal. The pump sits in a basket that helps to keep debris from entering the pump and consequently the hose and spider. The drip tubes above the pads appeared to be taking turns flowing water onto the pads. There obviously wasn’t an obstruction, rather the pump was no longer pushing the volume of water up to the spider to distribute to the pads.
I disconnected the bracket that holds the pump to the housing and pulled up the pump to look at it. It was very crusty like something you would see from an old boat that had spent its entire life just sitting in water, less the barnacles of course.
Pumps are cheap, and so I bought a new one and installed it. It flowed plenty of water up to the spider and all drip tubes were flowing a consistent amount of water on top of the pads. Here is an article on how to replace a swamp cooler pump.
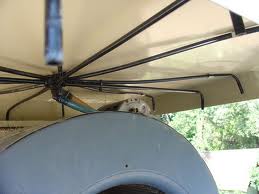 A swamp cooler spider isn’t normally the type of part that wears out or breaks. The spider is the assortment of tubes at the very top of the swamp cooler housing that distributes water to the various areas of the pads to keep them wet. It is called a spider because with the long tubes, it resembles a spider.
If you notice that an area of the pads is dry, check to see that you have a full flow of water coming from the spider. If not, you might try sticking a thin piece of firm but flexible wire through the end. It has to be flexible enough the make the 90-degree bend. The blockage will likely be near the end anyway, so just by picking at it you might get lucky and dislodge it. I have found picture-hanging wire works very well. If it bends too much, twist two strands of it together.
If you need to replace the spider, it is easy. Remove the screw that holds it to the top of the cooler. You will need to free each leg of the spider by slightly bending the metal holder and pulling the leg out. Once each leg is free you will need to pull the hose from the offset pipe that connects to the spider. By the way, the hose connects to the pump at the bottom of the cooler.
Once you have your new spider assembled, Screw the offset pipe into the bottom and push the hose back onto the barb. Screw the top of the spider back to the top of the cooler, and then install each leg back into the flexible metal holder. Turn the water on and you should have a good free flowing stream from each leg.
 If you have a light fixture on the front of your house with your address on the cover, at some point it will cause you some frustration. It is going to go out and you will be left to figure out why.
The easiest repair will be replacing the bulb inside. These are ordinary bulbs that you can just screw in. You may be able to find them at a home center, or you may have to go to an auto parts store (I know that sounds weird). It’s best to take the light bulb with you to make sure you are getting an exact replacement. The cover is usually held in place by some tabs on the top and bottom. If you gently squeeze the top and bottom you can disengage the tabs and remove the cover. You may have a screw on each side of the cover that holds it in place.
Once you have the cover off, you will have access to the bulb. You may find a variety of different bulbs. Some fixtures may have a small bulb that you have to push in and turn to remove. Other bulbs have contacts that are held by the fixture, and these will pull out of the contacts. Although not common, some even have small bulbs that screw in.
 If you have a swimming pool, then you have maintenance on that pool. Besides keeping that chemical s balanced, you have the ugly chore of getting rid of all the debris that blows and falls into the pool. The skimmer and filter will help get rid of some debris, but what about the leaves and debris that sinks to the bottom?
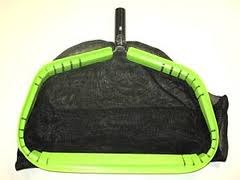
You can certainly sweep it towards the drain or vacuum it out. But why set up the vacuum when you can scoop it out with a leaf rake or net? Check out the pro’s that go to your neighbor’s house. They don’t use the cheap net that you have. Instead they have a net with an angled front that allows them to push it along the bottom and scoop out the debris. These have various names like “stingray” or “piranha”, but they function the same. The angle allows the debris at the bottom of the pool to flow over the lip and into the net. Brilliant! They are more expensive however; usually around the $40 mark.
They don’t only perform well at the bottom, but they do well skimming floating debris from the top of the water too. You can also buy them with different sized net densities to capture smaller particles, but that makes them harder to push through the water.
 If you are moving out of your home and have drywall nails throughout, don’t just smear some spackle over the hole. It is very unsightly, and with just a small amount of effort, you can make the smear go away.
It usually happens in a hurry. You just want to fill in the tiny nail holes and get on your way, so you use a putty knife and spread a glob of spackle on the wall. Yep, the hole is filled, but so is all of the surrounding texture which now is about 2” in diameter.
So here are a few ideas to make the 2” sore shrink back down to a nail sized hole. Make sure that the hole hasn't been raised by pulling out the nail. If so, you can use the handle of a putty knife to push it in, or even a sharp utility knife to cut off the high spot. Instead of using a putty knife, you can always use your finger. Get a little spackle on your finger and press it into the hole using a wiping motion. This way you won’t fill in all of the surrounding peaks and valleys which draw more attention to the area. You might also try using drywall compound that you mix yourself. This takes longer to dry and gives you more time to clean out the peaks and valleys if you do happen to fill them in. Use a toothbrush dipped in warm water and use a swirling motion to clean up the area. Then you can touch up the paint if needed.
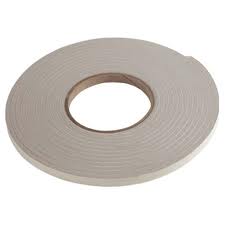 I don’t typically like peel and stick weatherstripping, but it does have its place. Generally, I find it to be a very temporary type of weatherization, but if you apply it to an area that doesn’t see a lot of movement, it should do well there.
Areas that don’t see a lot of use would be the attic hatch. Doors on the other hand, get lots of use daily and will fail sooner.
It seems that temperature extremes will cause many peel & stick surfaces to fail and then your weatherstripping falls down. Some tips to get the adhesive to stick longer are to apply the weatherstripping when the temperature is not extreme (between 40-90 degrees). Make sure the surface is clean, dry and grease-free.
Start at one corner, and peel the tape from the back of the weatherstrip. Firmly press the sticky side onto the surface. Peel the tape and continue applying the weatherstrip until the perimeter of whatever you are sealing is covered.
I would use the peel & stick as a last resort though. If your door or window has a groove or kerf for a specific style of weather stripping, I would certainly use that first. It tends to last a lot longer.
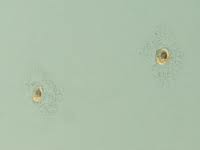
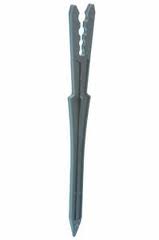 This is a common sense handyman job: using stakes to hold drip emitters in place. You’ve checked the emitters and water is coming out.
How many times have you seen plants dying due to lack of water? “How can that be? The drip emitters are working!” Maybe they are working. To keep the plant alive and healthy, the drip emitter must be delivering the water to the root ball. I can’t tell you how often this happens.
Instead of using stakes to hold the drip emitter in place, some people will just scoop landscaping rock, or mulch, or whatever is nearby onto the drip line to hold it in place. It usually doesn’t last though. Whether it is neighborhood kids, or pets, or pests, the emitter will end up in the wrong place and the plant will die soon after.
Save yourself some aggravation and buy a pack of stakes. They are cheap and will save you from replacing your dead plants. You don’t even need any tools. At the top of the stake are various sizes of cutouts that allow you to place the drip line. Push the drip line into the top of the stake and push the stake into the ground. Make sure the emitter is where you want it. They are easy to adjust if you need to adjust them.
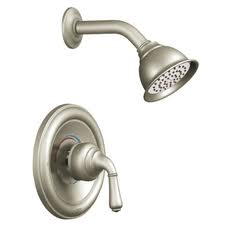 If you are looking to update the appearance of your shower, you might try something as easy as changing the finish or style of the hardware. This is easy to do as long as you stay with the same brand that you currently have.
Many showers that have gold in them have become outdated. There are many finishes to replace it, but realize that this type of project tends to get larger. For example, if you change the hardware from gold to brushed nickel, you might find that the frame of the shower door and the sink faucets need to be changed too. It is very common.
For the shower, if you have Moen, buy Moen replacement handles. The same goes for Delta and Price Pfister. The decorative kit will come with a new escutcheon, but the shower arm and head are totally your choice. Brands don’t matter with shower arms and shower heads.
Replacing the shower head and arm are a matter of unscrewing them, taping the threads with Teflon tape, and reinstalling them.
For the handle, you will need to find the screw that holds the handle on to the stem. It might be hidden under the handle’s cap, or it might be a set screw that is recessed along the handle somewhere. Loosen the screw and remove the handle. Remove the screws that hold the old escutcheon plate to the wall and clean off the old caulking. Secure the new escutcheon plate to the wall with the screws and caulk around it. Finally, secure the new handle.
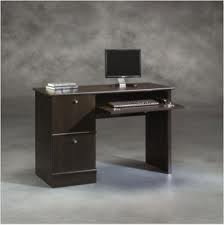 Sliding keyboard desk drawers or even sliding cabinet drawers can get overloaded pretty easily. Just think if you are typing on a slide out drawer, the weight of keyboard and your arms are resting on the drawer. People will put a lot of weight on the drawers and expect nothing to happen until it comes apart.
Something on the drawer will give. It will either be the sliding mechanism, or where it attaches to the cabinet or where it attaches to the slide out drawer. You have to figure out where it is damaged and fix it.
In some cases the sliding mechanism we become bent. If that is the case, I would just replace the slider. They are sold in a pair, so if you don’t get an exact copy of what is currently installed, you should replace both sides.
If the wood cabinet is damaged, the holes holding the screws will be cracked or oblong. You can fill these holes in with some wood glue and then stick a wooden golf tee in the hole until it dries. Cut the tee off flush with the surface and predrill a new hole in it.
If the shelf has split, remove it from the sliding mechanism, glue it and clamp it back together for a day or so. Then reinstall it back onto the slider.
 Sometimes a drain isn’t slow because there is a blockage in it, rather it may be that the sink stopper is set too low and doesn’t allow much water to pass. When you pull the rod upwards to lower the stopper, it may only move a fraction of an inch. This is all easy to repair.
If you follow the lift rod downward under the sink, you will see a “V” shaped clip that holds it to a horizontal pivot rod. Squeeze the clip together and pull the vertical piece off of the horizontal rod. You should be able to move the pivot rod up and down and watch the stopper freely move up and down as well (if it doesn’t have much travel, you may have the wrong stopper in place).
Generally in this situation, you want to move the pivot rod to the next hole down from where it was. Place one leg of the clip on the horizontal pivot rod, then place the vertical lift rod on the horizontal rod, and then squeeze the clip together and place the other leg onto the horizontal rod. The tension from the clip keeps everything in place.
Test the movement of the stopper again. It should have more movement. If it still needs more adjusting, just repeat the steps until you are happy with the movement.