Repair Loose Shower Arm
 A customer was adjusting his showerhead when he noticed that the arm to which it is attached was a little loose. There shouldn’t be any movement in the shower arm, only in the showerhead.
There is a valve in the wall that controls the hot and cold water. From this valve is a riser that goes up the wall and connects to an elbow with a female thread. This riser should be strapped to the framing in the wall to keep it still, and the shower arm screws into this female elbow. It may be that the riser wasn’t strapped to the wall, or it may be that you need to reinstall the shower arm; you would likely see evidence of a water leak.
You can check for leaks by removing the showerhead, then screwing a cap onto the end of the shower arm. Remove the escutcheon around the shower handle to allow access to the wall cavity, and turn on the water. This will pressurize the riser and if there is a bad connection from the shower arm to the elbow, for example, you should see water coming down in the escutcheon hole. If you have a leak, then try replacing or reinstalling the shower arm.
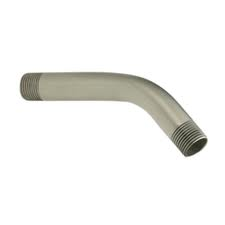
Reinstalling the shower arm is as easy as unscrewing the old one and screwing in the new one. Just make sure you wrap the threads of the new shower arm with several wraps of Teflon tape and slowly screw it in.
Because the shower arm has a bend in it, it’s pretty easy to cross-thread the arm as you screw it. So, at the point where the threads enter the elbow, you will need to hold it steady as you screw in the new arm.
Your chances of cross-threading it also increase because you won’t be able to see the elbow inside the wall. You will, however, be able to feel it as it screws in.
After you have the shower arm snug and in the right direction, place the cap back on and turn on the water; you shouldn’t see any water dripping down.
The other possibility is that the riser may not be strapped to the framing. This is a fairly easy fix, but you have to have access to the riser pipe, which means cutting open the wall. If you don’t have access through the back of the wall (for example, if there is a closet or bathroom behind the shower), you may need to go through the shower wall, which means removing tile or the surround.
This job can be a pain, because invariably the tiles will break and you may not be able to find an exact match for replacement.
To strap the pipe to the framing, cut the wall open slightly lower than the shower arm. Buy a ½” pipe strap and screw it in to hold the pipe in place. You may need to add apiece of lumber in between two wall studs if there isn’t any wood it the right place.
Seal up the wall when you are done and that should be the end of it.
If you don’t have any leaks, you might consider leaving well enough alone.
I don’t think most people play around with the showerhead each time they shower. But if it bothers you that much, be forewarned: you may be opening yourself up for a long weekend.