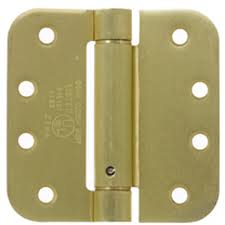
 A fire door is a big heavy door that takes some extra elbow grease to get it to close. The door between the house into the garage is just such a door. It likely has self-closing hinges on it, that may need more tension, or the spring may have sprung.
Most modern self-closing hinges have an adjustable mechanism inside that you simply turn to increase the tension and closing power. If you push down on the mechanism, it releases all tension. Use the appropriate sized allen wrench and turn the mechanism to increase the tension, which will close the door. It may be that the single hinge is not enough to close the door, and you may have to install a second hinge on the door. If so, install the hinges at the top and bottom hinge positions on the door.
You want to adjust the hinges so that the door doesn’t slam closed, but that there is enough force to close and latch the door. This may take a little fine-tuning of the hinges so that you can accomplish this. The final test is this: hold the door at a 45-degree angle and let it go. It should close and latch. If it doesn’t, you can gradually adjust the hinges until it works.
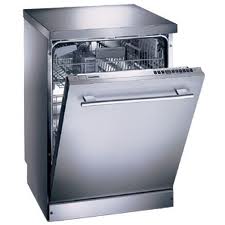
 You won't need a handyman to fix your wobbly or loose dishwasher. It sometimes happens that maybe one of the legs of the dishwasher is sitting on debris, or maybe someone installed ceramic tile that is uneven. The dishwasher legs are made to be adjusted up or down to accommodate any unevenness. So if your dishwasher wobbles, it will take about 5 minutes to fix it.
You will need to get access to the feet of the unit. Remove the bottom panel by unscrewing the screws that hold it in place. If you only need to get access to the front feet, than all the better. Otherwise, you will have to remove the screws at the top of the dishwasher that hold it to the underside of the counter, and pull the unit out of its opening. You can get access to the rear feet this way (or you may be able to shimmy your arm back there). Rock the DW to determine which feet need to be adjusted. Usually it is just one, but sometimes two. To lower the foot, rotate it counter-clockwise. This will stop the rocking motion. You may want to level the dishwasher and raise a foot by turning the foot clockwise.
Once it is level and balanced, center it in it's opening and resecure the screws that hold it to the underside of the counter and then reinstall the bottom panel.
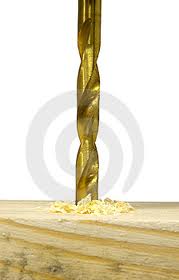 Here is a handyman tip that may help prevent you from pulling out your hair. If you are working with certain species of wood, namely hardwoods, you will find that they can be difficult. Hardwoods will dull blades and bits very fast. They are also unforgiving when you try to install a screw or bolt through them. I’ve done a lot of work with solid oak, and I learned the hard way (and expensive way), that if you don’t pre-drill the hole for the screw, you are going to split the wood.
So hint number 1: pre-drill the hole. You can hold a drill bit up to the screw you are going to install, and select a size that is just barely smaller than the shank of the screw. Drill the hole into the wood. If the hole is going to be deep, you may need to manually clear the bit and the hole of wood shavings or it may start to smoke.
Hint number 2 is to grab a bar of soap. Rub the screw’s threads on the soap until you have some soap shavings along the threads. The soap will act as a lubricant and the screw will go into the hole like butter.
 If your sink leaks when your dishwasher runs, I wouldn’t blame the dishwasher. The leak could be coming from several possible locations. Most likely the leak is happening when the dishwasher drains, and so start looking closely at the drain line forward. It may be a split in the drain line, but the best way to find the problem is to run the dishwasher and look for the leak.
The drain line will connect to the air gap on top of the sink, and this is a likely culprit. From the air gap, the hose runs into the side of the disposal. So if you see a leak only when the dishwasher is running, you know it is isolated to the dishwasher. If the leak is at the disposal, it would leak whenever water ran down the disposal, regardless of whether it was the dishwasher emptying into it or the kitchen faucet. Check the connection where the air gap hose connects to the disposal; this hose has a rubber boot that connects to a nipple at the disposal and it may be torn or damaged. The most likely area of the leak is from the air gap to the disposal. Check these hoses and fittings.
Once the dishwasher goes into the drain mode, the leak should be very obvious.
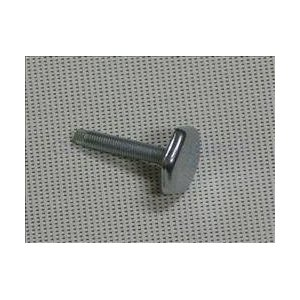
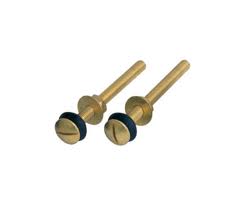 I get asked this toilet question frequently, and I suspect that those people asking it have already found out the answer. Toilets are made of vitreous china and if the tank bolts are over tightened, the china will crack and can cause a leak.
The leak will come directly from the toilet tank and can be anything from a slow drip to a good flow of water. The big question is how do I know when to stop tightening the bolts?
That is the million dollar question. I think the right answer is probably “experience”, but if you don’t have a lot of experience go slowly. I use the smallest wrench I can find and choke way down on it. That way I am not tempted to continue tightening. When I say “choke down” I mean to place my hand right next to the jaws of the wrench to eliminate any leverage with the wrench. Tighten each bolt equally a little at a time. Then things start to get firm, it is time to be very aware. Get the bolts snug but not tight. Some tanks have built in lugs that will contact the bowl. If yours has these, stop when they contact the bowl.
You can fill the tank and look for leaks at the bolts. If you have a leak at a bolt, you either need to tighten the bolts a little more, or you have already cracked the tank. You are done when the tank doesn’t leak and is firm to the touch.
 If your pool’s plumbing is making noises, chances are you have air in the system. A couple of things to look for are air bubbles. Do you see air bubbles coming up from the jets? Can you see bubbles in the top of the pot where your basket is? When you turn on the motor, do you hear a rumbling noise?
One of my neighbors turns on his pool motor at 6:50 am. I know this because I can hear the gurgling of his piping as the system purges all the air that got into it since it was shut off. Air may be getting in the system from different sources. It may be as simple as filling the pool. If your water level is low, the skimmer will draw air into it as well as water. You will hear the motor run dry until the suction is built up enough to draw water in and then the cycle repeats itself.
Other areas to concentrate on are the lid for the pot basket and the filter. Both of these areas have a thick gasket that gets compressed to eliminate air leaks. You won’t be able to see an air leak at the filter, but you may be able to see air bubbles getting in at the pot, due to the clear plastic. Remove the top and inspect the gasket for damage. If it is damaged replace it. Clean off the surfaces between top and bottom and lubricate the gasket. The lube will attract debris on the surfaces, so wipe the surfaces clean and reinstall the freshly lubricated gasket.
Not so obvious is a crack in the piping or fittings that would allow air into the system. These repairs are likely outside the skills of a typical homeowner, and may take a professional.
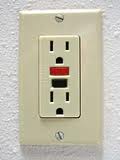 Just because you don’t see a physical GFI outlet in your bathroom, doesn’t mean you don’t have GFI protection. A ground fault circuit interrupter (GFCI or GFI for short), detects a ground fault and can stop the flow of electricity in a fraction of a second. They truly can be lifesaving devices. You need GFI protection in wet locations, such as bathrooms, kitchens, and outdoors.
If you don’t have a physical GFI outlet in that particular bathroom, it may be located in a nearby location, which will still give the bathroom protection. As long as the GFI outlet is wired in the correct position, it will protect outlets downstream of it, although many electricians use 5-7 outlets as a general rule.
The outlets may also be protected by a GFCI circuit breaker. You can look in the main panel for the breaker as it will be marked as such and will have a reset on it.
To test if you have GFI protection in a particular outlet, you can plug in a tester, push the button, and see if power stops to the outlet. If an outlet is protected by GFI, it should have a small sticker on it that says “GFI protected”, but this certainly doesn’t always happen. The stickers also fall off.
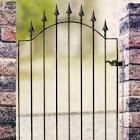 If you are looking for a quick spring home improvement project, how about painting the gate? It is reasonably fast, it won’t cost you much money, it looks nice, and it will get the HOA off of your back. All in all it’s a good project.
If you have peeling paint on the gate, scrape and wire brush it to get it off. After that you can apply a primer and let it dry. By the way, I wouldn’t paint an iron gate with anything other than a spray can or airless sprayer. Just painting a gate really isn’t worth getting out an airless because the set-up and clean-up is time consuming. So that leaves the spray can and they work very well. The only problem with the spray can is that your finger might get fatigued from holding down the button.
The big concern with spraying is over spray. You can avoid this by covering any nearby surfaces or using tape to define the border. The best tool though is a paint shield. Don’t bother buying one, just get a piece of cardboard and cut it to a workable size…18” x 36” seems to work well. Expect to get some paint on whichever hand is holding the shield.
To use the shield, just hold it wherever you don’t want the paint to go. If you have bars in the gate, hold the shield from the top and let it cover behind the bars. That way the bars get painted but nothing else does. Also, keep the can moving. If you stop the can, you are going to get a buildup of paint and it will run. Make several successive passes to get a good coat.
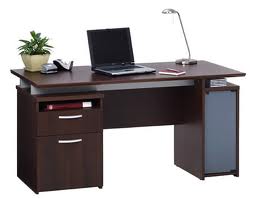 Whether or not you should have a handyman assemble furniture is a case where you must put a price tag on your time. If you flip burgers for a living, maybe you assemble the desk. If you are a corporate executive, maybe you consider paying someone to do it. If you enjoy working with your hands however, this desk project will be worthwhile no matter what your profession.
A large desk with a hutch can weigh several hundred pounds, as I’m sure you found out when you brought it home. It is likely made of particle board or medium density fiberboard. If you are lucky, you will only spend several hours on the assembly. Still, it may take a chunk of your day.
Fortunately, the instruction manuals are clear and understandable. You will only need simple tools, such as screwdrivers and a hammer.
The large pieces of the assembly (the top and sides) are connected with cam mechanisms on one piece and then mate with a rod on the matching piece. Roughly half of the time it takes to assemble the furniture will be spent placing the cam mechanisms and rods in all of the pieces, as well as the hardware in various pieces.
When it’s time to connect the larger ones, you turn the cam with a screwdriver. This turning action grips the mating rod and pulls the two together for a snug fit.
Since many parts look identical, make sure you orient each piece so that the finished edge is where it should be. Manufacturers only finish the visible edges, so when you are installing the hardware and assembling the pieces, make sure finished edges are where they are supposed to be. It’s a bad day when you finally stand the furniture up and you have raw particle board edges staring at you.
One of the most tedious tasks will be assembling the drawers. There are lots of small pieces that fit together just right. Each side is secured to the drawer front by brackets or grooves while the drawer’s bottom is slid into slots in the sides. The back of the drawer slides down onto the bottom.
Once all of the hardware is installed, you can start assembly. For the larger pieces, this will take place on your floor.
Do not stand the structure upright until you nail the back on it. The back holds all the pieces squarely so they won’t collapse. Nail it on and then you can stand the piece up.
All that’s left is to slide the drawers in and place the plastic covers over the cam mechanisms to make them blend in a little.
 Here is a simple handyman tip when you have broken a light bulb and need to remove the base of the bulb which is still in the fixture’s socket.
Make sure the power is off before you start anything. Ideally, if there is any space between the base of the bulb and the fixture’s socket, you could get needle-nose pliers in there to physically grab the base of the bulb. Now just by grabbing it, you may not be able to unscrew it. So if you can use another set of pliers to grab the other side of the base you are in business. You want the pliers to be on opposite sides of the bulb’s base and then move them counter-clockwise in unison.
You can also try using a single pair of pliers or wire cutters (even scissors might work) to create enough friction on the inside of the base to unscrew it. Close the pliers, place them inside the base of the bulb and then open them until they contact the interior of the base. You will want to keep pressure on them which in turn places pressure on the base. Now turn the pliers counter-clockwise. With any luck you will be able to get the base turning, and finally be able to unscrew it from the socket.