
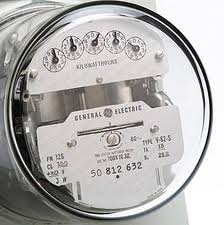
Although I’m not a big fan of my power company, they do provide me with some good information about my swamp cooler, and energy use in general. NV Energy has an online feature that allows you to get your actual energy costs in 15 minute increments. The information is very telling.
The picture above is my personal usage on hot, humid day in late July last year. I picked a day that was humid enough where I would not be able to use a swamp cooler and would have to use traditional air conditioning. This would allow me to see the actual costs of running the a/c.
To get my swamp cooler power costs, I used a Kill-a-watt meter and ran the cooler for several days. Some of the days were run on “low” and at other times on “high”. The "low" setting used .35 kWh (at $0.13 per kWh costs me $0.045 cents per hour to run), and at the “high” speed used .62 kWh to run (at $0.13 per kWh cost me $0.08 cents per hour to run). So depending on the speed, if I ran the swamp cooler 24 hours per day, my cost would be between $1.08-1.92 per day in electricity.
Shifting to air conditioning, if you look at the graph above, you can see spikes in the usage. These are times when the air conditioner turns on. The tall spikes between Noon and 8pm indicate times when both air conditioners are running simultaneously.
On this day, it looks like my baseline electricity usage is about .75 kWh every 15 minutes (way too high). When the air conditioners turn on, the kWh usage rises by approximately 2 kWh every 15 minutes (or about 8 kWh per hour!). At it’s peak usage, that would cost $1.04 PER HOUR for air conditioning only! According to the graph, that would be the maximum. I arrived at this my deducting the baseline amount from the peak usage.
 A homeowner called and said his new faucet wouldn’t shut off the cold water. Now that’s strange. He was looking under the sink to try to figure it out. The problem has to be related to the faucet and not under the sink however. This was a two handled faucet and so the problem is isolated to the cold water side.
It might be as easy as repositioning or tightening the handle depending on the style. Sometimes if the handle is not engaging the stem it either won’t turn it all the way on or off, or if it is not correctly aligned, it may hit an integral stop before it is meant to. They will show itself as either low pressure or in your case, the water won’t shut off. You can remove the handle, turn the stem by hand until the water shuts off, and then correctly reposition the handle and tighten.
In the event that is not the problem, you may need to replace the stem and or seat (although this would be rare in a new faucet). You might call the manufacturer of the faucet and they can send out a new free part….or just take the faucet back to the retailer for a new one.
 So you are replacing your kitchen faucet, but you can’t get the old faucet off. What can you do?
If you have tried the normal tools…various wrenches and the like, it’s time to get serious. It is usually one of two issues: either you can’t reach the nuts well enough to exert force on them, or the nuts are stuck and they won’t budge.
If you can’t get access to the nuts, use a basin wrench. It is an “L” shaped wrench with jaws on the long side. The only issue is that it doesn’t allow you to get much leverage on the nut. You may be able to position the basin wrench with the handle facing the cabinet doors and then place a short length of iron pipe over the handle to get more leverage. It is awkward because you will have to keep the jaws engaged while moving the pipe with the other.
If you simply can’t get the nuts to budge, you can try a nut splitter or a power tool. A nut splitter is just what is sounds like…keep turning the handle until the nut splits. But, you may not be able to get the tool up there.
You can also try a dremel tool with a small cutting wheel on it. You probably won’t be able to cut through the entire nut, but maybe you can damage it enough where it will finally move. You can also use a reciprocating saw with a metal cutting blade. You have to be careful here and don’t let it shake and vibrate so much that it damages the surrounding area.
You really don’t care about damaging the faucet or nuts because you are replacing them anyway. Just don’t damage the sink or countertop.
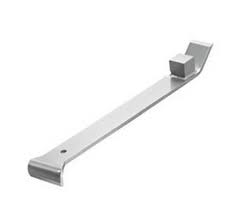 As a handyman I have lots of tools. For installing laminate flooring a must-have is a pull bar and a scrap block. As you start along one wall, the first coarse of laminate planks go in easily. It’s the next many courses that may prove challenging.
You will cut off the length that is too long at the end of your first coarse, and use that piece to start your second course. This works out perfectly since you want to stagger the seams of the planks, so the off-cut will stagger the seams by the length of the off cut. What this also does is instead of just mating along the one long side of the plank, the pieces will also mate along the short edges. Since the planks are likely tongue and groove, you will need to angle the piece, push it in, and snap it together. That’s fine for one side, but not-so-much with two sides.
The answer is a pull bar. This is a metal bar with a 90-degree arm on it that allows you to set the bar over the edge of the plank and tap it into place. I usually snap the short end into place with the long edge just touching the mating piece. Use a sacrificial scrap block and place it over the edge of the piece you are installing. The scrap only has to be as wide as the pull bar’s surface. Lay it all down, make sure it is flat, and tap the par to pull the planks together. You will have to do this gradually every foot or so along the length of the plank to gradually pull them together.
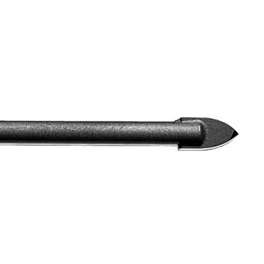 Handyman Tip for Drilling a hole in Glass
It isn't often a handyman needs to drill a hole in glass, but stranger things have happened. If you need to drill a hole in glass, there are tools for this.
You will need to get a glass and tile bit for your drill. These are unique bits that look like they have an arrowhead stuck on the end of the bit. They cut glass very well and don't take long to do so. The trick is to get the bit to start cutting without wandering off of its original point.
Whether you are drilling into a piece of flat glass or curved, you can get the point of the bit to start cutting where you want it with a rubber mallet. Hold the bit where you want the hole, and tap the shank of the bit so that it drives the point of the arrowhead into the glass surface. This will make a small divot in the surface and will be your starting point.
Put the bit into a drill and place the point of the bit into the divot you created. The bit will cut right at that point and won't wander from it. You can start with a small or large bit, or start small and cut gradually larger holes in the glass.
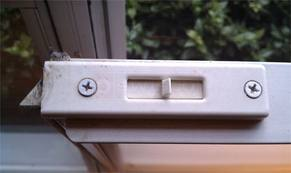 An easy handyman job is replacing a window latch…assuming you have the right part. There are lots of different window styles and types, and even more latching mechanisms. Window latches are made of metal and plastic, and if any moving parts are plastic, you will likely end up replacing them at some point.
When the latch breaks, I would remove it and go find another one. It is doubtful you will find an exact match at a home center, but there is no harm in trying. The latches are held in place with a few screws and they are easy to remove and reinstall. If you have a sliding window and the latch breaks, you can either replace the latch or buy a universal thumbscrew. This slips over the track and you can push it right up against the window before tightening it, which prevents the window from moving. Other window styles are not so easy and you will be forces to buy a replacement.
Take the part with you and go to a glass shop. They will be able to take screw patterns and measurements and order the right part. It might take a week to receive it, but you will get the right part.
 You can easily calculate the energy cost of seasonal usage, in this case air conditioning. Whether you use all electric or have a combustion source for heat, such as natural gas or propane, using your power bill is a handy tool.
You will need to have a twelve month history of your power consumption. Most invoices will have a graph that will allow you to approximate the usage, although you may need to call your utility for the information. You will be determining your baseload consumption and seasonal consumption. Baseload consumption are things that don’t vary with the seasons like lighting, the refrigerator, and other appliances. Seasonal energy use includes heating and cooling. We will focus on cooling here and the energy costs associated with it.
With twelve months of electricity consumption in front of you, find the three lowest months and add them together. Then divide this amount by three (this will give you an average for the lowest months of the year). Then multiply this amount by 12 for the approximate annual baseload energy usage. You now have your annual baseload figure. *Be careful here as some utilities will show daily usage by month, in which case you will need to multiply this baseload figure by 365 to get the annual figure. You will need to read your bill to determine if you need to do this.
To determine the seasonal use for your cooling, add the actual kWh (Kilowatt hours) used for all twelve months to arrive an an actual electric usage. Now we just need to subtract our baseload figure from the annual figure to arrive at the seasonal consumption in kWh. Then multiply this kWh by the cost on your power bill to get your dollar cost of seasonal cooling.
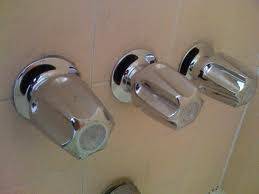 A customer called asking for help on an old shower valve. He has three handles: one for the hot water, one for the cold, and a middle knob that shifts the water from the tub nozzle to the showerhead. The problem is that the middle knob didn't fully shift the water, so he would end up standing under a drizzling showerhead while lots of water flows out of the tub spout.
Many newer showers use a single-handle shower valve and a tub spout diverter, rather than a diverter valve in the wall like you have. Getting replacement parts may not be as easy as going to a home center, so you will likely have to make a trip to a plumbing supply store. Before you replace the stem assembly, you might try to repair it first. The problem usually lies in the washers at the rear end of the stem, but getting access to this part can be tricky.
You will first need to turn off the water to the house and disassemble the valve. You can remove the diverter handle by the screw in the middle of the handle, which is hidden underneath a cap (it just pops off with a screwdriver). Then unscrew the escutcheon cover to reveal the stem assembly.
Getting the stem out can also be tricky. It is usually recessed inside the wall and it has a large nut (called a bonnet nut) that holds it down. The problem is that there is usually very little space between the bonnet nut and the wall surface to get a wrench around it. If the nut sticks out slightly from the wall, you may get lucky and be able to twist it out. However, you will usually need to get a deep-set socket, which can get by the tight clearance and remove the stem.
Use gradual pressure and twist out the stem, but remember this has been in place for years and won’t react kindly to a sudden pounding. If you get really nasty with it, you could damage the old solder joints and really spoil your weekend plans.
With the stem assembly out, you can take it to a plumbing supply house for a new one or you might be able to clean it up and replace the washers. If you feel like repairing it, grab two wrenches and twist the stem free of the bonnet nut. You will be able to see and replace the washer on the bottom of the stem. It is held in with one screw and you should easily be able to find an exact duplicate (or in a pinch you can turn it over for a fresh surface).
While you have the assembly apart, use a small wire brush and clean off any sediment or buildup. You can use vinegar or a lime remover and give it a gentle cleaning.
Reassemble the pieces and screw them back together. You may need to add some Teflon tape or packing to the assembly if it leaks, but when you use your shower again, you should get more water on your head than on your feet.
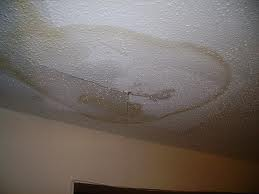 So one day you notice a stain on the downstairs ceiling, which just happens to be below a bathroom upstairs. Where do you start?
The answer is that it is a guess. Just because a stain is in a certain location doesn’t mean the leak is directly above it. I know people that measure the distance from walls and determine that the cause must be this or that because it is directly above the stain. Not so. Water (or waste) doesn’t always drip straight down, but will land on a framing member and follow it until it finally drops onto the ceiling below.
If you are into the guessing game, you can try to replace the wax ring to the toilet first. This is a common cause, and it is a fast job. The only way to really determine the cause of the leak is to cut open the ceiling and look around. The cause will be evident. You will see stains from the path of the water leading to the source. In any event, run the water until you find the cause. It will typically be either the drain or the pressurized piping.
You can turn this into a guessing game or you can open the ceiling and know for sure. It is painful, but once you know the cause, you can repair it.
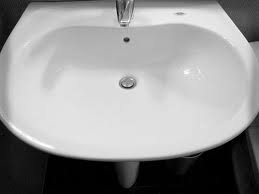 Have you noticed that whenever you fill your bathroom sink a leak develops under the sink onto the cabinet floor? You probably need to be looking at your overflow.
On some bathroom sinks the overflow is integral to the sink, but on most sinks, you will find that the overflow drain is basically not part of the basin, rather it attaches to the underside of the sink and finally to the drain assembly. In many cases the overflow is just a molded piece of plastic that attaches to the bowl. When water enters the overflow hole near the rim of the sink, it is guided down this piece of plastic and to the drain assembly.
Since it isn’t often (or shouldn’t be that often) that water enters the overflow, you probably wouldn’t have the need to be concerned, but these plastic parts traditionally don’t seal very well to the underside of the sink. In fact, you may be able to see gaps along the underside of the sink where it connects.
You can try to fill in any gaps with silicone caulking, but don’t expect much. It may work well enough since the water should be infrequent. If you find that the problem continues, you probably will need to replace the sink.