Would You Like a Free Expert Consultation?

Las Vegas Handyman 

Not every project goes as well as planned. We would be happy to spend a few minutes answering your questions.

Subscribe by Email

Your email:

Browse by Tag

Pro Handyman Blog

Current Articles | RSS Feed RSS Feed

Hang Blinds With Drywall Screws


drywall screwIf you’ve ever installed window coverings, the hardware that comes with the kit is very poor. Use drywall screws instead. The screws that the manufacturer includes are not only very short, but they threads are small and don’t have much bite.

Most of the methods of mounting the window coverings, whether they are mini blinds, faux wood blinds or vertical blinds, are the same. The manufacture includes a bracket that mounts to the wall and has a small swinging door that closes to hold the head rail in place. Installing these with drywall screws is very easy, not so much with the manufacturer supplied screws.

Drywall screws are very hard and brittle. They are great for holding things to the wall, but their shear strength is poor because they are so brittle. The point on a drywall screws is very sharp and it goes into drywall and the wall studs behind it very easily. It is very fast to hold the bracket in place with one hand and drive the screw into the wall with a drill driver. Make sure both brackets are level and screw them into the wall. Then just place the head rail into each bracket and snap the bracket closed.

Tags: 

Drywall Texturing With A Toothbrush


drywall textureDrywall texturing is one of the most challenging things in home repair. Most homeowners have the courage to patch a small hole, but putting the finishing touches on the patch can be an anxious moment.

A couple of keys to hiding a patch are getting the patch level with the surrounding area, blending in the border of the patch, and using the right paint. Fail at any one of these and your patch will be noticeable.

After you patch the drywall, tape it and float the mud out, let it dry before you flatten it. The drywall patch should be mostly flat just from the taping knife, but when it dries, you can either sand it or use a damp sponge to remove any excess drywall compound.

Now use the toothbrush. Dip the toothbrush into some water and tap off the drops on the rim of the glass. Rub the bristles of the toothbrush along the border of the drywall patch to expose some of the texture on the wall. This is original texture that you will have covered up with the joint compound. The idea here is to erase the border of the patch to minimize it. You want to get rid of the defined border and make it blend in more.

Once you have gone around the patch to blend it in, you can spray some texture on it. There are as many ways to do this as there are drywall repair professionals. For most homeowners, I would suggest the texture in a spray can. It is easy and the results are very good.

Repairing Torn Drywall Paper


drywall paperIf you have ever removed wallpaper from drywall, you know the situation is ripe for tearing the paper on the drywall face. Drywall paper can get torn from a variety of causes….from a pet to moving furniture.

The problem with tearing the paper on the drywall face is that it will suck up wetness from the drywall compound and leave you with a blemish on your drywall repair. You can sand and paint all you want, but you will still have a noticeable patch because of this.

You can remove the torn areas as best you can using a razor blade. Your finished product should look something like a smooth piece of cardboard. You don’t want a bunch of torn fibers poking up above the surface. Next you want to seal the paper. You can use Kilz or another stain sealer on the area. Spray or brush the sealer on the paper area and just outside the border. A few coats of this works nicely and it dries fast.

Once the sealer has dried you can repair the area with drywall compound, letting each coat dry before the next one is applied. Float the area with the appropriate width taping knife and finish as normal. Here is an article on drywall repairs.

Cutting A Circle In Drywall


drywall circleCutting a circle in drywall is not difficult. With the right tools, you can have a circle cut in minutes.

Most circular cuts are for light fixtures (think recessed lighting), or electrical boxes. These holes are not large and can be cut with a drywall saw after you mark out the lines, or by using a circle cutter. For a small circle, like for a plumbing penetration, you can use a hole saw chucked into a drill.

If you are using a drywall saw, mark out your circle by tracing around the electrical box, or use a template from the light fixture. If you use the electrical box, just realize that you will have to make the cut inside of the line so that the remodeling box “ears” have something to hold onto.

For the circle cutter, you can use a two-handed or one-handled style tool. The tool has a sharp point that digs into the drywall and a sharp wheel that scores and cuts the circle. Once the wheel makes several passes, you can pop out the piece of drywall. The two-handed model requires you to hold the pointed end in the drywall with one hand, while the other hand rotates and pushes the cutting wheel (I wouldn’t try using only one hand on this). The single-hand style has a point in the middle and two cutting wheels, one on each end of the tool.

Tags: 

Drywall Ceiling Popcorn Texture Match


drywall repairIf you have a house that has the acoustical texture (aka popcorn texture or cottage cheese) on your drywall ceiling, you know what a pain it can be if you get a stain on the ceiling. A lot of older houses have this texture and it is repaired differently that typical orange peel or knock down texture.

When you get a leak on your popcorn-textured ceiling, sometimes the texture will peel off of the drywall and sometimes it will stay but turn brown. It will look as if someone spilled coffee on your ceiling. Assuming it was just a one-time leak, the area will be dry but unsightly, but make sure the source of the leak was fixed before you start repairing the ceiling as you only want to do this repair one time.

If the popcorn texture is still on the ceiling but you have a stain, try sealing the stain with Kilz or some type of stain sealer. Use a spray can rather than rolling or brushing it on the surface as popcorn has a tendency to fall off of the ceiling when disturbed. You can spray on a few coats after each has dried and then paint it to match, or paint the entire ceiling.

If you have popcorn texture that has fallen from the ceiling, you can seal the area and use a spray can product to patch the area. You can buy popcorn texture in a can. One such product is called “Up Shot” and you hold the can away from the ceiling and squeeze the trigger in short bursts as you move the can. It’s a good idea to go light on the trigger as you don’t want to make a stalactite on your ceiling. Once you have a good blended patch, you can paint it after it dries.

Sanding Drywall To Remove Scratches


drywall sandingDrywall joint compound (known as “mud” in the trades) sands very easily. With the right tools and know-how, you can do a professional looking job.

Many people use heavy grit sandpaper to chew off the compound, while working the sandpaper with lots of pressure. This gets rid of compound fast, but leaves a nasty surface to finish. The heavy grit sandpaper will leave scratches and gouges, while excessive pressure will scuff the paper face on the drywall.

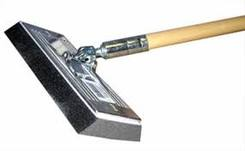
Try buying a drywall hand sander and some 120-150 grit sandpaper for it. The tool looks like a trowel and has a big surface to keep the finish level. It has a fat handle and some clamps to hold the paper as you work.

While you’re at it, buy a dust mask and some goggles to keep the dust out of your eyes and nose.

Assuming you have floated out the compound enough (the more you float it out, typically the less noticeable it will be.

Load the paper into the sander by clamping one side and wrapping the paper so it is taut on the sanding surface, then clamp the other side. This is important, because if there is play in the paper, you won’t have as much control over the sanding motion.

Hold the sander at a slight angle and use long uniform motions. Don’t hold the sander perfectly vertical or horizontal, but somewhere in between. The goal here is to blend in the surface so after it’s painted, you won’t be able to tell where the joints are.

For inside corners, use a sanding sponge with a tapered edge. If you try to use the hand sander here, you will gouge the opposite side and create more work, so sand within a few inches and then go to the sanding sponge. One edge of the sponge tapers to a sharp point which is perfect for finishing the corner. The grit of the sponge should be fine, so just run the sponge vertically on both sides of the corner until clean.

Unfortunately, you will have gouges and depressions in the surface, and many people try to sand these flaws out. Instead, just add another thin layer or two of joint compound. Use a 6-inch taping knife and scoop just a tiny amount of compound on its edge, then run it along the flaw. You can hit it with the sandpaper later.

Finally, you can use a hand-held work light and hold it against the wall so that its light shines along the wall. The light will cast shadows on your work and let you know which areas need more filling and sanding.

Tags: 

Drywall Stain May Be Caused By Air Conditioner


drywall repairIf you have a drywall stain on your ceiling, don’t just assume it is a roof leak. You need to climb up into the attic and snoop around. It certainly may be a roof leak, but during the summer months, particularly when it is humid, check out the air conditioner.

Particularly when it’s humid, the central air conditioner will condense and drip into a pan (just think of a cold glass of iced tea sweating on your coffee table). As the pan fills with water, the water level will rise and the water will be carried off by the condensation drain. There is a primary and secondary drain in case the primary becomes clogged. If the drain lines are clogged, the pan will back up and overflow onto the insulation and ultimately the ceiling drywall.

The first thing to check would be the pan itself. These have the tendency to rust out and leak. If this is the case, an a/c company can try to seal the pan or replace it altogether. If the pan appears to be clean and in good shape, look at the condensation lines. It may be that that the condensation line(s) are clogged with debris. These lines run to the exterior of the house and are usually cleared using compressed air/gas. I’ve seen where just the opening of the drain lines are clogged with attic insulation, so you may get lucky and be able to clear the debris quickly.

Tags: 

How To Remove Drywall Anchors


drywall anchorsWhen it comes time to remove drywall anchors, it is a pain. Maybe you are moving and have to take down all of your pictures, shelving, or whatever led you to install the anchors, but now you have the chore of making them disappear.

Depending on the drywall anchor, there are several options of removing them. After you remove them, you are going to be left with a small hole to repair. Smaller anchors come out easier and leave a smaller hole to fill. The small plastic anchors can generally be pulled out of the wall without much fuss. Use needle nose pliers and grab one side of the anchor or grab the entire anchor and collapse it. You may need to use a slight rocking motion to get it out. After you remove it, you can use a utility knife and slice off any torn edges around the hole and fill it with spackle or joint compound, and then touch it up with paint, if necessary.

For screw-in anchors, like the EZ anchor, you can unscrew them and repair the wall as above.

For larger wall anchors, usually your best option is to push the anchor into the wall. You can get it loose and then use a screwdriver and tap it into the wall. Then repair the drywall as mentioned.

Tags: 

Choosing A Drywall Anchor


drywall anchorDrywall anchors can be extremely helpful. They are great for hanging pictures and objects from the wall, where you don't have a wall stud directly behind. The preferred way is to hang the object to a wall stud because the stud is capable of supporting a great deal of weight.

Not all drywall anchors are created equally. The small cone-shaped anchors don't give me much confidence in hanging an object. I have found that the strongest anchors penetrate the drywall and have a mechanism for holding the anchor to the wall. The weak anchors will pull out of the wall, but a well-designed anchor will not. That's not to say that a strong anchor won't pull out of the wall...it just may pull a chunk of drywall out with it.

There are two anchors that I like. There is a plastic anchor that has very large, deep threads. These threads bite into the drywall and bottom out against it. The other type of anchor is metal and has a toggle feature on the end of it. Both types of anchors screw into the wall, but the toggle anchor has a mechanism that pops out inside of the wall (on the other side of the drywall). Once you start to screw the anchor in, the toggle is drawn into the back side of the drywall and clamps against it. Then you can just attach whatever object you are hanging to it.

Tags: 

Drywall Orange Peel Texture In A Can


drywall textureYou don't have to be a drywall veteran to get good results matching drywall texture. You can go to any home center and buy texture in an aerosol can that will give you very good results, even if you have never done it before. Drywall texture that resembles the peel of an orange, hence the name, is very popular and so I will focus on that type.

Orange peel texture uses higher pressure and a smaller orifice than other texture types. When you use an aerosol can, you will have to take a few practice shots on a piece of scrap or cardboard. If the texture comes out not quite right, you can adjust the size of the orifice by turning the dial on the can, or by using a smaller straw (if you purchased that type of spray). If the pressure at the nozzle is too high, you can stick the can in cool water to lower it. Conversely, if the pressure is too low, you can stick the can is warm water to raise it. These adjustments will all affect your finished look, so play around with them until you get it right.

When you are ready to spray the texture on the wall, keep the can moving as you depress the button or trigger. You can tape a section of newspaper on the wall with a cutout of where you want the texture to fall. This will help control overspray and make for easy cleanup. Once the texture is dry, you can paint just the patched area if you have a great paint match, or more likely, the entire wall for it to blend in.

All Posts