 You will need to cut a hole in your drywall if you are planning to add an outlet or switch. The key here is to accurately cut the drywall so that the opening isn’t too big. If the opening is too small, that’s okay as you can always cut it larger. But if the hole is too large, you sure don’t want to end up doing a drywall repair when you could have been more careful cutting it in the first place. Use a stud finder to locate the studs.
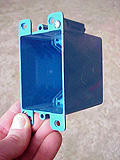
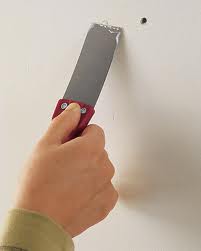
After I’ve picked out the location for the junction box, I will hold physically hold the box up to the wall and trace around it lightly with pencil. Be aware that the remodeling box is somewhat tapered. It is larger at the front than the back. So if you trace around the front of the box, you will need to cut inside the line by anywhere from ¼” –around ½”. Look behind the perimeter of the box and you will see indentations around it. You will also see the ears that pop out and hold the box to the drywall. Also make sure the box is level and the placement is consistent with other boxes.
Use a drywall knife and cut out the drywall. Use a shallow stroke to cut just in case there is a cable, or pipe in the wall. You may have to fine tune your hole, but when done you can push the box into the wall and tighten the screws. The ears will pop out and clamp to the back of the drywall.
 There are a variety of reasons you might need to cut the drywall open. Maybe you need access to the plumbing, or maybe you are adding an electric outlet. Regardless, there are a couple of ways to cut open the drywall.
The first thing to do is to make sure you will be cutting where you need to cut. For example, use a stud finder and know where the obstacles are behind the wall. Once you have that marked out, you can cut the hole. Cut the wall the minimum size necessary for you to do the job. You will likely be patching, at least partially, the area you are cutting…so cut wisely.
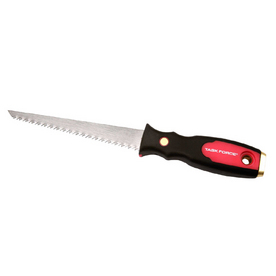
I know some people who use utility knives to cut drywall. This is fine if you are cutting up sheets that haven’t bee installed. In that case, it is a simple matter of cutting the paper on one side, snapping the board, and cutting through the paper on the other side. But for cutting pieces installed on a wall, I would use a drywall saw.
A drywall saw is a stiff, sharp tool that allows you to not only push it through the surface of the wall, but also to cut the drywall. Use shallow strokes here. This might require you to hold the handle close to the wall and cut at an extreme angle. This is fine, as we just want to avoid hitting a cable or pipe lying behind the wall.
 Matching paint for drywall repairs is not easy. Even if you have the original paint, it probably won’t match the paint on the wall due to different factors. I can’t tell you the number of times I will ask a customer if they have the paint to match. They will say, “its just regular old white paint”. Sorry folks, there is no such thing as “regular old white paint”. There are, however, about 40 different shades of white paint to choose from. There is antique white, Navajo white, milk white, clean white, cottontail….you get the idea. Choose poorly and the wall repair will stand out. Choose wisely and your repair will disappear.
The computer matching services are pretty good so long as the machine has been calibrated. Cut a small sample from an inconspicuous area on the wall to bring in. Cut just through the painted surface so that the blade just cuts the top later of drywall paper. Peel this off and take it with you. Doing this will give you a good paint sample to match from, and you won’t have a hole to patch…only the surface and texture. Have the paint store blow the match dry right on your sample to see how far it is off. If you can see his spot on your sample you will see your drywall repair.
Once you can no longer see the paint on your sample, you have a good match. Retexture the small spot on your wall and paint the area. If you don’t have a good match, you will have to paint the entire wall to blend it in.
 Cutting perfect circles in drywall isn’t as hard as you might think. As usual, there are tools for everything.
Depending on the size of the hole you are looking to cut, you can use power tools or cut the circles by hand. For smaller holes you can use a hole saw. This works like a drill bit but it has an inverted “cup” attached to it. Around the perimeter of the cup are teeth that cut through the drywall. This can also cut through different surfaces as long as it was designed to do so.
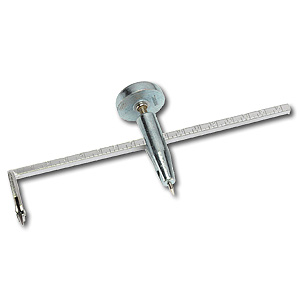
For larger holes you can use a circle cutter. These come in many different flavors, but basically it works like a large compass. One pointed leg is placed in the middle of the circle you will cut, and the other leg is placed at the radius. It is sharp and as you move the leg around it gradually cuts through the drywall, until the circle is cut.
There are other types of circle cutters that have a midpoint that gets secured to the drywall, and has two cutting legs on opposite ends of each other. These do the same thing as the single leg version, but it cuts faster.
Lastly, you can cut the circle by hand. Trace the circle on the drywall (for example turn the round junction box over and trace around it). Then use a drywall saw and cut the circle by hand. This is easy and if you don’t want to spend the money on a circle cutter, it is definitely the way to go. The saw cuts slowly and gives you complete control over the cut. Plus, you probably already have it in your toolbox.
 Patching a hole in drywall may seem like a daunting task, but if you follow some simple rules, even a beginner can make a reasonably good match on the texture. The goal here is to obviously make the hole disappear, which can be a challenge.
Make the patch flat. If any part of the patch stands out, the repair will be noticeable. If you want to get fancy, use a hand held light or flashlight and lay it against the wall. Move the light over the patch and look for shadows. A shadow indicates an area that needs some attention.
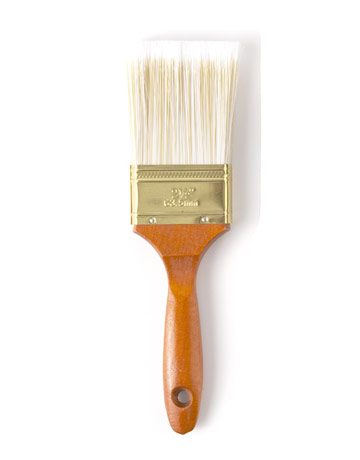
Once the patch is flat you can add some texture. The spray texture in a can works well. Practice on a piece of cardboard or wood to get a good splatter pattern. I usually spray the larger splatter first and then fill in the bare areas with smaller splatter. Practice holding the can at different distances from the surface and always keep the can moving so that you don’t have a build-up of texture in any one spot. Once you get the texture to look like the surrounding area, you can actually apply the texture to the surface.
If you have knock-down texture, rather then knocking it down soon after applying it, I prefer to let it dry. Use fine sandpaper and give it one swipe with a sanding block. That should be all it needs to get the same appearance as the surrounding texture. The sanding block will take off the high points of the texture and make it level with the surrounding texture.
When you are done, paint the entire wall surface rather than just the patched area. It should make your patch disappear to all but the trained eye.
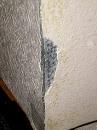 The corner of your drywall is prime real estate for damage. It sticks out like a sore thumb waiting for something to hit it. Most of the time it gets damaged, it is usually a dent or a scrape significant enough to remove paint and texture. I would rather fix it than replace it. Fixing it is not difficult.
Start off by removing any loose texture. If the metal corner is pushed out, it may be easy enough to use a hammer and tap it into place and fill in the void with drywall compound. Don’t worry about getting it exactly straight in line with the wall, let the joint compound do that. Use a putty knife and fill in the void and let it dry. You probably will have to do this on each side of the corner to get a nice square edge. Once this is dry you can sand it or use a damp sponge to form the corner. You likely will have to add a second coat and repeat.
When the corner is formed you can spray some texture on it to blend it in with the surrounding wall. If you can exactly match the paint then you can probably dab on the touch up paint. If you can’t match the paint, you may be forced to paint both of the walls that form the corner.
 Most of us have been tenants at one point, and that means filling holes in drywall. Landlords want the house returned to them in a rentable condition and the less they have to do, the more of your deposit you will get back. Filling nail holes in drywall takes very little time and is something most landlords expect.
Spackle is lightweight and dries quickly; typically you can paint in 15 minutes. Filling nail holes can go quickly if you are careful about applying the spackle.
I use as little spackle as is necessary to fill the hole. Remember, these holes are very small and so you don’t need much spackle. You want to avoid creating a bigger eyesore than the hole already does. I would rather see a small nail hole rather than a 2 inch smear on the wall from spackle. If the wall is textured, you will be left with a big flat spot in the middle of a textured wall, when all that was wrong was a tiny nail hole.
Use a small putty knife (a big putty knife will encourage you to use too much). Get a little spackle on the corner of the putty knife and push it into the hole. The idea is to fill the hole so that it is flush with the surrounding surface without getting spackle on the surrounding surface. I know, easier said than done. Spackle is water based, and if you do get a blob of it on the wall, use a damp sponge and wipe it off. If you are lucky, you won’t need to touch up the paint. By the way, in a pinch you can use toothpaste as a nail hole filler.
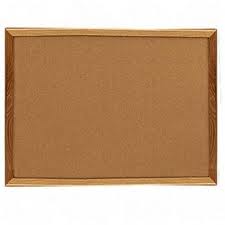 Hanging a corkboard in drywall isn’t difficult. Corkboard is very light and is typically used to hang papers or pictures on, so it shouldn’t need to support a lot of weight. You can buy a corkboard at an office supply store.
Most corkboards have reinforced corners you can screw through to install into drywall. Although the reinforcements are made of plastic, since there if very little weight hanging on the board, should be sufficient to hold the board to the wall.
Whenever possible, you should mount the corkboard into a wall stud. You may get lucky and get a stud on each side of the board, but don’t count on it. If you don’t have a wall stud where you are mounting the board, you can use a wall anchor. I have even used just course threaded drywall screws (only if very little weight will be supported).
Install one of the top corners into the drywall and then set a level on top of the board. Swing the board up or down to get it level and then secure the other top corner. Once the top has been secured, secure the bottom two corners into the wall. Just make sure you are screwing through the reinforcements so that the corkboard won’t rip.
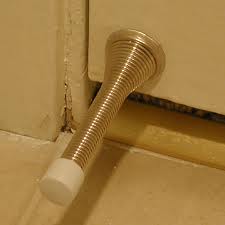 I can’t tell you how many houses I go into and there are holes in the drywall from door knobs. These holes could be avoided with a simple door stop.
A typical doorstop takes a whopping 2 minutes to install and will save you a lot of anguish when trying to repair a drywall hole. The only question is if the doorstop should be installed on the door or on the baseboard of the wall it would potentially damage. I’ve seen it both ways and it probably comes down to a matter of preference.
If I had to choose, the wood at the base of the door is probably a little stronger than the MDF (medium density fiberboard) that the baseboard is likely made of. This means that in the event you stepped on the doorstop, the base of the door may give a little more support to the doorstop than the baseboard would.
Installing it is the same no matter the location. It’s easier if you pre-drill a small hole for the threads to screw into. Line up the door to the baseboard and make sure that the rubber tip of the doorstop will hit where you want it to, then drill the small hole. You can turn the doorstop in by hand until it is snug.
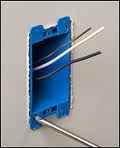 If you are adding an electric outlet in you house, you will need to cut a hole in your drywall. The hole you cut has to be the correct size for the remodeling box you will install.
A remodeling box is a plastic junction box that sits at the wall surface while the box resides inside the wall. You don't need to secure it to a wall stud since the box has mechanical wings that clamp it to the drywall. However, the size of the hole you cut is very important. The hole has to be big enough to allow the box to sit in the wall, but not so big that the mechanical wings can't grip the drywall.
So the best thing to do is to place the rear of the box against the wall where you will install it. Mark around the rear of the box with a pencil. This will be the rough cut, and you will have to fine tune it later. Use a drywall saw and make a shallow cut. Pull the piece of drywall out and place the box in the wall. It won't go in all the way because the wings jut out in two areas. You will need to cut these areas out somewhat until the box fits.
Once the box will completely go into the wall up to it's front lip, you can push the cables into the box and push the box into the hole. Use a philips head screwdriver and twist the screws which cause the mechanical wings to pop out and clamp against the rear of the drywall.