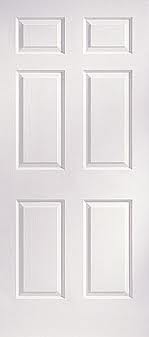
 When you need to replace an interior door and you buy one at a home center, many people are surprised that they don’t fit the opening. The typically need to be trimmed by approximately ¼” along the height of the door. You will also need to mortise the hinges into edge of the door.
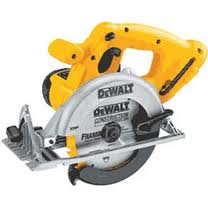
When you trim the door, do so along the hinge side of the door and not the handle side. You don’t want to alter the setback of the latch, so that leaves the hinge side to work with. Use a table saw if you have one, or use a circular saw and clamp the door to your work surface. You can use a straightedge as a guide if you like, or you can cut it freehand after marking a cut line on the door.
I like to add a piece of painter’s tape to where the blade will be cutting to eliminate tear-out along the cut. Use a good blade in the saw (the more teeth the saw has, the smoother the cut), and cut the door in one continuous motion. If you stop the saw, you may get a burn mark and the blade may bind. It’s also a little dangerous trying to start the blade in the middle of a cut (you should start the saw and let the blade get to full speed before cutting).
With the door trimmed, you can mortise the hinges and install your door.
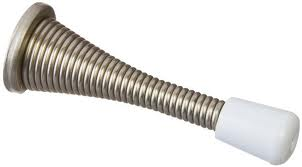 Installing a door stop for an interior hollow core door is very easy, but where should you install it? You have a choice to install it either on the door or on the baseboard of the wall where the door would hit.
The key is to make the area of impact somewhere where the door has the support around the perimeter. Whether or not you install the door stop on the wall or the door, if the point of impact is in the hollow area, you will end up with a hole in your door.
If you choose to install the door stop on the door itself, you can install the door stop either at the bottom corner or top corner on the latch side of the door. You will be able to tell if you hit the wood perimeter if the door stop is hard to screw in (that’s a good thing).
If you choose to install the door stop on the baseboard, make sure the padded end of the stop contacts the edge of the door (where there is wood support), otherwise you get a hole in your door. It also helps to have the door cut correctly so that you don’t have to angle the door stop upwards to contact the door. The door stop will stay in place if the force is absorbed along the entire length of the stop. If it is at an angle, the force may push it out of the baseboard.
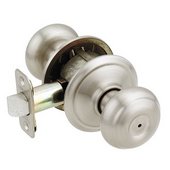
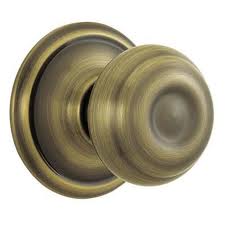 Installing a new door knob handle on a hollow door is really no different than a solid door. For the most part, a door is a door. The cut-out for the knob is the same size and so it will go into the hole for it, regardless of whether or not the door is a hollow core door or solid.
Installing the handle is a five minute process. The handle will come in two halves that go on either side of the door. Obviously, make sure the lock mechanism is on the correct side of the door. On any locking handle, the screws will be on the interior side of the door and the handle side that locks will be on the exterior side of the door. Just make sure you have the correct side of the handle on the right sides of the door.
Install the latch button assembly into the edge of the door. This gets secured to the door with two wood screws. Push the two halves of the knob together and match up the holes. The two halves will mate with the latch assembly so that when everything is together, the door knob will engage the latch and move it in-and-out. Install the screws from the interior side of the door into the exterior side of the handle and tighten them until snug.
 Replacing an interior door is tough enough for a beginner…especially if the door doesn’t fit. You find this frequently when buying a door from a large home center. They will be about ¼ inch too wide. So to add to the misery of mortising the hinges, you get to rip the door to fit.
A table saw is great for this, but you risk scuffing the door as you push it along on the table saw. In the field, a circular saw is ideal. The only trick is making a straight cut on the hinge side of the door. A guide is a big help, but if you don’t have one, you can use a steady hand.
One concern with a circular saw is tear out. As the blade pulls up through the surface of the door, the top edge along the cut may splinter out. It’s probably not a huge deal with the back edge of a door, but it is something to be mindful of. You can place a piece of blue painter’s tape along the cut line to minimize tear out.
If all this sounds too daunting, you can buy a door from a door shop. You won’t have to cut these down as they come in the correct size. You will however, need to mortise the hinges.
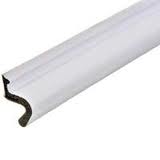 My favorite style of door weather strip is the push-in kerf style. It stays in place and you don’t have to worry about it coming off of the door or jamb when the adhesive wears out.
Not all doors can use the kerf-style weather-stripping though. A kerf must be present in order for this weather strip to work. A kerf is a small groove that sits around the perimeter of the door. Look at the stop (the piece of wood that the exterior side of the door rests against). If you see a groove about 1/8” wide, your door can use this type of weather strip. If your door does have a kerf, you probably already have this weather strip in though. I sure wouldn’t replace it with the peel-and-stick style.
To remove the old kerf-style weather strip, just pull it out of the groove. There is a small barb on it that pushes into the kerf and holds. Measure the distance for the new piece and cut it. Start at one end and push it all the way into the kerf. For the corners, you can either cut the strip straight across (you may have some overlap in the corners), or you can cut the strip at 45-degree angles to make a 90-degree corner (for example, like you would on window trim). You shouldn’t have any problems with it coming out of the groove.
 A customer called and said her son locked himself out of his bedroom. The thing that really bothered her was that he left his television on full-blast. That’s when she called. She told me she tried sticking a nail in the small hole in the handle, but it wouldn’t open. Not bad.
This is one of those quick fixes that it is tough to charge anyone for. It’s going to take under 15 seconds to get the door open.
Interior door locks will have either a button to push or a knob to turn to lock the door from inside the room. However, if you accidentally lock the door and you are outside the room, you can start to panic. That is, until you see the small hole at the door knob.
You can unlock the door in one of two ways. Look for a small hole either in the door knob itself, or on the escutcheon around the door knob. You can try to push a nail in the small hole to unlock the door (this style is typically found for the push-button locks). More common though is the slotted mechanism. This style of door lock comes with a little tool exactly for this purpose. If you don’t have the small tool, you can use a small standard screwdriver that fits into the hole. By the way, look on top of the door trim for the tool as many installers will place it here after the door knob has been installed.
Stick the tool or screwdriver into the hole and feel for the slot. When the tool engages the slot, just turn the tool until the door unlocks. It’s that easy.
 Most people think that for a sagging door, they are going to spend either a lot of time or money to repair it. There are several things you can do to fix this without having to call somebody.
Open the door and lift up on it. You might see and feel a lot of play in the door. This is bad. If you can lift up the door, something is not connected well. Look at the hinges, particularly at the top of the door. It may be that the hinges have worked themselves loose either at the door or the jamb. Try tightening them up to pull the door back into the correct position. You may need to use larger screws for this if the holes have been reamed out. For hinge screws, try a larger diameter screw rather than a longer one.
If the hinges look good, you can lift the top of the door with a long deck screw. Remove one of the top screws that hold the top hinge to the jamb (not the door). In place of the short screw you removed, install a long deck screw 3 or 4 inches in length. This screw is going to push through the door jamb and into the rough framing surrounding the door. This will pull the jamb closer to the framing and lift the door bottom up, so that it doesn’t drag on the threshold anymore.
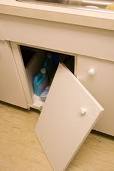 Cupboard doors do sometimes have a mind of their own. But falling down? That is pretty extreme. I’m wondering how much abuse they have suffered.
Cabinet doors have either fixed hinges or adjustable hinges. Either style can be abused and will cause some play in the hinge. If a door gets opened too far, it can place lots of stress on the hinge and cause it to become loose. In fixed hinges where the screws go through the hinge and into the door, the stress can cause the screws to become loose or even split the wood in the door or frame. On adjustable hinges the screws that hold the two pieces of the hinge together can become loose and pull apart. This will cause the door to become separated from the hinge and fall down or at the least pull away from the cabinet. Since these doors have two hinges, it isn’t likely that the door will completely fall off and hit the floor, unless both hinges are loose and damaged.
It is probably a good idea to secure the hinges back quickly to avoid any further damage. On non-adjustable hinges, you can add some toothpicks and wood glue and then reinstall the screws. For adjustable hinges, mate the two halves together and tighten the screws. Being a little gentle on your doors probably wouldn’t hurt either.
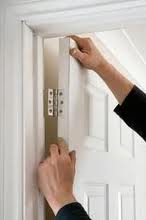
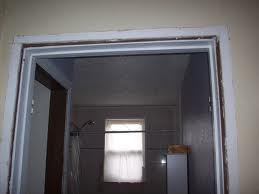 Replacing a door can be challenging. If you are replacing the door and frame, the first step is removing the old frame from the opening. This is called a pre-hung door since the door is already hung from the frame. Removing the old frame sometimes takes a little finesse to save the molding around the perimeter of the door.
The door frame is nailed through the rough framing of the opening, whether it is an interior door or exterior door. The key here is to gently remove the molding on both the interior and exterior of the opening. If you are planning on replacing these anyway, you can just bulldoze through them. Most people will reinstall them as they match the rest of the molding. Cut through the caulking with a utility knife at the perimeter of the molding and then gently goose up an edge. Once you can slide a screwdriver or pry bar under it, just shimmy the bar along the length of the molding. Be very careful here though, it doesn’t take much to snap the molding and send you on a shopping spree.
Once you have removed the molding, you can cut out the door frame. Use a reciprocating saw with a demolition blade in it and run the blade along the perimeter of the door fame. The blade will cut through virtually anything in its path…nails, wood shims, etc.
At this point the frame will be free for you to pull out and haul away.
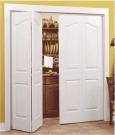 Bi-fold doors need regular adjustment to work properly. The doors are not hard to adjust, but it seems to be a game of constantly fine-tuning the doors.
The key is to get the doors to the point where they have a uniform gap in the middle, and that they fully open and close without getting hung up on anything. To accomplish that you have to make some fine adjustments.
Look and see where the doors are contacting each other. Is it the top or bottom or all along the entire length of the doors? There are adjustments at the top and bottom of each door on the wall side. At the bottom of each door is a pivot that sits in a grooved bracket. This allows you to move the doors closer to each other or farther from each other. You simply lift the door and move it to the next resting point in the bracket. That adjustment will give you some space in between the doors, but you will also have to adjust the top of the door as well to keep a uniform gap between the doors.
For this adjustment, you will need to open the door. The top of the door has a retractable pin that slides into a guide in the track. There will be a screw you can loosen that will allow the guide to slide down the track. You need to make small adjustments until both doors work correctly. You will see a pattern of adjust and test. Once you have the doors to your liking, be gentle with them. You don’t want to have to do this every week.