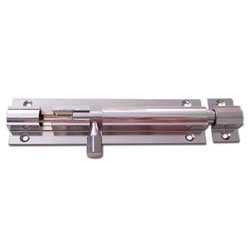
 Installing a lock on a door takes a little common sense. For those folks with small kids, you‘ve probably learned that Junior can open the door with little effort. This is where a barrel bolt comes in. A slide bolt simply slides into a door jamb or a receiver to keep the door closed. They are easy to install and you can mount it high enough to prevent Junior from reaching it.
The sliding part mounts on the door and is held in place with four screws. The mating receiver piece mounts on the door jamb. To lock the door, simply slide the bolt into the receiver.
On some doors, the bolt will actually slide into the jamb, and so you will need to drill a hole for this. Choose a drill bit slightly larger in diameter than the bolt. To determine where to drill, you can extend the bolt until it hits the jamb and then draw a circle around the bolt at this location. The other way is to use lipstick and cover the end of the bolt with it. By extending the bolt, the lipstick will make a mark on the jamb when it contacts it. Then just drill a hole in this location and you are all done.
 A customer called saying his door stop wouldn’t stay in the wall. I assumed he meant the door stop wouldn’t stay in the baseboard, but you have to ask these questions. Yes, he did mean the wall.
Installing a door stop in drywall is generally not a great idea unless the force of the impact is spread out among a larger area. Drywall will puncture easily, so placing a door stop there is asking for a hole, which defeats the idea of a door stop anyway. It is probably a better idea to move the door stop down to the baseboard, which will weather an impact better.
Another option is to place the door stop on the back of the door itself so that when it contacts the wall, it will hit the baseboard. Some people install them at the top of the door, but you have the same problem with the force being focused on a small area (the tip of the stopper) and will puncture the drywall.
You might also consider installing a hinge-pin door stopper. These sit at the top of the hinge pin and the force is placed at the door and the jamb. You will need to pop out the hinge pin, thread the stopper onto the pin, and tap the hinge pin back into the hinge.
 Dents in your metal front door are unsightly. You will see blemishes from small dings to sizable dents. Fortunately, repairing the dents is an easy process.
It’s a good idea to lightly clean the door and then rough up the dents with some sandpaper or steel wool. You can buy bondo at an auto parts store or you can opt for various metal repair products at a home center.
Some products require you to mix them together and others you can use straight from the can. Just read the manufacturer’s instructions to figure it out.
Basically, you are going to use a wide putty knife and push the product into the dented area, and spread it out. If the area is large, you will probably have to use several coats of the product. It is generally better to use several passes than one large swath. Let the preceding coat dry before you add another coat. The idea is to get the area flat and flush with the surrounding area so that when you paint it, it will be unnoticeable.
When the area is flat, sand it smooth. You can use wet/dry sandpaper up to 220 grit. Start with slightly larger grits and work down to 220.
When done sanding you can paint the entire door. Prime the door first and then paint it. Use a paint conditioner like Floetrol for latex paints or Penetrol for oil based. These will slow the drying down and allow any brush or roller marks to disappear.
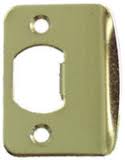 A door strike plate is the curved piece of metal that the door button contacts and latches into. If you have a door strike plate that is loose or too tight, you can repair it so that it does its job.
If the door latch is loose, use a screwdriver and tighten it. If the screws don't tighten it, use longer screws so that they contact new wood or even contact the framing behind the jamb.
If the door strike is too tight, it is likely that it was placed on the outside of the jamb without mortising it to be flush with the jamb. You can trace around the strike plate with a pencil and then remove the plate. Use a hammer and chisel and remove some wood inside the trace line. You want to remove only enough wood so that the strike plate sits flush with the surface of the jamb. This will be a pattern of removing wood, test the fit and repeat. Once you have the surfaces flush, you can screw the strike plate to the jamb.
If the door doesn't latch in the strike plate, it may be that the gap between the door and the jamb is too great. It's not likely that you can make up the distance with shims behind the strike plate, rather you will have to move the jamb. This is more involved as you need to remove the door molding and goose out the jamb. You can add shims in between the jamb and framing and nail through the entire surface, then reinstall the moldings.
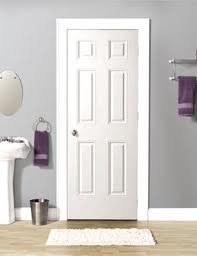 Most of the doors that you buy at a home center need to be cut for width. They are often ¼” too wide and yes, they can be cut. The only thing is that you can’t cut too much from the doors.
In a hollow core door, only the perimeter of the door and around the handle/latch is wood. The interior is made of a corrugated cardboard material. This makes the door light and inexpensive.
You can also cut the door for height. Either way, you can use a circular saw with a fine toothed blade for a smooth cut. A straightedge helps to keep the cut in line, and a piece of blue painters tape can help minimize any tear out as the blade pulls through the surface. If you are cutting for width, cut on the hinge side of the door rather than the latch side.
If you need to cut a significant amount from the door, you may look at a special order door, or you might cut into the hollow of the door. If you cut into the hollow, use the off-cut and peel away the skin of the door to get at the wood core. You can take this core, and push it back into the hollow after applying wood glue onto both it and the door. Then clamp the piece in place until it dries.
 When replacing a door, sometimes you can get away with just a slab door, and sometimes you have to replace the door and frame (pre-hung door). Installing a pre-hung is great, but you first have to cut out the old frame of the old door.
Removing an old door frame takes a little patience. Before you can bulldoze through the frame, take care with the molding. You will need to remove the interior and exterior molding that covers a portion of the frame. Cut through any caulking where the trim meets the reveal of the door jamb and where the trim meets the wall. Once you have cut through this, gently pry up a portion of the trim. If you are replacing the trim you don’t have to be as gentle, but if you are reusing it, start lifting up a portion and gently move down the trim until it is lifted from the surface. A standard screwdriver is good to begin the prying process. Do the same for the exterior of the door frame. You want to avoid splitting or breaking the trim. If you break a section of it, you will have to find the same profile or replace all of the trim with something of your choosing.
When you have all of the trim removed, use a reciprocating saw and run a demolition blade just behind the door jamb. The blade will easily cut through the nails, etc. With the old frame removed you can begin installing the door pre-hung door.
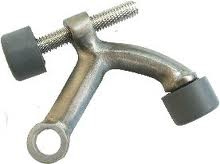
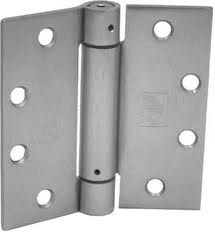 A garage entry fire door needs to have self closing hinges. It is likely that there are already self closing hinges on the door, but it may be that the spring has sprung (meaning it doesn’t self close anymore). Fortunately, these are not difficult to replace.
When you buy new self closing hinges, you will need to buy the right size to fit into the existing mortise at the edge of the door. They are usually 3 ½” or 4” tall, but they get larger for bigger doors. Buy the right size and you won’t have much work to do. You may need to chisel out the corners if you buy hinges that have 90-degree corners and are replacing hinges that have rounded corners. You usually only need to install a self closing hinge at the top and bottom hinge positions.
Once the hinges are installed, you need to set the torque to close them. There are two different styles for this. Once style uses a ratcheting method. Stick an allen wrench into the top of the hinge and simply turn it. You will hear the “click click click” of the ratcheting mechanism applying torque to the hinge. You want enough torque to close and latch the door, but not so much that it slams and knocks the pictures off of the wall. To release the torque push the allen wrench down into the hinge.
The other style uses a pin to hold the torque. Again, stick an allen wrench into the top of the hinge and turn it. Place the pin into the holes and it holds the torque. Repeat this until you have the right amount of torque.
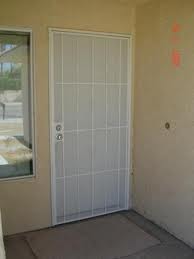 There are certainly times when you would want to remove a security door. Maybe it makes the house look like a jail, or that you just want to replace it. Either way, you will need to remove the one-way screws that hold it in place.
The door is held in place with one-way screws. These are unique in that you can tighten them, but can’t loosen them. Once you remove the screws, the door will come off.
To remove the screws takes a little patience. The fastest way is with power tools. If there is a gap between the house and the frame of the door, you can stick a reciprocating saw blade in there and cut through the bolt.
You can also cut a groove on the top of the screw head. This is best done with a small hand grinder. Grind a slot in the top of the bolt’s head and then you can use a large screwdriver and back it out.
You might also consider cutting off the sides of the round bolt head so that you can use a wrench to unscrew it. Cut parallel on each side and unscrew it.
If you don’t have a grinder, you can use a hack saw to cut the sides off of the bolt head. To cut a slot in the top of the bolt head, hold two hacksaw blades together and cut it.
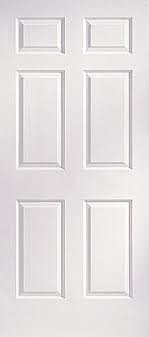 Replacing an interior door often requires cutting it to fit, particularly if you byuy it from a "big-box" store. Typically, you will need to cut about 1/4" from teh hinge side of the door. Making the cut is not difficult.
Remember that a hollow core door is called hollow core for a reason...it is hollow. Only the perimeter and the handle area have wood around them. The center of the door has a cardboard-like material zig-zagging in there. That is what makes the door lightweight, easily damaged, and inexpensive.
A table saw is the perfect tool to rip a small strip from a door. If you don't have a table saw, use a circular saw with a blade that has a high number of teeth for a smooth finished cut.
A circular saw will cut through the top surface of the door as it is laying down. Place a strip of blue painter's tape along the path of the cut to avoid blade pull-out. This is when the blade rises up and out of the surface and will pull small slivers or material with it, which leaved a ragged cut.
When the door has been trimmed, you can cut the hinge mortises and hang the door.
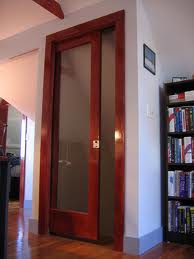 Pocket doors are not easy. They will save you approximately nine square feet of space, but making adjustments or repairing them will drive you crazy. The problem is that the hardware is tucked away at the top of the jamb. The act of adjusting the door isn’t tough, but getting to the hardware is.
Pocket doors use a split jamb so the door can recede into the wall. The door hangs from rollers that roll along a track secured to the head jamb. There are lots of different designs, but it is pretty likely you will need to remove trim pieces around the door to get access to the hardware. You should only have to remove trim pieces from one side of the door, but choosing which side might prove difficult. Close the door and see if you can determine how the hardware comes off that connects the door to the rollers. Some hardware has an opening on one side that allows you to remove the door. Other hardware allows you to tilt and lift the door.
Start removing the side and top trim pieces carefully. Cut through the caulking and then gently goose the trim away from the door. You will need enough space to get access to the hardware at the top of the door. You may need enough clearance to completely remove the door, and if so snoop around to see if more trim comes out. You can also remove the front hardware and shimmy the door out of the opening.
Some hardware adjusts with a special tool that never seems to be around when you need it, and others use an open ended wrench. Generally, you can adjust the hardware up or down with a wrench. If the door is dragging, you may need to adjust the hardware so that it raises the door, or it may be that the screws holding the hardware to the door have pulled out.