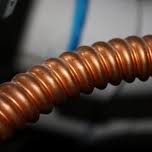
 Using flexible copper plumbing lines to install things like a water heater or water softener can really make things easier. Plumbing purists love to hard pipe these items but, I really like the flex lines.
I think flex lines are more convenient and faster than hard piping in an appliance. However, flexible lines can diminish the interior diameter of the pipe. If you make a sharp turn with a flexible pipe, you could easily restrict the volume of water able to flow through that pipe. Not so with hard piping. With hard piping, you use fittings and lengths of straight pipe that will not decrease, because they do not bend.
Also, since hard piping is soldered in place, you have fewer problematic areas. On a flex line, for example, you may have a rubber washer fail which causes a leak. This won’t happen with hard piping, although a poorly soldered joint can fail. If a joint fails with hard piping, it is a real challenge to fix since you need to heat up the joint to pull it apart and repair it. With flexible lines, you can just unscrew the joint, replace the washer, or clean up the threads and re-assemble everything back together. There are good and bad with each style, and each installer has his preference.
 If you’ve noticed that either your sink stopper won’t stay up anymore, or that you have a leak under your bathroom sink, you likely have an issue with your sink stopper. If you have a stopper that won’t stay up, you can typically tighten the nut slightly at the rear of the drain assembly, and the extra pressure will help the stopper to stay in place.
In some cases though, the nut (actually it is a cap) will corrode and crack, break, or generally leak and cause problems. If you get to that point, it is probably time to replace the entire drain assembly, because chances are good that there is other unseen damage as well. You won’t really be able to tell what failed until you get a good look at the threads on the assembly and the cap.
You can try to clean up the threads on either part, but generally it is easier to clean up the male threads on the assembly than it is the female threads on the cap nut. I don’t think you will have much luck finding just a cap nut to buy, as you typically have to buy more parts than is necessary. You can certainly buy an entire drain assembly, which includes the cap nut, but if you are going to buy all those parts, you may as well install the entire assembly.
 So why would you want a handyman to install screening on exterior vents, such as a dryer vent? To keep things out that you don’t want to get inside your house. It’s not even so much as getting in your house as getting in the vent. Things like rodents and other pests love small areas that they can climb into and get shelter and warmth. On a cold day, I’m sure a nice warm dryer vent is quite the place for a rodent to hang out. It’s also not a place where you want bees to build a hive.
Many vent terminations have screens already installed for this reason, but plenty of home inspectors find otherwise. And that is where some metal mesh will save the day. You can buy this type of screen at most home centers where they sell chicken wire. You don’t want chicken wire though as the holes in it are too large. You can buy the mesh with openings of approximately ¼” x ¼”. Take a quick measurement of the opening in the vent and cut the mesh large enough so that you can wrap it over the ends of the vent and screw it in. You can use self tapping screws with pan heads. These large heads will allow you to tighten the screw as the head of the screw holds the mesh to the vent.
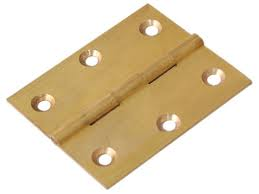 Hollow core doors are light weight, but are easy to damage. Door hinges can become loose in hollow core doors fairly easily. Remember, a hollow core door has solid wood only around the perimeter of the door and at the handle area.
If you have a loose hinge, obviously try tightening it slightly with a screwdriver. You may be done at this point. If the screw just turns and doesn't tighten the hinge, the hole is probably reamed out and there isn't enough wood for the screw threads to bite into. For this you can try a larger screw with more aggressive threads. If this fails, fill in the hole with a golf tee and use adhesive to glue it in place. Once it has dried, you can pre-drill a hole and reinstall the original screw (if it is in good shape). You may have to do this at more than one screw location.
If the hinge is loose at the jamb, you have more options. Certainly you can use the golf tee trick, but you can also use a longer screw. A longer screw at the jamb will eventually reach the framing behind the jamb, whereas where the hinge meets the door, there is only empty space with a cardboard-like material because it is hollow.
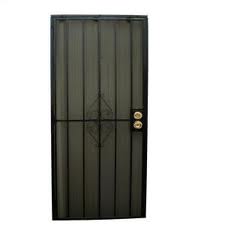 Security doors that are installed correctly do a great job of preventing break-ins. Even if they are rock solid though, doesn’t mean some idiot won’t try to get in.
A friend of mine told me that someone tried to get into his house by trying to open the security door at the front of his house. He first tried to pry the door open, but when that didn’t work, he tried to pry up the metal mesh behind the door. He was able to somehow pry or kick a portion of the mesh away from the frame, but still wasn’t able to get by. The bad guy eventually gave up and left.
The mesh served a good purpose, another roadblock to entry. At this point, my friend could have either replaced the entire door, or repaired or replaced the mesh. He chose to just screw the mesh back into the frame. I’m not sure how well that looked, as the mesh was bent and dented. He used self-tapping screws with pan heads which made for a quick installation. The alternative would have been to clamp the damaged area back to the frame and weld it in place. Alternatively, he could have bought new security screening and installed it, but he would have had to paint it, and at that point, why not just buy a new door?
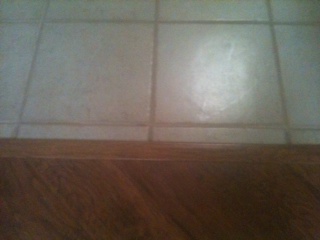 When you are installing flooring and are using laminate and ceramic tile, you will have a transition strip between the two surfaces. The transition strip is an attractive strip that covers the area where the two different flooring surfaces meet. They are not difficult to install, but you must plan ahead.
It is usually the case that one of the flooring surfaces will already be installed, and so when you are looking at materials, take note of the clearances for the transition strip. You will need to leave a gap between the two surfaces where the strip will fit.
A common distance is 3/8” between the surfaces, but read and measure for yourself. The transition strip is shaped like the letter “T” and the vertical leg will fit into the gap while the horizontal leg spans the gap and makes the nice transition. Some strips come with a metal channel that you can glue, screw, or nail to the subfloor, while others use adhesive.
For the metal channel, measure and cut and then figure out which method you will use to secure it. If you have a wood subfloor, you can easily screw the channel in. For concrete, you can use an adhesive, or concrete nails (be careful here though as you can damage the flooring by an errant hammer strike). You can also use concrete screws like tapcon bolts but their height will affect how the transition strip sits. You will have to remove a small amount of the vertical leg right above the head of the screw if the screw head sits to high. Once the channel is secured, the strip just pushes into the channel.
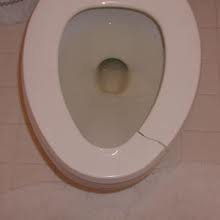 The question of whether or not a toilet seat can be repaired is a little silly; of course you can. The real question is why would you? Generally, the less time working on toilet seats, the better.
There aren’t many things that can go wrong with a toilet seat. If there is a problem, it is just that the seat is loose and needs to be tightened. Wear rubber gloves when touching the nether regions of the seat and underneath the bowl. Check that the hinges are tight at both the lid and the seat. If you can move the seat side-to-side, then the nuts under the bowl are loose (this is a good time to put on the aforementioned gloves).
At the rear of each hinge is a cap you can pop up to expose the head of a plastic bolt. You can tighten this bolt while holding the nut underneath still (some nuts have a little arm that keeps them from turning). Once you have the seat snug, just pop the caps back down to cover the heads.
If the seat is damaged, like a crack or if the finish is no longer smooth, just replace it. It just isn’t worth the work, when you can replace it in 5 minutes.
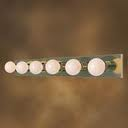 I got a call from a customer who wanted to replace their Hollywood light bar. These folks liked the light fixture, but felt it was cheap and outdated.
This particular light fixture is somewhat unusual in that the builder doesn’t usually install a junction box behind it. Instead, they will take a hammer and break open a hole in the wall, which will be covered by the light fixture anyway. It is usually the case that if you want to replace the Hollywood bar with a different fixture that you have a problem. Then you need to repair the drywall and install a junction box for the new fixture to mount to.
With a Hollywood bar, the fixture is mounted in several places along the length of the bar. They can be fixtures commonly from 3 bulbs to 10 bulbs. Removing the old fixture is a matter of unscrewing the bulbs and then pulling off the decorative retaining rings around the sockets. This will allow you to remove the decorative bar, leaving only the support and wiring behind it.
With the power off, you can remove the wire nuts and separate the wires. You will also see the screws that hold the support bar to the wall, so when you remove the screws the bar will come off of the wall as well. You can install the new bar in the reverse order, just make sure the bar is level.
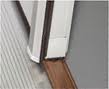 Double doors can be challenging to secure. It seems that there is always some play in the middle of the doors as there isn’t a jamb for the swinging door to latch into. So because these doors are large and don’t have a fixed jamb, they do tend to move slightly. This could also cause some movement and the weatherstrip may have gaps, so be on the lookout.
Of the two doors that make up the opening, the stationary door locks into the top head jamb and the bottom threshold. With the stationary door secured, the swinging door latches into the stationary door. So the key is to get the stationary door nice and secure.
On the edge of the stationary door is the astragal. Built into the astragal are sliding bolts built into either end. The top bolt slides into a hole in the head jamb, and the bottom bolt slides into a hole in the threshold. If you really ream out the holes you are going to have more play in the door. So really you want the hole to be just slightly larger than the diameter of the bolt, but not so large that the looseness allows the door to move.
At worst case, you can add a barrel bolt to the top and bottom of the door to stop it from moving.
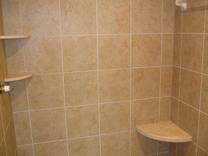 Showers that look gross leave you feeling nasty even after you’ve just showered in them. It’s like eating gourmet food out of a dog dish…the experience just isn’t what it should be. Fortunately, there are a few things you can do that will make you feel clean again without totally breaking your budget.
You can start by re-grouting, re-caulking and replacing your outdated shower handles and showerhead with modern ones. Now would be a good time to change grout colors if you would like. If you have white tiles, I would stick with white grout and caulking, otherwise the different color will contrast too much and it will look a lot like a checkerboard. If you have dark tiles, you can change to a slightly lighter or darker color to avoid getting dizzy while showering.
The biggest challenge you will have will be the shower handles. Many people go out and buy whatever handles appeal to them, not realizing that they may not fit. Different manufacturers have different patterns when it comes to attaching their handles to the stem that juts out of the shower wall. So you can’t just install a handle from one brand to the stem of another. There are some universal kits available, but with those there is usually a certain degree of play in the handle, which will cause the setup to wear prematurely and break. So you should buy new handles from whichever manufacturer produced your current shower valve. Realize though, that this is no guarantee it will fit, especially if your shower valve is very old and you are installing new handles.
The safest way is to remove your handle and take it with you when you go shopping. That way you can see if the pattern matches up. You can buy replacement handles at home centers or plumbing supply stores. If your handles are old, I would go and have an experienced parts technician find what you are looking for. You also can try contacting the manufacturer directly or placing an order online. While you are dressing up the handles, also get a new escutcheon plate, shower head, and shower arm. That way, all the visible parts will match in color and style.
The shower handle will remove by a screw. This screw will be hidden under the handle (usually a set screw-you will need an Allen wrench to remove it), or behind a cap on the handle. You will need to pry off the cap, and you may not even recognize it as a cap as it is built into the handle. With the handle removed, you can take out the escutcheon plate. It will be held on with an obvious screw and then caulked against the surface of the wall. Once the screw has been removed, you will need to pry off the plate with a screwdriver. The only caveat to be aware of with the escutcheon plate is to make sure you buy one that is large enough to cover the hole in the wall. You can reinstall these items exactly like they came out, just make sure you run a bead of caulking around the inside of the escutcheon plate before you screw it to the wall.
With these inexpensive changes to your shower, it will look modern, and you may even feel clean after you shower.