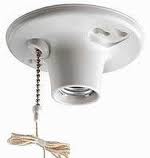
 A pull chain light fixture is a no frills light fixture. It’s cheap and is easy to install. You usually find these in an attic or a utility room. Pull the chain to turn it on, and pull the chain to turn it off.
As you might guess, since they are cheap, they don’t stand up to much abuse. If you pull the chain too hard, it may come right out of the fixture. The fixtures come in plastic or porcelain, but I would buy the porcelain as it will hold up a little better.
Make sure the power is off and loosen the two screws that hold the fixture to the box and remove the light fixture. Remove the wires from the fixture by loosening the terminal screws and grab the new fixture. The new fixture will be wired the same way as the old fixture. The black hot wire gets secured to the brass terminal screw and the white neutral wire gets secured to the silver terminal screw. Wrap the wires clockwise around the screw terminals and tighten firmly. If you have a ground screw terminal, attach the green or bare copper wire to it, although some of these fixtures don’t have a ground screw.
Place the fixture up to the box and secure it with the two screws and then turn the power back on.
 I am a handyman, and yes, I have broken light globes. I’m sure we have all broken light fixture globes before. By the way, the “globe” is the official name for the glass that covers light bulbs. You can also have these on ceiling fan light fixture kits. So if you break one, what are your options?
You can try to find a replacement, and you may get lucky and find one. Big box stores will have a small selection, specialty retailers will have a better selection, and the web will have more, but you take a risk with your measurements. The effort and time it wall take you will make you wish you would have just bought a new light fixture, and that may be the best option.
For ceiling fan globes, you will have either 3 or 4 light globes, so if you break one, you will have to get an exact replacement. That won’t be easy. What will be easy is buying four new globes, so that they all match. I know, it sounds counterproductive to buy four new globes to replace one broken one, but the globes are cheap and your time is not. The nice thing is that the new globe will install in a few seconds. There are usually three thumbscrews that hold the globe in place. Just loosen them, insert the globe, and tighten until snug.
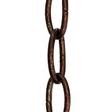 If you are installing a hanging light fixture, you may have the need to have your handyman lengthen the fixture’s chain. This isn’t difficult to do provided there is enough wire to do it.
The goal here is to avoid splicing the electrical wiring or re-wiring the fixture to do this. If you are looking to lengthen the chain be a few inches, you should be fine. There is more wire coming out of the ceiling cover than you need, and you should be able to move this our of that area and into the chain area.
You will likely have to buy some matching links for the chain and then disconnect the last chain where it meets the ceiling cover. You can then feed the extra wire down into the chain link area. To span the gap, you need to add a few new links of chain. The links will have a separation in one side, but don’t pull them away from each other. Instead, twist the link horizontally so that the gap will open and you will be able to add a few links in this manner. By twisting the link, you avoid distorting the oval shape of the link.
When you have added enough links to bridge the gap, simply twist the links back into their original position. Make sure the ends of the links are aligned and you will be ready to hang the fixture.
 Most of us have a florescent light fixture. Okay, they are a little big, but they do put out a lot of light and they are inexpensive. Replacing the light bulbs are easy, but what about replacing the plastic light lens cover? It is easy if you don’t have to trim it to fit. Most come in a 2’x4’ piece. That is great if your fixture happens to be 2’x4’. Cutting them can be a pain.
The diffuser lenses are very brittle. Some have a pattern to them, like diamonds, that make them sparkle as light passes through them. That also makes them more difficult to cut. I have found that a new razor blade in a utility knife is the right tool. Lay the plastic lens cover on a hard surface (a soft surface will cause it to crack when you place weight on it). Mark out where you need to cut and use a straightedge along this line. Take successive light passes along the straightedge until you start to form a groove in the plastic. When the groove has been cut deeply enough, you will notice the blade will push through the other side in many places. At this point you should be able to bend the piece and it will snap at the groove.
We get calls from homeowners that they have received a notice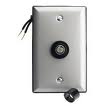 from their homeowners association that their light fixture or fixtures are out. This typically means the address light and the coach lights on either side of the garage (some communities will only have the address light that is uniform).
You can sure check the bulbs, but this usually indicates that no power is getting to the fixtures. This can be traced back to the photocell. A photocell is a switch that “sees” the light. When it gets dark outside, the switch activates and allows electricity to flow to the fixtures. Conversely, when the sun rises, the switch stops the power and the lights turn off. The photocell is cheap and it’s easy to replace. The only challenge you may have is finding it. Look on the side of the house (usually the South side) for an exterior junction box with a small bulb in the middle of it. You will replace this “bulb”.
Most home centers will carry replacements and they are easy to install. Turn off the power at the main panel, remove the box cover and disconnect the switch. Reinstall the new switch (it is only 2 or 3 wires), and secure the box cover. Once you turn the power back on, you can test the photocell by placing a piece of black electrical tape over it (to trick it into thinking it is dark), and the lights should come on.
 Replacing the tubes on your florescent light fixtures is an easy job...except when you don't have the pins aligned and you crack the florescent light sockets on either end of the fixture.
Replacing broken light sockets is an easy job. Make sure you turn the power off to the fixture before you start tinkering with it. You will need to remove the plastic light lens cover to access the bulbs. After you remove the bulbs you will see a metal cover running down the center of the fixture. Under this cover are the ballasts and wires. The wires from the ballasts to the sockets which provide power to the bulbs. The sockets with either be held my a clip or may need to be unscrewed to remove them.
Now the socket will be dangling in the air. Some sockets will have a quick release harness where you can just unsnap the old socket's wiring and snap in the new one. Other sockets will disconnect from the ballast with a wire nut. The new socket will connect with the wire nut snuggly securing the wires. Just make sure you match up the wires as you install the new socket. In other words, don't remove all the wires and then try to guess where each is supposed to go...do one wire at a time.
Once the wiring is done, re-secure the sockets, re-install the metal cover, and carefully install the bulbs and light lens.
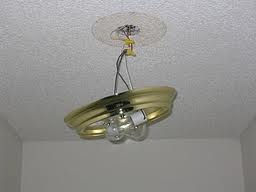
 It used to be that when you bought a house, there was a plastic cover over the pre-wired location for the light fixture. Boy, have times changed. As a Las Vegas handyman, now we find dangling wires coming out of the ceiling where the light fixture was, since the previous owner removed the fixture when the bank forced him out during the foreclosure process. Regardless of a ceiling cover or not, the new light fixture installs like it always has. By the way, it's a good idea to test the wires to make sure they aren't live while you are working on them.
You will find three wires coming out of the ceiling, a black hot wire, a white neutral wire, and a green wire (or bare copper wire) for ground. You might also see a red wire. If you do, you can install a ceiling fan and have separate switches to run both the fan and light independently. If you won't be using the red wire, screw a wire nut on it and neatly tuck it into the junction box.
Typically the light fixture will have mounting holes in it where it gets secured to the junction box in the ceiling. Loosen the screws in the junction box until they stand proud by ½ inch. Then you can place the fixture over the screws, turn it slightly and tighten the screws down to hold it in place. On some fixtures, you will wire it first and then secure it to the ceiling, but this is challenging trying to hold the fixture will connecting the wires.
To connect the wires, simply hold the black hot wire to the black fixture wire and screw on a wire nut. Do the same for the white neutral wires, and finally the ground wires. Then just install the bulbs and glass globe.
 A customer called to say that a recessed light in his house kept going out. He said that after turning the light on, it stays illuminated for a few minutes and then turns off. He replaced the bulb several times anyway and it still turns off.
The problem isn't the bulb, rather it's the heat. Recessed light fixtures (aka can lights) are basically a can with a light bulb in it. Most people use a flood-style or spot-style bulb in them. These produce heat that gets trapped in the can. To complicate matters, there is a decorative trim ring around the bottom of the can which further traps heat. You see these when you look up at the ceiling.
It's not the light bulb that is shutting off, it's the light fixture. The recessed can fixture has a high-limit cut-off switch that shuts off the fixture when the heat becomes excessive. An easy fix may be as simple as moving the light bulb closer to the ceiling's opening, allowing more space between the bulb and the switch. If the bulb is too deep in the can, it is closer to the switch and more likely to build up heat, which will shut off the fixture. The fixture will have a sliding mechanism with a wing nut that you can loosen so you can move the bulb up or down.
Another thing to consider is whether or not the correct bulb and trim ring are being used. Unscrew the bulb and read the label inside the fixture. It will tell you what bulbs are compatible and the maximum wattage. You may be able to solve the problem by just using a bulb with a lower wattage. Here is some additional information on recessed light fixture repair.