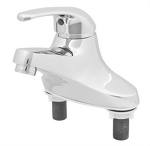
Faucet Installations
 Faucet installations can jolt your bathroom into the modern age in about an hour.
Start by turning off the water at the hot and cold valves under the sink, then test that the water to the faucet is off.
Next, disconnect the water supply lines from the faucet. I suggest you wear safety glasses if you have to lay on your back to access the water supply nuts. I know wearing safety glasses sounds silly, but many times the corrosion around the nuts will flake off and land right in your eye.
If you're lucky, you can unscrew the nuts with a small crescent wrench or pliers (each about $5). If there is no room for a wrench, or even your hand, you'll need a basin wrench (about $10). This tool has a long handle with self-closing jaws, and is made for getting into tight places. Secure the nut in the jaws and unscrew. Repeat for the other side.
After you clean up the water that has spilled, loosen the screw that holds the sink stopper handle to the extension rod and pull out the handle.
Next, loosen the lock nuts that hold the faucet to the sink. It's the same deal as the water supply nuts, except that these nuts are bigger, and can often be removed by hand. Once the lock nuts are gone, pull the old faucet straight up through the holes and discard it.
A new faucet will typically attach to the sink by using the same fittings as the water supply lines, or it will have separate bolts coming out of it that will hold it to the sink using metal plates. If the faucet has separate fittings, wrap the water supply fittings three times with teflon tape. It's easier to wrap the fittings standing up than it is lying on your back.
Center the faucet on the sink and secure it using the locknuts or metal plates (whichever came with the faucet). Make sure the water supply fittings are wrapped with teflon tape and screw the nut on the fitting (make sure the hot water supply line is attached to the faucet's hot water side and vice versa). Turn the water supply valves back on and test for leaks. If it leaks, it will likely be where the water supply connects to the faucet's fitting. In this case, give the nut another quarter turn until it stops leaking.
Replacing the drain flange and pop-up assembly can be even easier because there is no water pressure.
First, loosen the slip nuts on the P-trap and drain the water out of the trap. Remove the pop-up pivot lever by loosening the retaining nut. The pivot lever attaches the pop-up stopper in the sink to the pop-up handle on the faucet -- it makes the stopper go up and down.
Next, loosen and remove the lock nut on the underside of the sink. Also, remove the gaskets between the lock nut and the sink. The drain flange may lift right out, or you may have to unscrew the tailpiece assembly from the drain flange.
Once the drain flange has been removed, scrape the old plumber's putty out of the sink's drain hole and clean the area.
Take the new pop-up assembly and place a ring of plumber's putty (or silicone caulk, depending upon the manufacturer's recommendations) under the drain flange. Place the assembly in the sink's drain hole, and place the sealing gasket under the sink. Slip the retaining washer under the gasket and screw on the lock nut behind the washer. Don't fully tighten it yet.
Align the hole for the new pop-up pivot lever with the pop-up stopper handle in the faucet, then finish tightening the drain's lock nut. Insert the new pivot lever, making sure it connects with the new pop-up stopper, and tighten it down with the retaining nut. Attach the pop-up handle extension to the pivot lever and adjust if necessary.
Finally, reconnect the P-trap by tightening the slip nuts. Use a rag to wipe away the plumber's putty that will have squeezed out from tightening the drain flange.