Would You Like a Free Expert Consultation?

Las Vegas Handyman 

Not every project goes as well as planned. We would be happy to spend a few minutes answering your questions.

Subscribe by Email

Your email:

Browse by Tag

Pro Handyman Blog

Current Articles | RSS Feed RSS Feed

Handyman Tip To Cut Pavers


handyman paversIf you are installing pavers for a walkway, just ask a handyman which tool to use. He will probably tell you that there are several tools you could use. I guess it depends on how often you cut pavers and what your budget is.

Personally, I have more tools than I have sense, but even if you don’t have many tools, you can improvise. I like a handheld grinder with a masonry wheel in it. Once you have the grinder, you can replace the wheel with whatever your needs are. The wheels are cheap and make quick work of cutting masonry materials. You can cut pavers, brick, block and cultured stone. Just make sure you use protection for your eyes, breathing, hearing, and certainly heavy gloves.

If you don’t have a grinder, you can outfit a standard circular saw with a masonry wheel to do the job. Buy the correct wheel and the correct size for your saw and tighten everything down. Dawn your safety gear and cut the material slowly. It’s a good idea to secure the material you are cutting so that the force of the saw doesn’t accidentally move the paver and ruin it.

You can make several light passes rather than trying to hog out a lot of material with one pass. The sound of the blade spinning will tell you a lot about the speed of the cut. You want the blade spinning at full speed with a consistent cut. If you hear the blade change its tune, you are probably removing too much material.

Tags: 

Handyman: Replace Icemaker Line Filter


handymanMany refrigerators with an automatic icemaker (or even ice and water in the door) have a filter for the water. As a handyman, I replace some foul water filters. The premium units usually have a cartridge inside the refrigerator compartment that just unscrews. For the rest of us, you will have to pull the refrigerator away from the wall to access the filter.

This in-line filter sits in between the valve at the wall and the refrigerator itself. Depending on the manufacturer, the cartridge will intercept the line so that water passes through it to be filtered on its way to the icemaker or water dispenser. These are easy to replace. Make sure you have the correct replacement by checking the model number on the existing cartridge.

Turn the water off at the wall valve and relieve the pressure by pressing the water dispenser in the door. If you don’t have this feature, disconnect the filter on the side closest to the refrigerator and allow any water to drain into a container. Then disconnect the other side of the filter cartridge.

The new cartridge will either screw on or there will be a fastening system that holds the cartridge in place. This will usually have a receptacle that the cartridge nipple slides into with a slide that holds it in place.

Connect the side closest to the wall valve first and place the filter in a bucket. Turn on the water and let the water flush out the filter cartridge. Turn the water back off and connect the other side of the cartridge. Turn the water back on and gently push the refrigerator back into place.

Tags: 

Handyman Fix For A Loose Patio Paver


paversA lot of us have concrete patios, but some forego the maintenance-free concrete and go with the more cosmetically appealing patio pavers. As a handyman, I’ve done a few of these and if you like backaches, then this job is for you.

Patio pavers are hand placed into position. Pavers can be from a variety of materials, from stone to brick. Pavers are set into a bed of either concrete or sand. When you find a loose paver, it is typically one set in sand rather than concrete.

It’s not difficult to repair a loose paver in sand. Typically, the perimeter of the paver has worked its way loose as the sand that fills the gaps has gone. Remove the paver and add or subtract sand from under it to get it level with the surrounding pavers. You can used washed sand for this. Add small amounts at a time, spread it around and push the paver into its space with a slight twisting motion. Make sure the gaps from the paver to its neighbors is all uniform and then fill in the gaps with more sand. Normally if you were installing an entire patio, you could use a vibration compactor, but for a couple of pavers it’s not worth it.

Use a push broom and push the sand around the gaps to fill them. You can tap on the pavers to get the sand to settle or even sprinkle some water on them and then refill any voids.

Tags: 

Handyman Fix For Curling Vinyl


handyman vinylA typical handyman service sees plenty of curling or lifting vinyl flooring. Most often, it occurs at a transition point, for example where the vinyl meets carpeting, or along the bathtub or shower. If left alone, it will curl up and harden like a tax collector’s heart.

Repairing the edge of vinyl along a transition or a bathtub is similar. Getting the vinyl to lay back down can be challenging. First try to scrape up any old adhesive off of the floor where the vinyl has lifted, as well as the vinyl itself. Just be careful not to damage the vinyl. Then you can use a notched trowel (or make one out of a plastic scraper) and apply new adhesive.

For the transition area, you can always use a wider transition strip (or install one if it didn’t already have one). This will help hold the vinyl back down. Heat up the edge of the vinyl with a blow dryer to get it warm and pliable and then push it down into the adhesive. Immediately set some weight upon the edge to coerce it to stay down, and then secure the transition strip on top of it.

For the bathtub, use the same process, except instead of a transition strip, you can install a piece of baseboard along the edge, not only to keep the vinyl from lifting again, but to dress up the area as well.

Handyman Can Make Your Gate Self-Closing


gate springHaving handyman make your gate that self closes is nice. The dog won’t accidentally get out and it keeps small kids in the backyard and not wandering the neighborhood. Plus, if you have a swimming pool, a self-closing mechanism is a requirement.

Probably the easiest way to install these self closing coil mechanisms is to mount one side to the block wall and the other side to the gate itself. You will secure the mechanism to these and then place it under tension to close the gate.

For the wall, use Tapcon anchors. Place the mechanism where you want it and mark the holes. You can drill a pilot hole using the correct sized bit and drill into the block. Then screw the Tapcon anchor through the mechanism and into the block wall.

Hold the mechanism up to the gate and use a self-tapping screw to secure the mechanism to the gate. The mechanism has two holes at each end, so use 2 tapcon anchors on the block wall side and 2 self-tapping screws on the gate side. The mechanism will be under constant tension and the more fasteners is has the better.

Tension the coil so that the gate closes and latches when held open at a 45-degree angle. You will twist the top of the coil and then place a pin in the head to hold the tension.

Tags: 

Handyman: Range Hood Exhaust Filter


range hood filter

If your kitchen range hood makes a loud noise when you turn it on, you may want to play handyman and snoop around. True, it may be a motor that is going to die, or it may be something that has come loose in the cabinet. It also may be a clogged filter.

Range hoods come with a filter to try to minimize smells associated with cooking, particularly range hoods that recirculate air back into the room. The motor may be suffering from lack of air. As the motor pulls air from below, the air filter is so clogged that no air gets to the motor and so the motor tends to bow the filter towards it. If you remove the clogged air filter and turn the motor on, you will see what I mean…it should run much smoother.

Some quality range hoods have a filter that you can throw in the dishwasher and clean. The builder-grade units have a disposable filter with a series of layers designed to filter the air. These tend to get so caked up with grease that they stop any movement of air from getting to the motor. I suppose it could be said that they are doing their job, but that the homeowner should have replaced it a long time ago.

You can get replacements from a home center, although for add sizes, you may have to visit an appliance dealer. They just slide out and back in again.

Tags: 

Handyman: Reverse Refrigerator Door


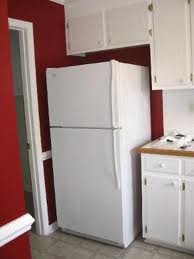
refrigeratorIf you are tired of banging your cabinets up every time you open the refrigerator door, then get ready to spend an hour, or call your handyman, to forever rid yourself of that headache. You can reverse the swing of your refrigerator’s door so that the hinges are mounted on the opposite side than they currently are. This fix is good for units that have a top and bottom configuration, for example, the freezer is on top and the refrigerator is on the bottom.

Your refrigerator is made so that you can move the handles and hinges from one side to the other with minimal effort. Each door is held in place with brackets on top and bottom, and you’ll also notice symmetrical holes on each side. These holes fit the pattern of the brackets that hold the hinges and the handle. Whichever side doesn’t have the hardware screwed into it will have the plastic caps to cover the holes.

Before you start working, unplug the refrigerator to avoid getting shocked. Obviously, you must work fast to keep the food cold. Remove the food from the doors and place all edibles inside the compartments to preserve them, as well as to remove the weight from the door shelves while the doors themselves are loose.

You can remove the plastic caps with a standard screwdriver wrapped in masking tape (to avoid scratching the fridge). Hand on to them as you will insert them over the holes where the handles and hinges are currently.

Realize, too, that different refrigerators have different configurations and that some additional steps may be necessary, such as removing a drawer attached to the door.

Start with either door and remove the handle first. The handle may be attached just to the front of the door, or more likely it will be wrapped and secured to the top and bottom edges of the door. You will be able to remove the fasteners with a screwdriver, allen wrench, or hex-head driver. Now, transfer the decorative caps to the opposite side of the refrigerator to plug the new holes.

For the hinges, the bottom hinge will bear the brunt of the weight of the door, so start by removing the top hinge. Remove the screws that hold the hinge on and then you can lift the door off the post of the bottom hinge. On some doors, you may have to rotate the door 180-degrees and remove some trim pieces.

To reinstall the door, simply secure the bottom hinge into the holes that were previously covered by the caps. Once the bottom hinge is set, you can place the door onto the post of the bottom hinge. Straighten out the door and then secure the top hinge to both the door and the fridge. After that, just screw the handle back on the plug it back in.

Tags: 

Wood Furniture Repair By Handyman


chair legIf that wooden chair leg is wobbling again, pay attention or call your handyman. Wooden chairs and wood bar stools are put together similarly. The ends of the legs typically are round like a dowel, and the seat that they mate with receive the round end of the dowel. This assembly is glued together and sometimes pinned with a brad to hold it together until it dries.

Sometimes this glue-to-wood bond breaks and it needs to be repaired. There really is no stronger bond than glue and wood as the chemical reaction makes the joint rock solid. This bond is far stronger than any nail or screw into wood.

The key is to remove the old glue from both the end of the leg and the hole into which it mates. To clean the end of the dowel, you can use sandpaper and go to work. Larger grit sandpaper will remove material faster. For the hole in the wood chair, you can use a wire brush (like you find to clean copper pipe) and chuck it into a drill. Once you chew through some glue, you can move to a smaller sanding drum. The goal is to get down to bare wood so that the glue-to-wood bond can take hold. You may find that with all of this sanding the dowel may have a little play in it when gluing it back together. You can use a plane and cut a few thin shavings from scrap wood. You can use this to build back up the thickness of the dowel.

Slather everything up with wood glue and push it all together. You can use a variety of clamps to hold everything together until it dries.

Tags: 

Handyman Tells Safe Way To Shovel Dirt


shovelAs a handyman, most of my jobs have to do with the repair of houses. However, occasionally a customer might have some exterior work to do. That means using a shovel and moving dirt or landscape rock. This is a recipe for a sore back.

YOu can practice some good safety tips to minimize injury to yourself. First of all, start with heavy work gloves and thick-soled boots or shoes. You will find yourself stomping on the shovel, and regular tennis shoes won't cut it. Also, use the right shovel. A pointed shovel (called a spade) is good for digging a hole into the ground, while a flat head shovel is good for scooping dirt or landscape rock.

The most important thing to minimize back soreness is to not use your back when doing this type of work. That means staying as vertical as possible when working. If you lean over you risk soreness. Use the shovel as the tool.

To scoop up dirt or rock, push the shovel in with your foot. When it comes time to lift the weight you will have your forward hand about midway down the handle and your rear hand on the end of the handle. Push your leading hip against your forward hand to gain as much dirt or rock on the shovel. Your are staying verticle and just pushing the blade into the material. Finally, use your front hand as a folcrum and push down on the handle with your rear hand. Think of a see-saw. Dump the weight in the designated area and do it all again.

Tags: 

Handyman: How To Install A Toilet Paper Holder And Towel Bar


toilet paper holderInstalling a toilet paper holder or a towel bar is virtually identical and is an easy handyman job. It is a matter of selecting the location and securing it. For a towel bar, it will typically be installed in drywall, whereas the toilet paper holder will be installed in either drywall or the side of the bathroom vanity.

Both use the same mechanisms to attach the fixture to the surface. For the toilet paper holder, since it is so small and doesn’t support any more weight than a roll of toilet paper, you can install this wherever is convenient. You might even sit on the toilet and mark an area that will work. This is very effective for small spaces.

Once you have the area chosen, screw the brackets to the surface. The flat portion of the brackets will mount to the wall and the ends of the bracket will angle away from the wall. When both brackets are mounted, place the arms of the holder on the bracket and tighten the set screw until it grasps the bracket and tightens. Then you can install the spool and roll of toilet paper.

The only different consideration for the towel bar is that you may want some larger screws to hold the brackets to the wall, and preferably into the wall studs. You can use a large screw and screw at least one side into a stud, but the other side likely won’t match up. For the other side, you can use a large wall anchor such as a butterfly bolt or an EZ anchor.

Tags: 
All Posts