Ceramic Tile Replacement In 5 Easy Steps
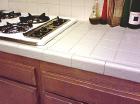 The edge of your kitchen countertop takes a beating. I can't tell you how many houses I've been in where the ceramic edge tiles on a counter are broken or cracked. Either someone drops something on them or hits them from underneath. The result is a sharp edge that needs replacing.
The job gets easy if you have a replacement tile. You can find several colors of white and off-white at home centers, as well as different colors of grout. You will be looking for a V-Cap edge tile. This tile is pre-molded with a round over built in, so instead of creating a corner with 2 tiles, this one tile is shaped like the letter "L".
1. Remove The Rest Of The Broken Tile
You can remove the grout from around the tile you are replacing with a grout grabber tool or a Dremel tool. Once the grout has been cleared, pry up the broken tile with a screwdriver or pry bar.
2. Remove The Old Mortar
Use a flat blade or a scraper and get rid of the old mortar so that you have a nice smooth surface to work with, then vacuum up the debris.
3. Mix Up A Batch Of Thin-Set Mortar
Mix up a small amount of thin-set and let it slake per the manufacturer's specifications (usually around 10 minutes). Use the suggested notched trowel and apply the mortar.
4. Install The Tile
Cut (if necessary) and install the new tile and use blue painters tape to hold it in place. The last thing you want is for the tile to move slightly causing you to do the job all over again. The tape can easily be removed when the mortar hardens.
5. Grout And Clean
Finally, mix up some grout and fill the voids. After that it's a matter of sponging off the excess grout and buffing the tiles with a clean cloth. For more information, read my article on ceramic tile replacement.