Water Heater Las Vegas
 It always happens at the worst time possible. There is no hot water and there is a constant stream of water coming from the bottom of the tank. A water heater Las Vegas always seems to last 1 day after the warranty expires.
Start by turning off the gas to the water heater. The valve is located near the wall, usually at the base of the water heater. Turn the knob a quarter of the way (the knob will be at a right angle to the pipe when the gas is off). Next, shut off the water to the unit. This valve is located on the water supply line, which comes out of the wall and goes into the top of the water heater. Turn the knob to stop any more water from entering the tank.
Grab a garden hose and attach it to the drain valve on the bottom of the water heater. Roll out the hose to the street and open the drain valve. Be careful, because this water is hot.
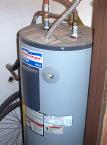
Disconnect the flexible gas line at the gas control valve (the metal box at the bottom front of the water heater that has a temperature dial on the front and a knob on top of the box that controls the gas).
Use a large open-end wrench or a pipe wrench to unscrew the flexible copper connectors at the nipples on top of the water heater. Finally, disconnect the vent pipe from the top of the water heater and push it aside.
Recruit a neighbor to help you lift the old empty water heater down from the stand. A gas water heater must be elevated at least 18 inches to prevent heavy low-lying fumes (gas) from contacting the flame in the water heater.
Water heaters feature a safety device called a temperature and pressure relief valve (TPR), which limits tank temperature and pressure and keeps it from exploding. When you purchase a new water heater, make sure it has the TPR valve in the same general location as your old unit. In other words, if your old water heater had the TPR valve on the side, buy one with the TPR on the side. In doing this, you won't have to extend any drain lines to accommodate the new location of the TPR valve.
Your new water heater will come with a TPR valve, but you may have to install it. Just wrap the threads three times with Teflon tape and screw it in tightly with a pipe wrench.
Buy two dialectric nipples, wrap the threads three times with Teflon tape on both sides, then crank them down snugly. Dialectric nipples are galvanized, but are lined with plastic to slow corrosion between two metals. With some water heaters, you may also have to install the fill tube, which is included in your purchase. Again, wrap the threads with Teflon tape and screw it snugly into the cold water supply hole. This tube pushes the incoming water down to the burner to get hot before it can leave the tank.
Call your neighbor back to help put the new water heater on the stand. Trust me, you'll pay him back when his unit dies.
All that's left is to reconnect the fittings to the cold water supply line, the outgoing hot water line, and the TPR valve. Use a large open-end wrench or pipe wrench to screw them down snugly.
Reconnect the flexible gas line to the gas control valve. Wrap the threads of the gas fitting with gas tape, which is similar to Teflon tape, but its yellow and much thicker. Securely tighten the line to the valve using two wrenches, one to keep the valve from twisting and one to tighten the line.
Check the manufacturer's directions for the proper vent size. Four inches in diameter is typical but it may vary depending upon the heat output of the water heater. Reattach the draft hood and the vent pipe to the top of the water heater. The draft hood will slide into slits and the vent pipe will attach to the draft hood with sheet metal screws (three-eighths inch).
Open the hot water faucet that is nearest to the water heater. Go back to the water heater and open the cold water supply valve at the top of the tank. As water fills the unit, it will push out the air through the faucet that you opened. The hissing sound coming from the faucet will stop when the tank is full and water comes from the faucet. Thoroughly check the fittings for leaks and tighten accordingly.
Turn the gas back on and test for leaks by brushing a 50-50 mixture of dishwashing soap and water over the connections. If you get bubbles, then you have a leak. Tighten or reconnect the leaking joints and retest them.
Light the pilot light according to the manufacturer's directions. Usually, you turn the gas control valve to "pilot" and hold the button down for a minute as you light it. After the pilot has been lit, turn the dial to "on" and then set the dial to the desired heat setting. You'll have hot water in about an hour.